DIY Pigment Watercolor Paint with Flowers

It’s the peak of summer here in the northern hemisphere and as my tomatoes struggle to live up to the perfection I’d imagined over winter, my flowers are filling vases, presses, dye vats, and now paint jars! About a month ago I signed myself up for Falling Off Tree’s Botanical Play Intuitive Painting with PH Modifiers class. I rarely take classes on anything, content (stubborn?) in my autodidact world where I’d rather teach myself with books or the internet, but I’m trying this new thing called trying new things.
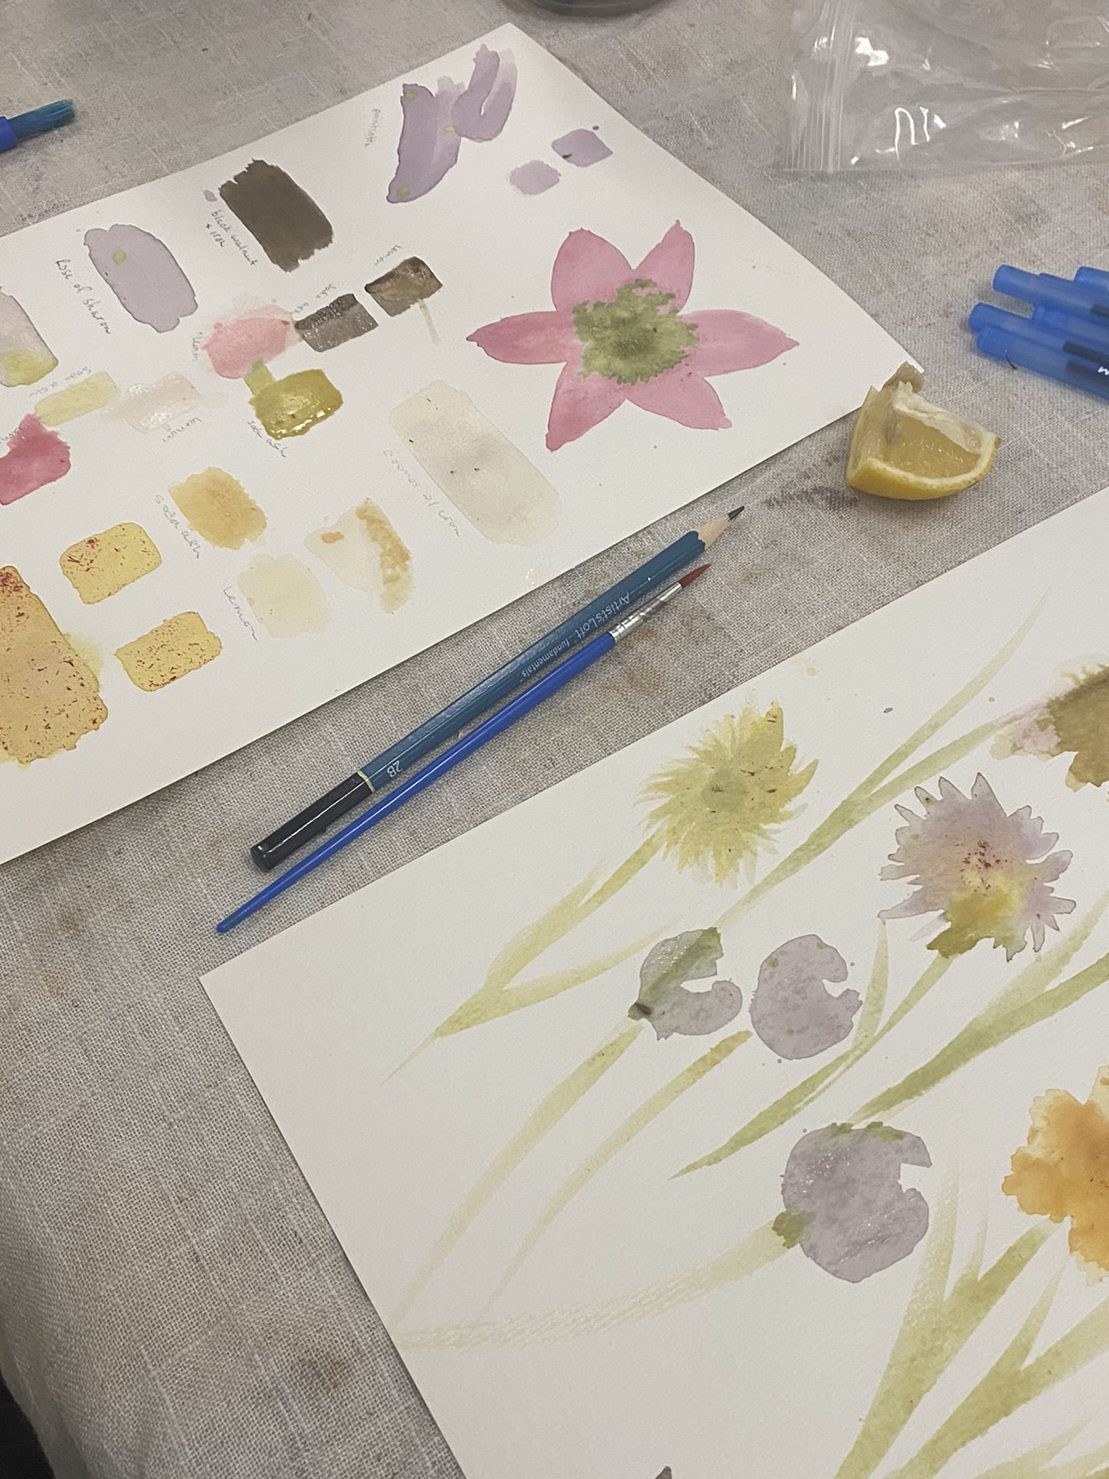
Taken @ Falling Off Tree’s Botanical Play class.

The class was relaxed and fun, and I immediately went looking for supplies to experiment more. When you have ADHD you ideally learn to resist the siren song of buying every supply imaginable for your new hobby, so I opted for decent paper and cheap brushes. I’m already eyeing down watercolor sets and fancy brushes so my strength may only go so far.

For our purposes today, you’ll need water, paper, a paintbrush, and flowers.

When setting out to learn painting of any kind, I think it’s always best to swatch and play with values and color before trying to do anything else, so that’s mostly what I have to show you. I am not an experienced painter and you don’t need to be either! This is about spending time with plants and working your creativity muscles.

Let’s jump into the process!
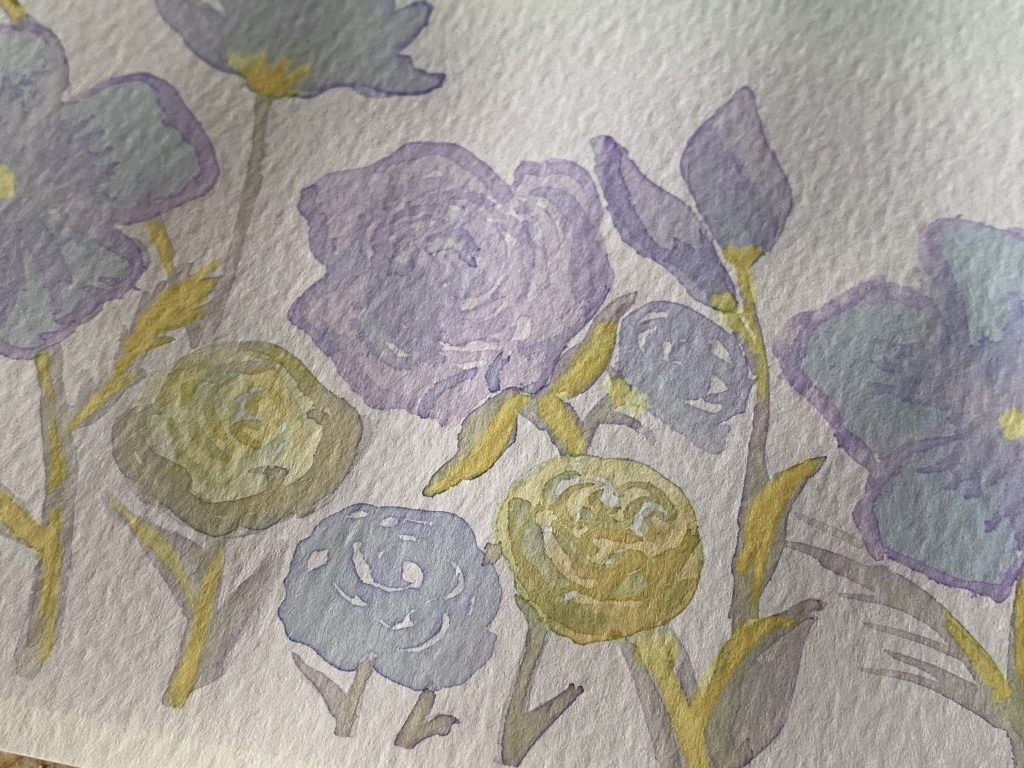
Pansies (purple and blue), rose of sharon (purple), onion skin (yellow), and snapdragons (greenish yellow that dried to a grey)

The process of extracting pigment from plant matter often starts with hot water. You’ll want to tear up or chop your material and then pour some hot water from the kettle over it to steep. Unlike textile dyeing you will need just a small amount to paint, so I used double shot glasses. I let everything marinate for 15 minutes or so before I started to test them out.

TIP: You can use fresh or dried plant material so start saving for winter now!

The next fun layer to this process is adding PH modifiers such as lemon juice, vinegar (acidic) wood/soda ash (alkaline) or metallics (copper, iron, alum) to see how or if it affects the color. You’ll find these modifiers used throughout all natural pigment processes and while they’re all natural, be sure to check safety precautions for everything you use. Natural is not a synonym for safe!
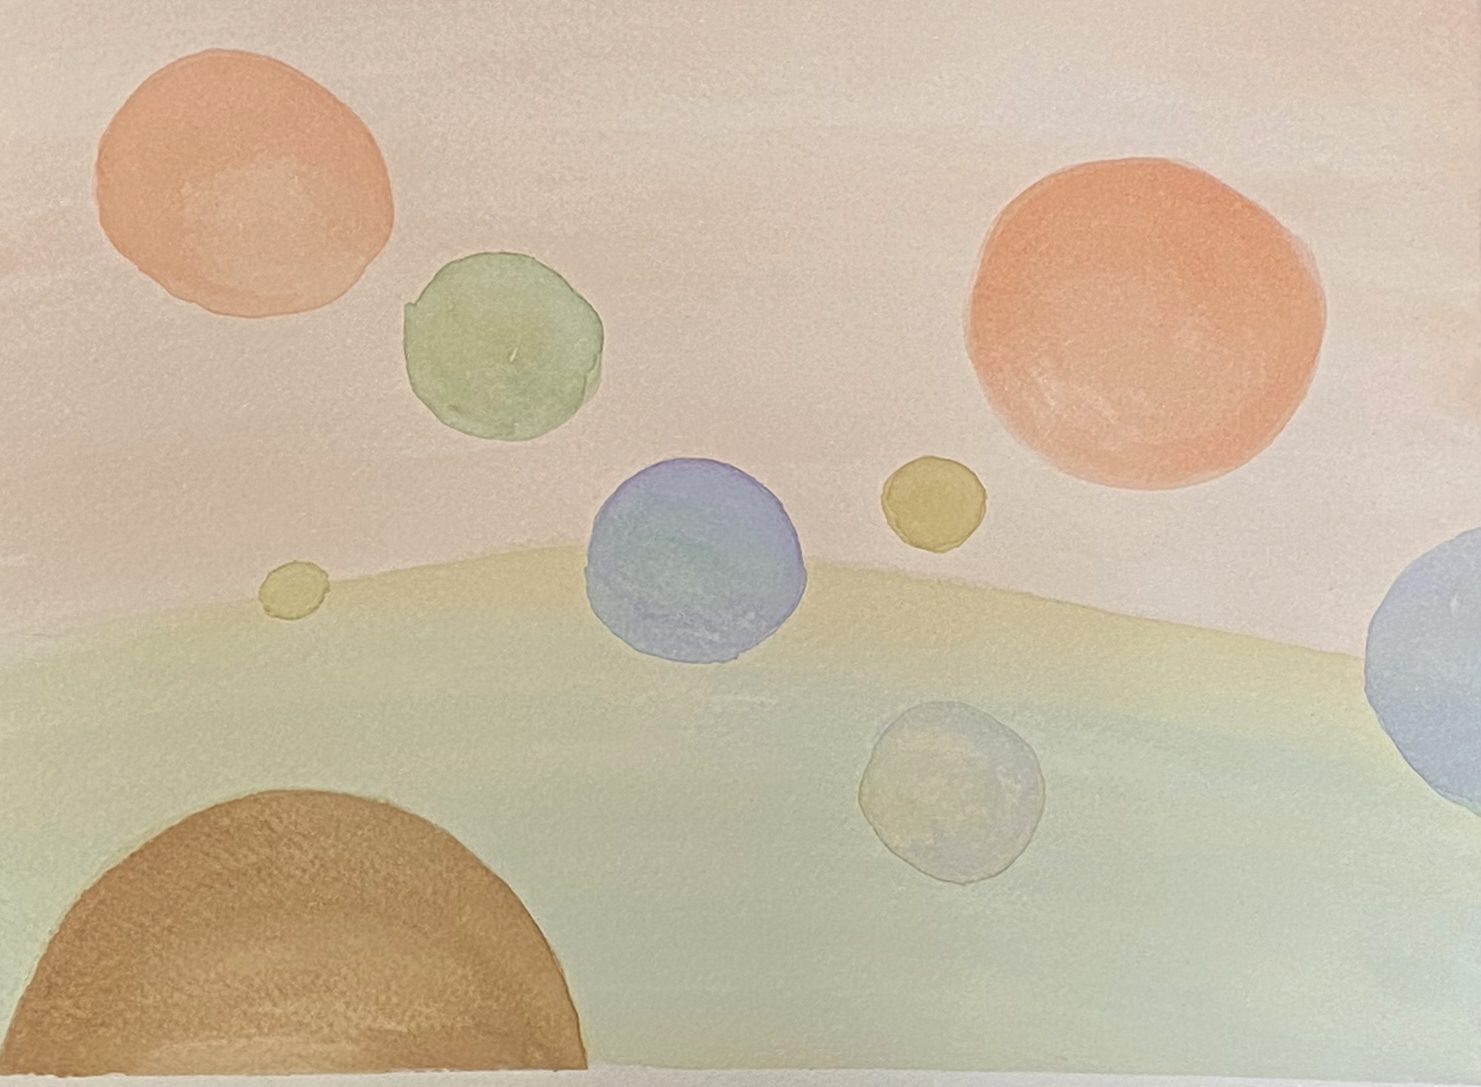
Adding some madder and black walnut hull powders to the mix gave me some reds and browns to play with.

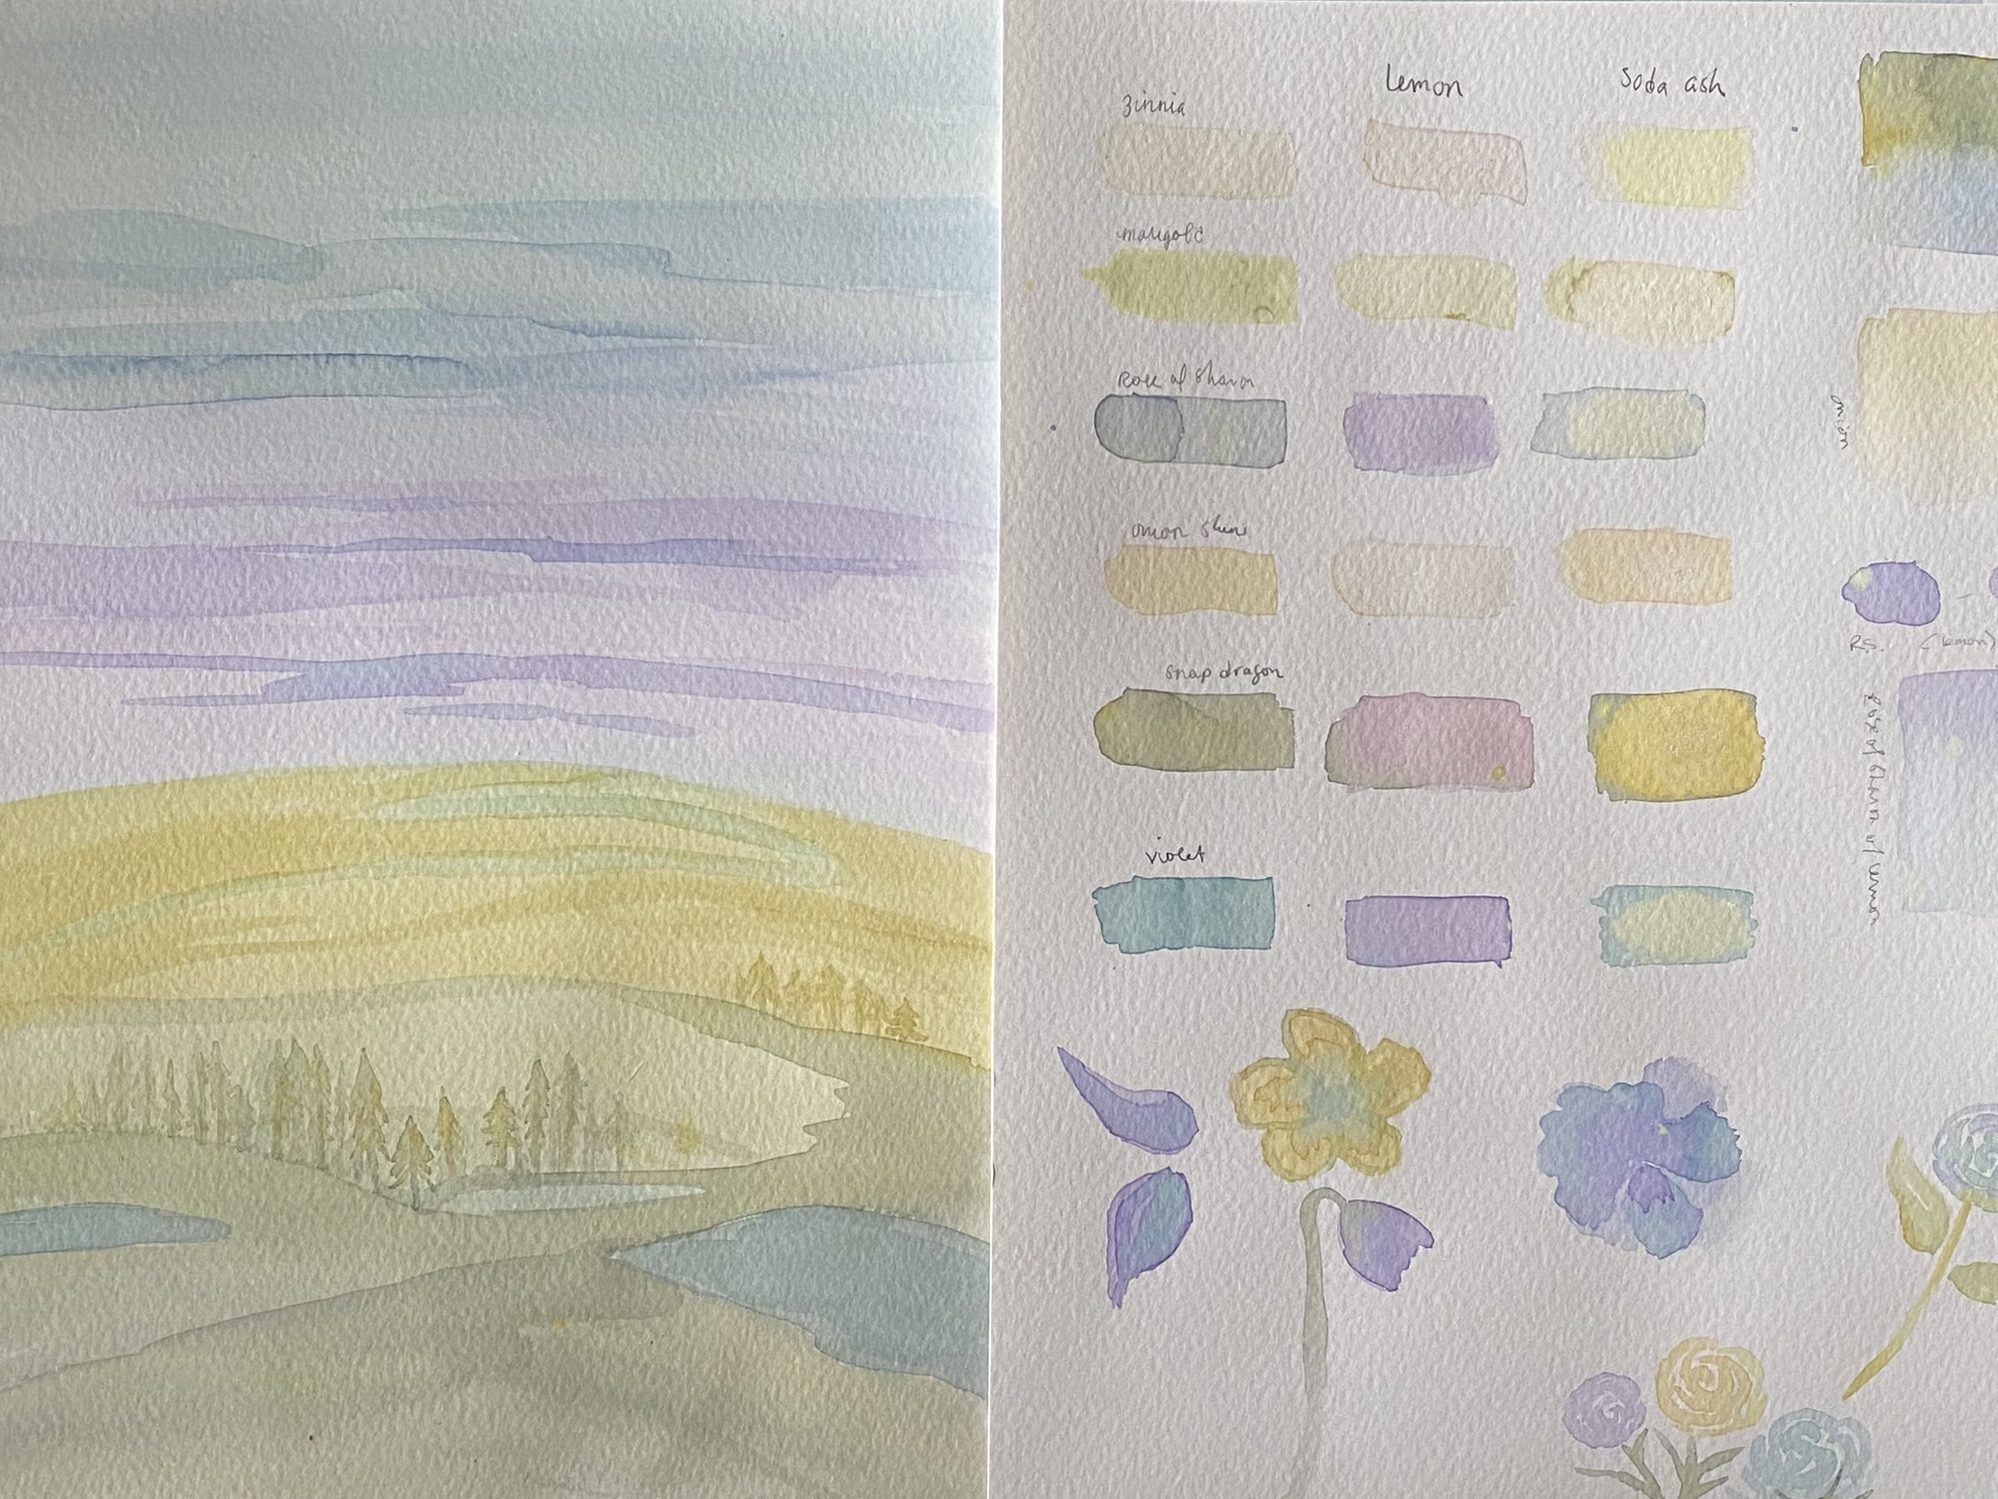
I took each color and painted three swatches, one for the paint as is, one for acid, and one for alkaline. You’ll notice quickly that the color of the paint wont necessarily match the color of the flower. Black pansies really show off how the dry down and use of modifiers can affect your final color result. You may even notice some colors continue to change after a day or so.

Without modification, the pansy produces a deep purple liquid that dries to a blue-green hue, but with lemon juice you’ll get a magenta paint that dries to a purple. Sprinkling some soda ash on the third swatch had a bleaching effect. You can see similar changes with the red snapdragon paint. For these reasons you’ll want to let your swatches dry before tackling a painting unless you’re ok with surprises!
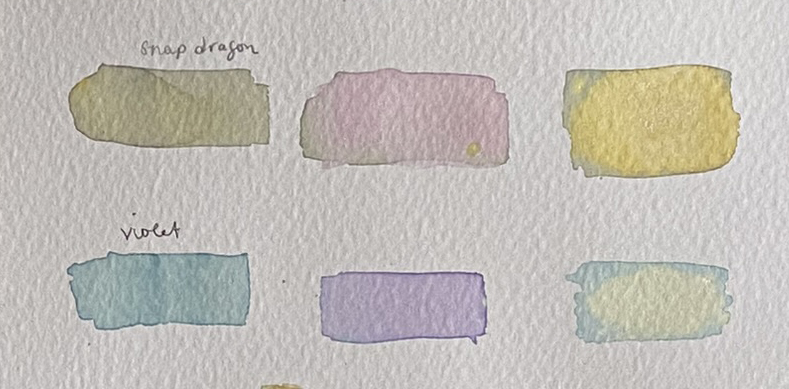
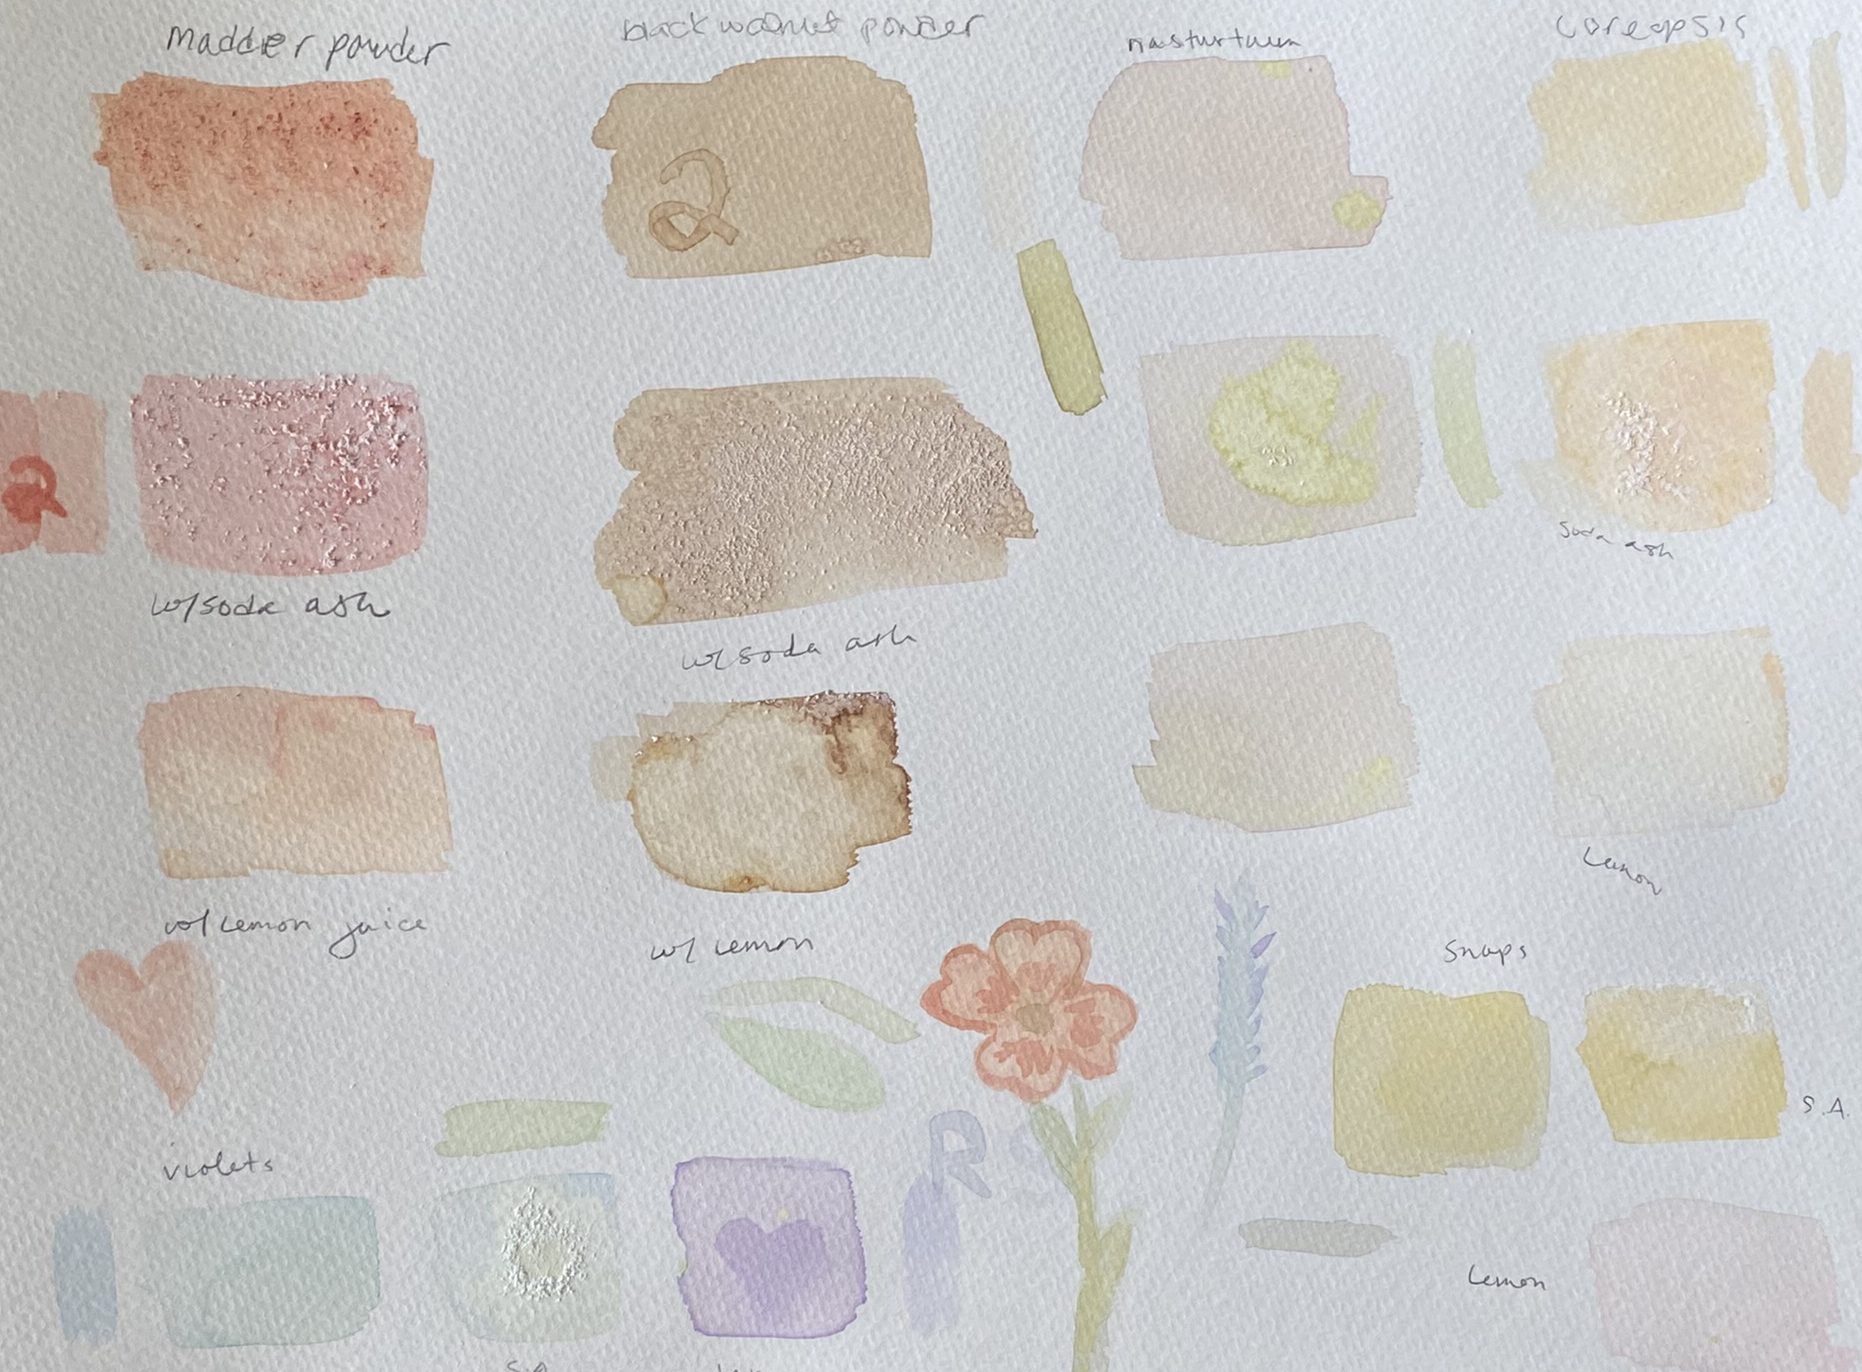
Red snapdragons and “Black King” pansies (marked violet here) show how they change with lemon juice (2nd column) and soda ash (3rd column) modifiers. You can mix modified paints in separate containers or just drip/sprinkle them onto your wet swatch.
Use your swatch pages to play with value (light to dark) and layering (letting the paint dry and going back in to detail or darken) the 2’s here show the 2nd layer applied over a dry first layer.

I watched a couple of YouTube tutorials about watercolor basics and lost myself for a couple of hours just doodling and swatching. If you decide to try it, feel free to DM me on Instagram @its_pam_ela and show me how you made out!

If you’re wondering about storing leftover paint, I’ve had mixed results. Some of the lighter pigments didn’t keep in the refrigerator, but the more saturated paint such as that of the black pansy were still useable after 3 days.

Other tips:
-Tape down your paper with washi or masking tape so it doesn’t curl.
-Do a quick search on YouTube about wet-on-wet versus wet-on-dry, it makes watercolor make a lot more sense!
-Go for a watercolor specific, pointed quill brush over flat brushes. They hold water and make beautiful strokes.
-Don’t stop at flowers! Leaves, berries*, oak hulls, spices like tumeric and saffron all produce pigment you can paint with!

*careful with the poison sort!

Happy painting!
Continue Reading

Growing Beyond the Salad

In all the years I’ve been gardening (and the many years I spent researching before I had the soil to plant in), I’ve noticed a sort of “pipeline” with gardeners. The start with the idea of a home-grown salad, often planting only food crops and rarely giving much thought to companion planting, pollinators, or soil ph. But, if one follows this theoretical pipeline, it doesn’t stop there.

Usually the next stop on the dizzying, slippery slope of falling in love with growing plants, is flowers. Maybe you get a pack of zinnia while you’re out selecting lettuce, maybe you read about the many, MANY benefits of planting for pollinators while growing food. Maybe from there you stumble into the vast wealth of discoveries in the world of native plants. Maybe, like me, you continue to tumble further and further into herbal teas, pressed flowers, floristry, natural plant dyeing, and macro photography.

Here are the ways I’m taking it further this year, growing not just food but materials to make art, clothing, and a better environments for the local birds and insects.

Canning, Freezing, and Storing:

With grocery store prices skyrocketing, and supply-chain crises becoming the norm, the old joke about spending $100 to grow a few dollars in produce is losing its potency. Sure, if you’re installing a brand-new garden, or perhaps watering a sun-parched patch of salad garden in the Arizona heat, your cost of production might still be vastly higher than the output. But in my New England garden, I’ve figure out how to pull baskets of produce throughout the growing season that total up to a net savings when I grow through three seasons and can, dry, freeze, and store the bumper crops.

Dried & Pressed Flowers:

One of the most enchanting new passions gardening introduced me to is the artistry of floral arranging and preserving. I got started by pressing some spring violets and pansies in a small flower press from Amazon two seasons ago. Arranging them into a delicate glass frame brought me so much joy that I promised to increase my attention to drying flowers every year in order to build up material to work with throughout the bitter days of New England winter. My head is already spinning with the possibilities of framed art, resin work, and dried arrangements to keep and share.

Beneficial Insects & Wildlife:

I wrote a detailed blog post years ago about this long-established interest of mine to have the buzzing-est, flapping-est, chirpy-est garden in my city. The very first bed I installed in the formerly languishing lot on the property I rent was a native perennial garden. A few non-natives have found their way into that bed but largely it’s remained a love letter to local bees, birds, and butterflies- especially my beloved Monarch and Swallowtails. I made sure to plant enough that there are blooms from last frost to first frost and an abundance of seed heads and hollow twigs for winter survival. I don’t rake until May to keep my bumblebees abundant, and they return this kindness by helping me pull in baskets of beautiful tomatoes come July.

Tea, Spices, Incense, & Herbs:

What’s a witch without her stores of fragrant and powerful herbs? I’ve been hand grinding my own herb and resin incenses since I was a teenager, and to this day I do not use commercial incense in my home. Nothing compares to the smell of smoldering rosemary. (Be sure with all incense to ventilate your home!) I enjoy the whole-body hug that is a cup of mint and tulsi tea all winter long, and there is just something about crumbling your own thyme or cayenne pepper flakes into a pot of winter soup.

Natural Dyeing:

Here, sweet reader, is my newest special interest when it comes to plant selection! Over winter, my restless heart found comfort in a once-fanatical hobby from my 20s: knitting. Knitting again led to finding my hand spinning stash and I’ve also fallen back in love with spinning my own yarn for knitting and weaving. *Deep inhale* and that led me to realizing “I can grow dye plants and dye the yarn I spin”! Two trips to the library later I am ready to let the garden color my life in a whole different and quite literal way.

Photography, Video, & Income:

Finally, and perhaps this is obvious, the last way my garden will give me more than just a salad, is through my work with cameras. I make videos on Youtube, visually document on Instagram, and take portraits and nature shots with the flower-heavy backdrop of my dreams. My garden doesn’t just feed my body, it feeds my creativity. Every morning from the first sunny mornings of late winter until it’s too cold to be enjoyable, I take my coffee in the garden. Often the camera comes with me and I’ve got folders full of beautiful b-roll and striking photos of rabbits, bees, and birds to show for it. An unexpected and usually unplanned income bonus comes by way of selling my extra plant starts off every spring, usually funding the supplies I need for my late June succession planting.

What are some ways you can get more out of your garden this year? Leave me a comment, or drop by my YouTube video companion to this post and we can chat there!

Continue Reading

How To Save The Planet With Plants

Last year, the Amazonian fires sent the world into a collective panic. The Amazon rain forest is known as our planet’s” lungs” and this panic was not misplaced. I bring it up not to diminish the importance of rain forest preservation, but as the foundation to ask an important question I first read in Bringing Nature Home by Doug Tallamy:

Why don’t we worry about the catastrophic loss of plants, animals, and insects here at home? Is it because the change has been so incremental, and yet constant, that we simply don’t perceive the scale? 

According to the alarming statistics in the first few chapters of Bringing Nature Home by Doug Tallamy, we have taken and repurposed 95-97% of the land in the continental United States. 41% of that land is reserved for agriculture, and 53-55% makes up our suburban and urban residential land.

15% of the Amazonian Basin has been lost to logging. We’ve lost 70% of the forest here on the Eastern seaboard. 

And what have we done with that land? Stripped it and replanted it with foreign ornamentals, which will not feed our native animal and insect populations. One doesn’t need a biology degree to surmise that less food means less biodiversity.

Tallamy uses an excellent example to explain the importance of biodiversity, or having a wide range of animal and plant species in an ecosystem, and the importance of keystone species. He explains ecosystems, such as your own backyard, as a Jenga game tower. You can remove some blocks without much consequence, but eventually, one of the blocks you remove will bring the whole tower down.

In nature, certain species of plant, animal, and or insect play such a key role in the food chain, their extinction or removal from an ecosystem will destroy it. Tallamy explains that we’ve already lost around 50% of our native bird population, and much of that is due to a lack of juicy, nutritious caterpillars! 

This is where the doom and gloom begins to subside, my green-thumbed friends. While not all of us have a patch of Earth to lord over, those of us who do can be a positive change simply by choosing the plants we plant a little more mindfully.

Enter native perennials! Weeds to many people who succumbed to the propaganda of overly-manicured lawns flecked with imported species of ornamentals. While some species can be a bit…tenacious, many native wildflowers are every bit as impressive if not moreso than their useless non-native counterparts!

Aside from providing more food sources to welcome a variety of animal and insect species, planting native means working with plants that are accustomed to thrive in your zone, your soil ph and consistency. This means less work for you in the long run, healthier plants, and as I keep banging on about- more biodiversity!

I know I’m going to have a hard time convincing some of you that your lawn is one of the worst offenders in the disruption of biodiversity, so I’m not going to try…right now. Not yet. But just know, it’s coming.

No, I won’t demand that you kill your lawn today, but perhaps, consider raising the blade a little. It’s better for the grass and you’ll have less carnage happening under your mower. Maybe you don’t rip up your whole lawn, but maybe…rip up a little. 

If you don’t have any earth to till, I highly encourage launching native seeds into those neglected roadside meadows and lots some of us may have around town in the fall. It’s called guerilla planting and if it’s wrong, I don’t want to be right.

Charles Bukowski once wrote, “you save the world one man at a time”. I’d argue that changing people is too hard on the heart, plant a garden instead.

Most native perennials require cold stratification to germinate, if you’d like to learn how to do that, check out this post!

Continue Reading