-Cactus Seeds -Cactus soil -a plastic takeout container with an opaque lid -something to poke holes in the plastic -a heating mat or somewhere warm like the top of a fridge Here’s the one I use: https://amzn.to/3cauj1g -a full-spectrum grow light
Last year, the Amazonian fires sent the world into a collective panic. The Amazon rain forest is known as our planet’s” lungs” and this panic was not misplaced. I bring it up not to diminish the importance of rain forest preservation, but as the foundation to ask an important question I first read in Bringing Nature Home by Doug Tallamy:
Why don’t we worry about the catastrophic loss of plants, animals, and insects here at home? Is it because the change has been so incremental, and yet constant, that we simply don’t perceive the scale?
According to the alarming statistics in the first few chapters of Bringing Nature Home by Doug Tallamy, we have taken and repurposed 95-97% of the land in the continental United States. 41% of that land is reserved for agriculture, and 53-55% makes up our suburban and urban residential land.
15% of the Amazonian Basin has been lost to logging. We’ve lost 70% of the forest here on the Eastern seaboard.
And what have we done with that land? Stripped it and replanted it with foreign ornamentals, which will not feed our native animal and insect populations. One doesn’t need a biology degree to surmise that less food means less biodiversity.
Tallamy uses an excellent example to explain the importance of biodiversity, or having a wide range of animal and plant species in an ecosystem, and the importance of keystone species. He explains ecosystems, such as your own backyard, as a Jenga game tower. You can remove some blocks without much consequence, but eventually, one of the blocks you remove will bring the whole tower down.
In nature, certain species of plant, animal, and or insect play such a key role in the food chain, their extinction or removal from an ecosystem will destroy it. Tallamy explains that we’ve already lost around 50% of our native bird population, and much of that is due to a lack of juicy, nutritious caterpillars!
This is where the doom and gloom begins to subside, my green-thumbed friends. While not all of us have a patch of Earth to lord over, those of us who do can be a positive change simply by choosing the plants we plant a little more mindfully.
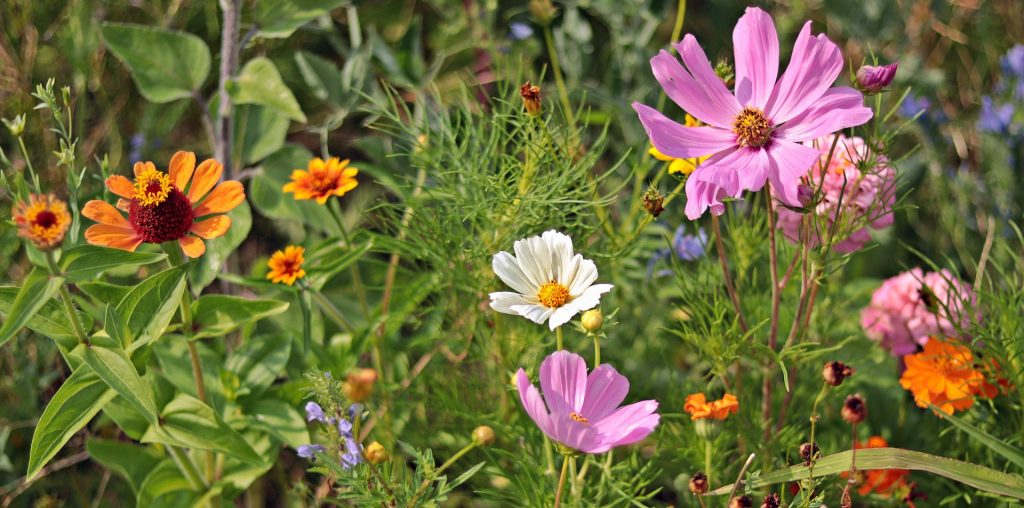
Enter native perennials! Weeds to many people who succumbed to the propaganda of overly-manicured lawns flecked with imported species of ornamentals. While some species can be a bit…tenacious, many native wildflowers are every bit as impressive if not moreso than their useless non-native counterparts!
Aside from providing more food sources to welcome a variety of animal and insect species, planting native means working with plants that are accustomed to thrive in your zone, your soil ph and consistency. This means less work for you in the long run, healthier plants, and as I keep banging on about- more biodiversity!
I know I’m going to have a hard time convincing some of you that your lawn is one of the worst offenders in the disruption of biodiversity, so I’m not going to try…right now. Not yet. But just know, it’s coming.
No, I won’t demand that you kill your lawn today, but perhaps, consider raising the blade a little. It’s better for the grass and you’ll have less carnage happening under your mower. Maybe you don’t rip up your whole lawn, but maybe…rip up a little.
If you don’t have any earth to till, I highly encourage launching native seeds into those neglected roadside meadows and lots some of us may have around town in the fall. It’s called guerilla planting and if it’s wrong, I don’t want to be right.
Charles Bukowski once wrote, “you save the world one man at a time”. I’d argue that changing people is too hard on the heart, plant a garden instead.
Most native perennials require cold stratification to germinate, if you’d like to learn how to do that, check out this post!
Winter sowing seems to be picking up steam among hobby gardeners all over social media, but what is it, and WHY do it?
I decided to give winter sowing in milk jugs a try this year, and learned a lot about plants in the process! If getting a head start on Spring planting in the gloomy months of winter sounds appealing to you, read on!
First of all, why winter sow at all? Couldn’t you just start your seeds outside in the spring, or even inside under a light? Well, you can, but with some plants- including most native perennials- you won’t have much success. This method also comes with some convenient perks we’ll discuss shortly.
Have you ever bought a package of rosemary, milkweed, or lavender seeds, only to have few if any sprouts turn up? There’s a reason for that, and no, it’s not you or a lack of a green thumb!
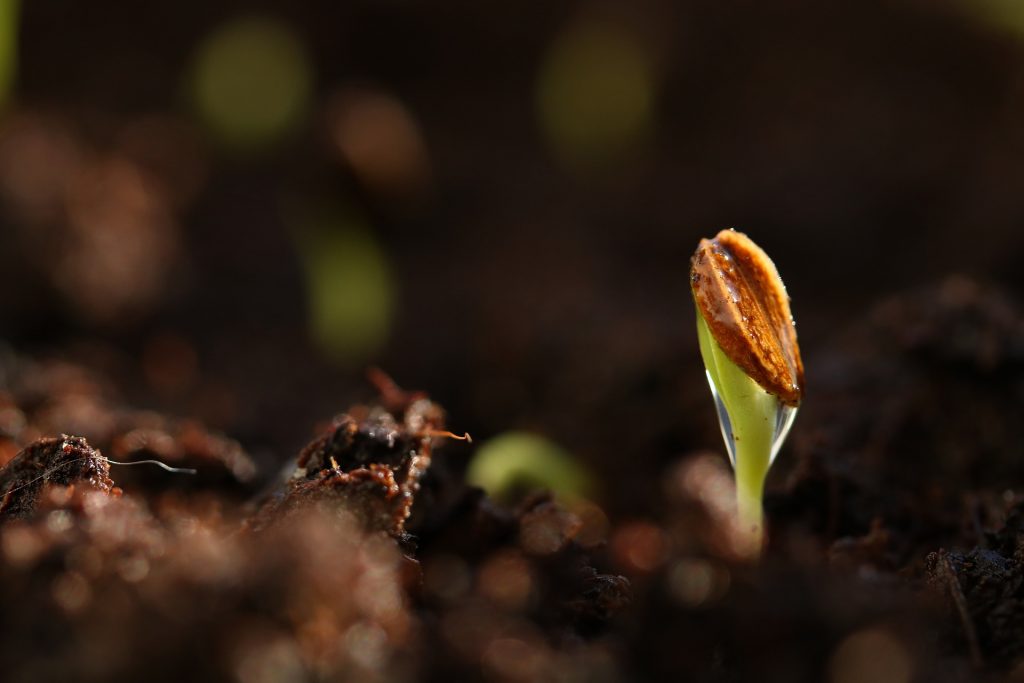
Many plants, such as wildflowers native to the temperate regions of North America (areas where winter is cold enough to kill vegetation), will not germinate without an extended period of moisture and low, freezing temperatures.
This required low temperature and high moisture period is called stratification, and it’s one of many evolutionary functions plants use to survive. This process starts a chemical reaction that releases the plant embryo from dormancy.
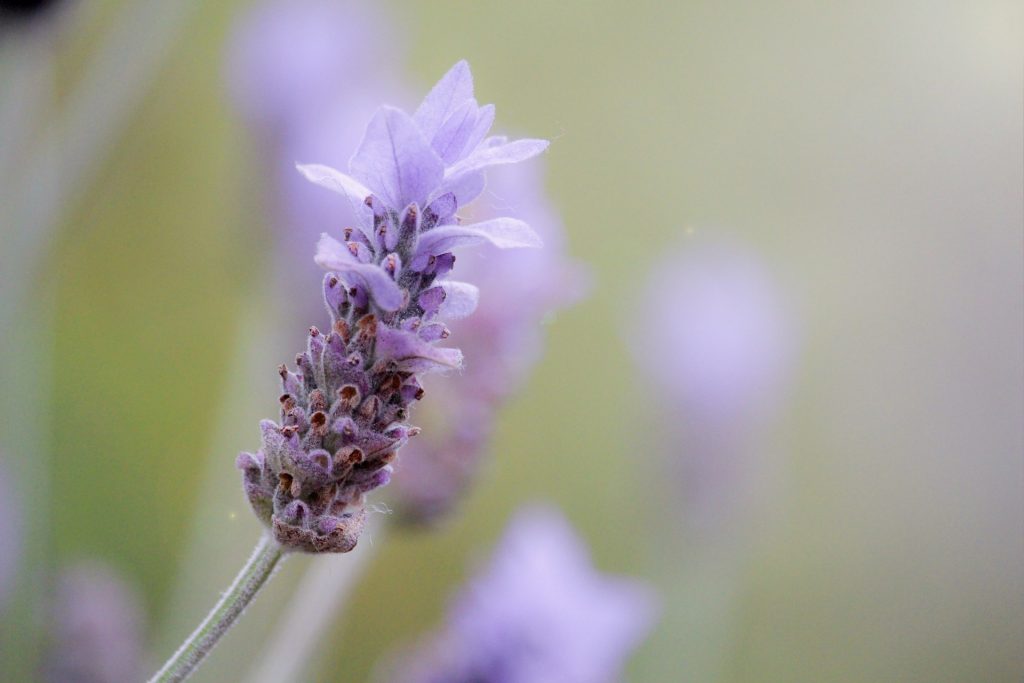
You can simply put your lavender and rosemary seeds in a baggy of damp potting mix in the fridge for a couple months before planting, by the way.
Stratification ensures that the seeds dropped by mature plants do not immediately germinate in the warm autumn sun, only to be decimated by the first frosts of winter.
Because seeds only contain about 2% water, they are not damaged by this water expanding as it freezes over winter, however the foliage of a plant contains 95% water. This is why gardeners fear unexpected frost! With that much water to expand, leafy plant matter is torn to shreds!
Another example of this evolutionary insurance policy that you may encounter in the native plant world is called scarification, or marring of the protective seed coat by outside intervention.
In nature this might take the form of a thick seed coat being worn down by the digestive enzymes in an animal’s stomach, and dispersed back to the earth in their waste, or simply dissolved by just the right amount of rain.
Gardeners often achieve this effect by gentle filing or scraping the seed before sowing it.
Additionally, many plants will only germinate when exposed to the right amount and hours of light and darkness that match the plants target growing season.
When we winter sow, the seeds are being exposed to the correct seasonal temperatures and light to have the best chance of germination.
In simpler terms, plants are really smart and they have their reasons! Work with them, not against them, and you might find yourself with less work this spring!
Now you may still be wondering, why not just plant the seeds directly in the ground? In my opinion, this is where winter sowing in plastic jugs really shines. Seeds sown directly in the garden are subject to being washed around in the rains, dug up or eaten by wildlife, or trampled by careless humans.
With this method of winter sowing, you’re getting far more control of your garden design, with less time spent trying to tell seedlings apart as they sprout among other flora in the garden.
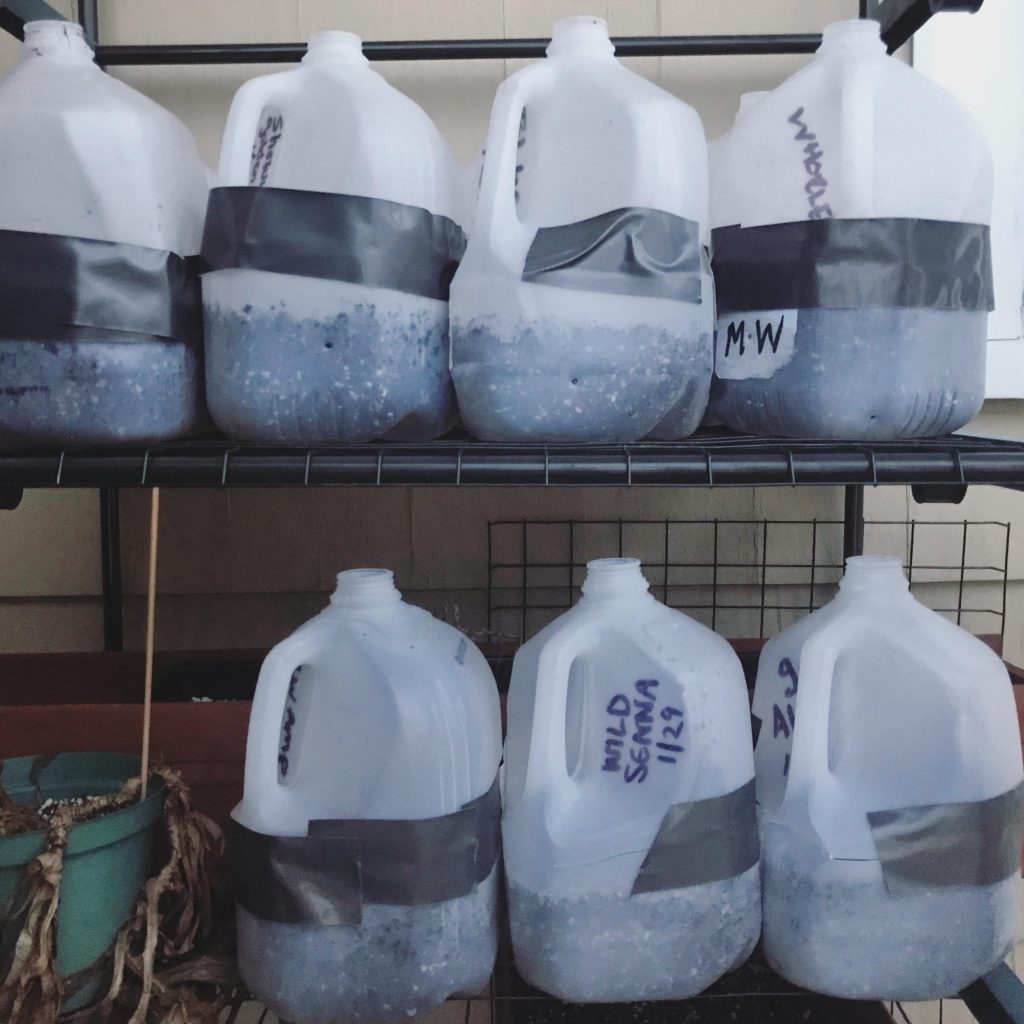
Some of my milk jugs working their magic outside. Photo by Me.
Once germinated, the tender foliage of these plants are at risk of annihilation should a surprise late frost rear its ugly head. The jugs act as mini greenhouses to protect the plants, while still allowing them the temperature, water, and light they require.
An added perk to this method is total avoidance of the hassle of “hardening off” indoor-started seedlings. This process can be tedious and it only takes one instance of falling asleep early watching Netflix on a chilly night to kill off your whole seed tray!
Having these precious baby plants in a perfectly mobile container, whose top can be opened for light and warm spring air, closed against the chill of night, or in emergencies, moved indoors safe from weather extremes makes all the sense in the world to this control freak!
Fellow sufferers of SAD Seasonal Affective Disorder) will love this mid-winter project, you can begin laying the tracks for your garden right after the holidays in most regions!
You’ll better guarantee your early crop and get to brag about your beautiful seedlings before your comrades even start theirs! Be honest, you know you’ll enjoy that just a little! There’s no judgement here.
OK, if you’re as sold on winter sowing as I am, let’s start making our little mini-greenhouses! Check out the video for a step-by-step!
Here’s What You’ll Need:
Milk jug / plastic bottles
Take out tins
rubbermaid /clear totes
Well-draining potting mix
X-acto knife or other sharp/safe tool to cut plastic
Hole-punching tool (heat up a screwdriver or sharp poking tool)
Directions:
Cut the jug as shown in the photo, just below any handles the container may have. Leave an inch or two under the handle uncut to form a “hinge”. Get rid of the cap, you won’t need it. NOTE: Leaving the cap on saved jugs will make the jug smell nasty, so chuck the cap before you store them.
Punch or melt holes in the bottom of the jug, enough so the soil can freely and quickly drain. You don’t want water sitting in these any more than you would in a potted plant! You may also want to add a few more ventilation holes around the top of the container.
Fill the bottom of your new mini-greenhouse jug with well-draining potting mix or compost and moisten it with water if you haven’t already. You can make sure you have adequate drainage here, the water should move through the soil and holes freely.
Plant seeds according the depth noted on the back of the packet being mindful that some seeds require light to germinate. Each plant embryo only contains so much energy to get it to the surface where it will use photosynthesis to get more. If you plant too deep, it may run out before it makes it out of the potting mix.
Close the greenhouse, label it**, and seal about 80% of the cut part closed with duct tape. You don’t want it airtight, just securely closed.
Place the containers in a place that isn’t blasted with the harshest hours of sun as this can be detrimental later in the season.
**Paint markers seem to be the best for labeling as sharpies will fade, I recommend keeping a chart as well of which container has what.
What I’m Winter Sowing in Zone 6b:
Lemon Beebalm/Purple Horsemint Monarda citriodora (Non-Native to NE, A) Corner Sun Summer 2-4ft (purple)
Native Wildflower Mix (N, P)
Verbena Bonariensis (South America) Draining Soil, Corner Sun, Can spread too much Summer-Frost 2-5ft (purple)
Zinnia, Mixed (A)
Mexican Sunflower (Mexico, S. A.)Tithonia rotundifolia (P) Draining Soil, Sun Summer 4-6ft (red)
Sneezeweed Helenium autumnale (Naturalized in New England, P) *late blooming late summer-fall 2-6ft (yellow) named by Linnaeus for Helen of Troy, said to have sprung from where her tears fell
Blue Mistflower / Wild Ageratum Conoclinium coelestinum (Non-Native to NE, P) late summer 2-3ft (blue)
Blazing Star / Gayfeather Liatris spicata (Naturalized, P)
My Peperomia Collection & Care Tips Video! Subscribe on YouTube for more!
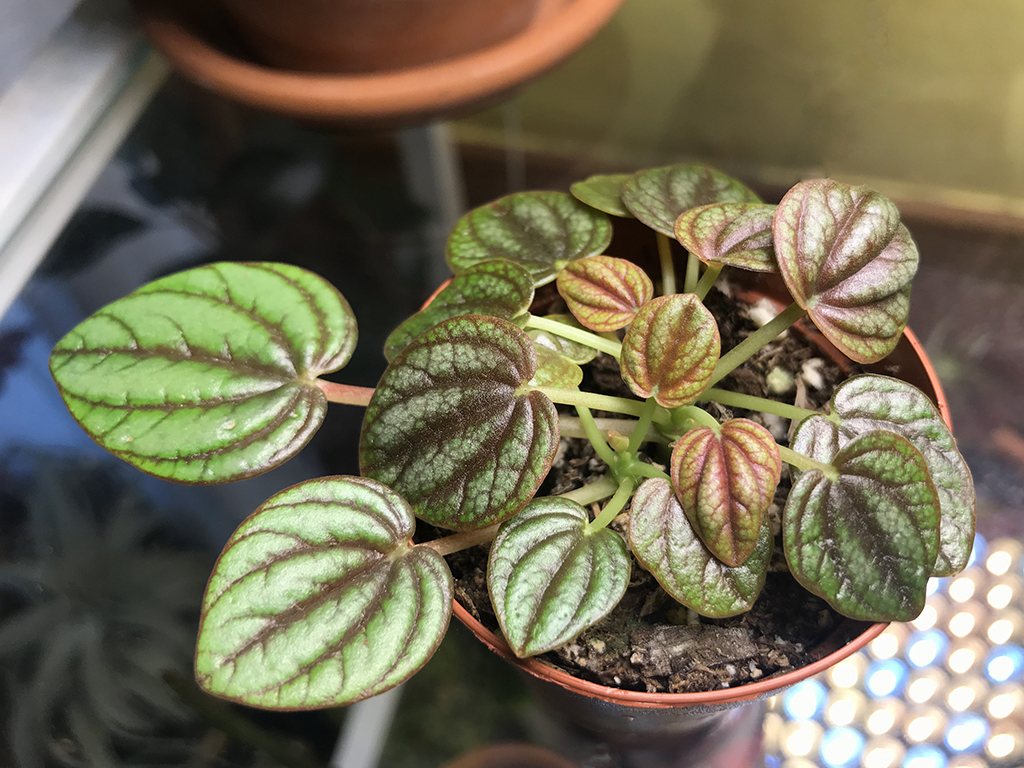
Origin & Characteristics
The genus Peperomia was first described by Spanish botanists Ruiz & Pavon in 1794. Since then, over 1600 species of these mostly pint-sized plants have been recorded. Peperomia are tropical and subtropical plants, originating mostly in Central and South America, with just 17 calling Africa their home.
In Brazil, Peperomias are a symbol of good luck, it is given as a sort of comfort that everything will be alright. I love that.
You can find one of the larger Peperomias, the obtusifolia growing in Florida now as a naturalized species. Peperomia belong to the Angiosperms, or flowering plants, and are a member of the Piperaceae family. That’s the same as the pepper plant, the spice, not the fruiting variety.
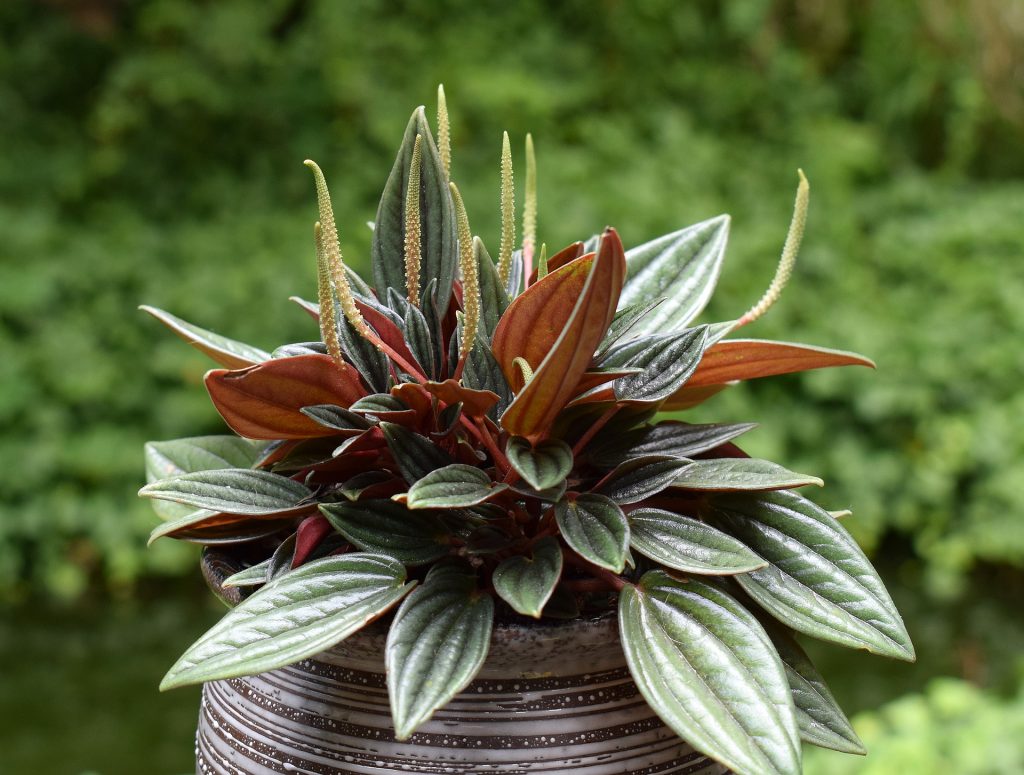
The flower of the Peperomia is a “rat tail” or spicate inflorescence that is, upon very close examination, comprised of tiny green flowers. The nature of their flowers suggests they are pollinated autonomously via the wind or insects.
While many Peperomia are small in size, the varieties are as diverse as a genus gets. There are three types of Peperomia, trailing (P. scandens, P. hope), bushy (P. caperata, P. argyrioua), and upright (P. clusifolia, P. obtusifolia).
The Care & Keeping of Your Peperomia
The Peperomia is an ideal houseplant because of its smaller size, they are mostly compact, slow-growing plants with shallow root systems that don’t require frequent uppotting. In fact, this is discouraged! A Peperomia can happily go for years in the same pot.
Peperomia enjoy average warmth (don’t go lower than 55 degrees F) and will not do well in direct sunlight. Instead give them bright, diffused to medium light. Many Peperomia will thrive under grow lights.
The kiss of death for most Peperomia is root rot. The delicate, fragile root system must be allowed time to dry out and “breathe” or they will suffocate, leaving you very sad and your plant very dead.
A good general rule of thumb for watering Peperomia is: the thicker the stem, the longer you can go between watering. Many indoor gardeners advise waiting until the leaves of your Peperomia feel floppy and bendable, but try not to let it get this far to avoid needlessly stressing the plant. For many bushy varieties, you’re gambling with leaf drop if you wait too long.)
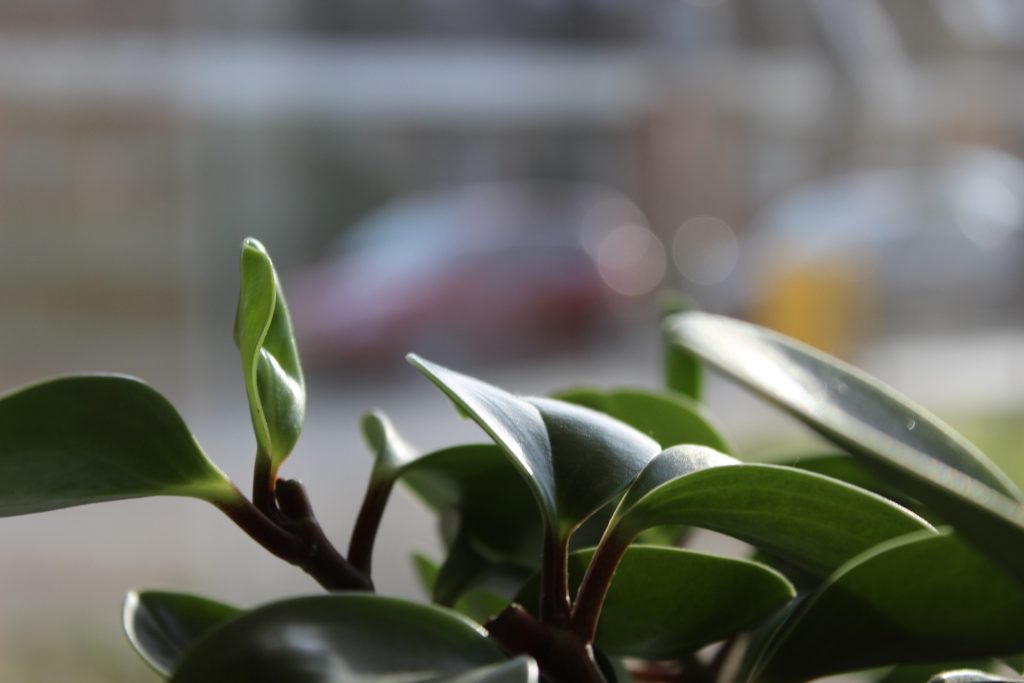
Example: prostrata and ruby cascade can take water more often (thin) whereas obtusifolia has more succulent tendencies and can go longer.
The Peperomia obtusifolia can hold water for weeks at a time and handle more sun than more tender varieties. Image by Free-Photos from Pixabay
Another bit of information you can glean from physical characteristics of Peperomia are how much light they can take without showing chlorotic stress.
Red undersides, succulent, and variegated peps can usually take more light, whereas watermelon and small-leafed medium thick can take medium light, with ripple peps being more shade friendly.
One very cool fact I’ve learned about Peperomia is that they are summer dormant. This means they do the bulk of their growing during the fall to winter months.
This does mean they may need a little bit of fertilizer to replenish the soil, but once a month is more than plenty, and use ¼ to ½ of what your bottle says.
In nature, these are epiphytes, meaning they grow in trees and get their nutrients from the rain runoff through the trees rather than from soil. They are used to a lower level of nutrients than many of our other tropicals!
And since these are epiphytic in the wild, this means they appreciate barky, well-draining potting mix. I use roughly 2 parts soil to 1 part perlite with a handful of some small pieces of orchid bark.
Peperomia are susceptible to standard houseplant pests, but don’t seem to be as enticing to pestiferous insects as other genera in my collection. Watch for leaf puckering that doesn’t go away with a good watering, you may have a sucking insect on your hands.
Peperomia thrive under grow lights. This P. albovittata (Piccolo Banda) has quadrupled in size under my Hidden Harvest LED panel in the last few months. Photo by me.
Troubleshooting
Leaf drop can indicate both low temperature stress, as well as lack of adequate watering. Keep your plants in a place that does not drop below 50 degrees F, and is free from cold drafts. Cold stress also takes the form of browning on the abaxial (bottom) half of the leaves.
A word of warning on ordering Peperomia online, I have noticed these plants take an especially hard hit in the mail even when packed well. The good news is, however, they bounce back incredibly quickly! Give them good light, a warm spot, and don’t over water and your Pep will show you how resilient it is!
Propagation
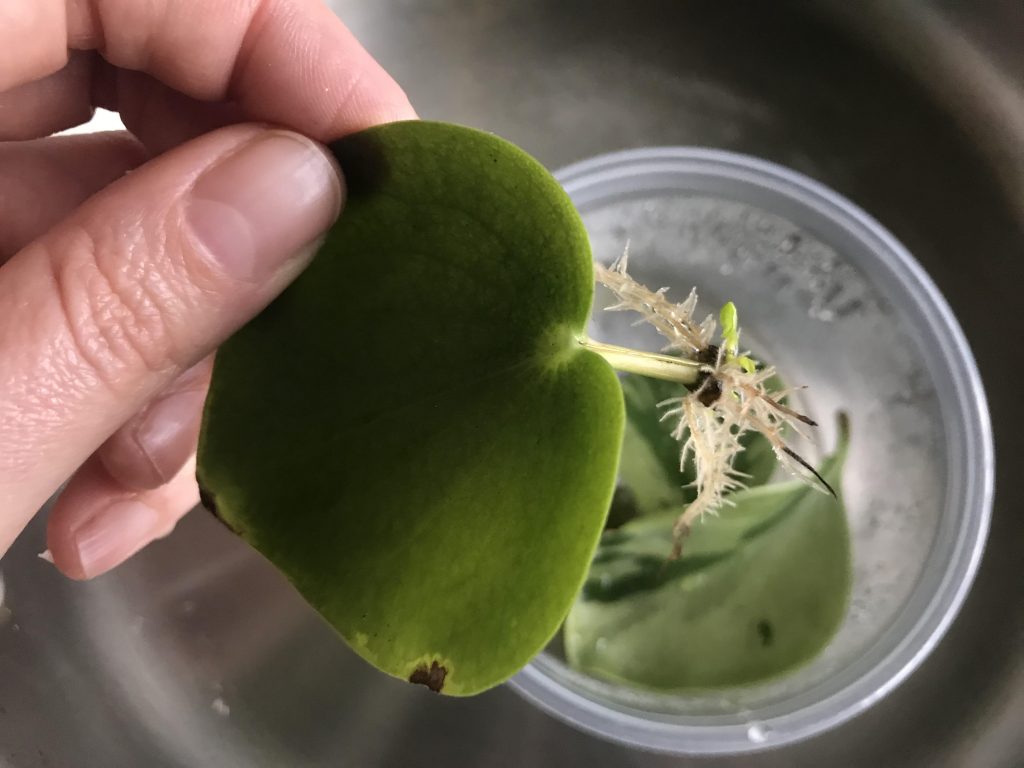
Peperomia are fun to propagate! You can root stem and leaf/petiole cuttings in water, soil, moss, or…my favorite method: in up-cycled hummus pots! I learned this method via Jane Perrone, host of On The Ledge Podcast.
Here’s the growth on my Peperomia obtusifolia petiole propagation after just a month in the hummus pot method. Photo by me.
You simply remove the labels and thoroughly clean an empty hummus or take out container, put a little bit of water in them, pop your Pep leaves in there, cover your mini-greenhouse, and forget about it for a few weeks!
People have loved Peperomia for a long time and with good reason! They’re cute, compact, and once you get the hang of their needs, a very easy houseplant to care for.