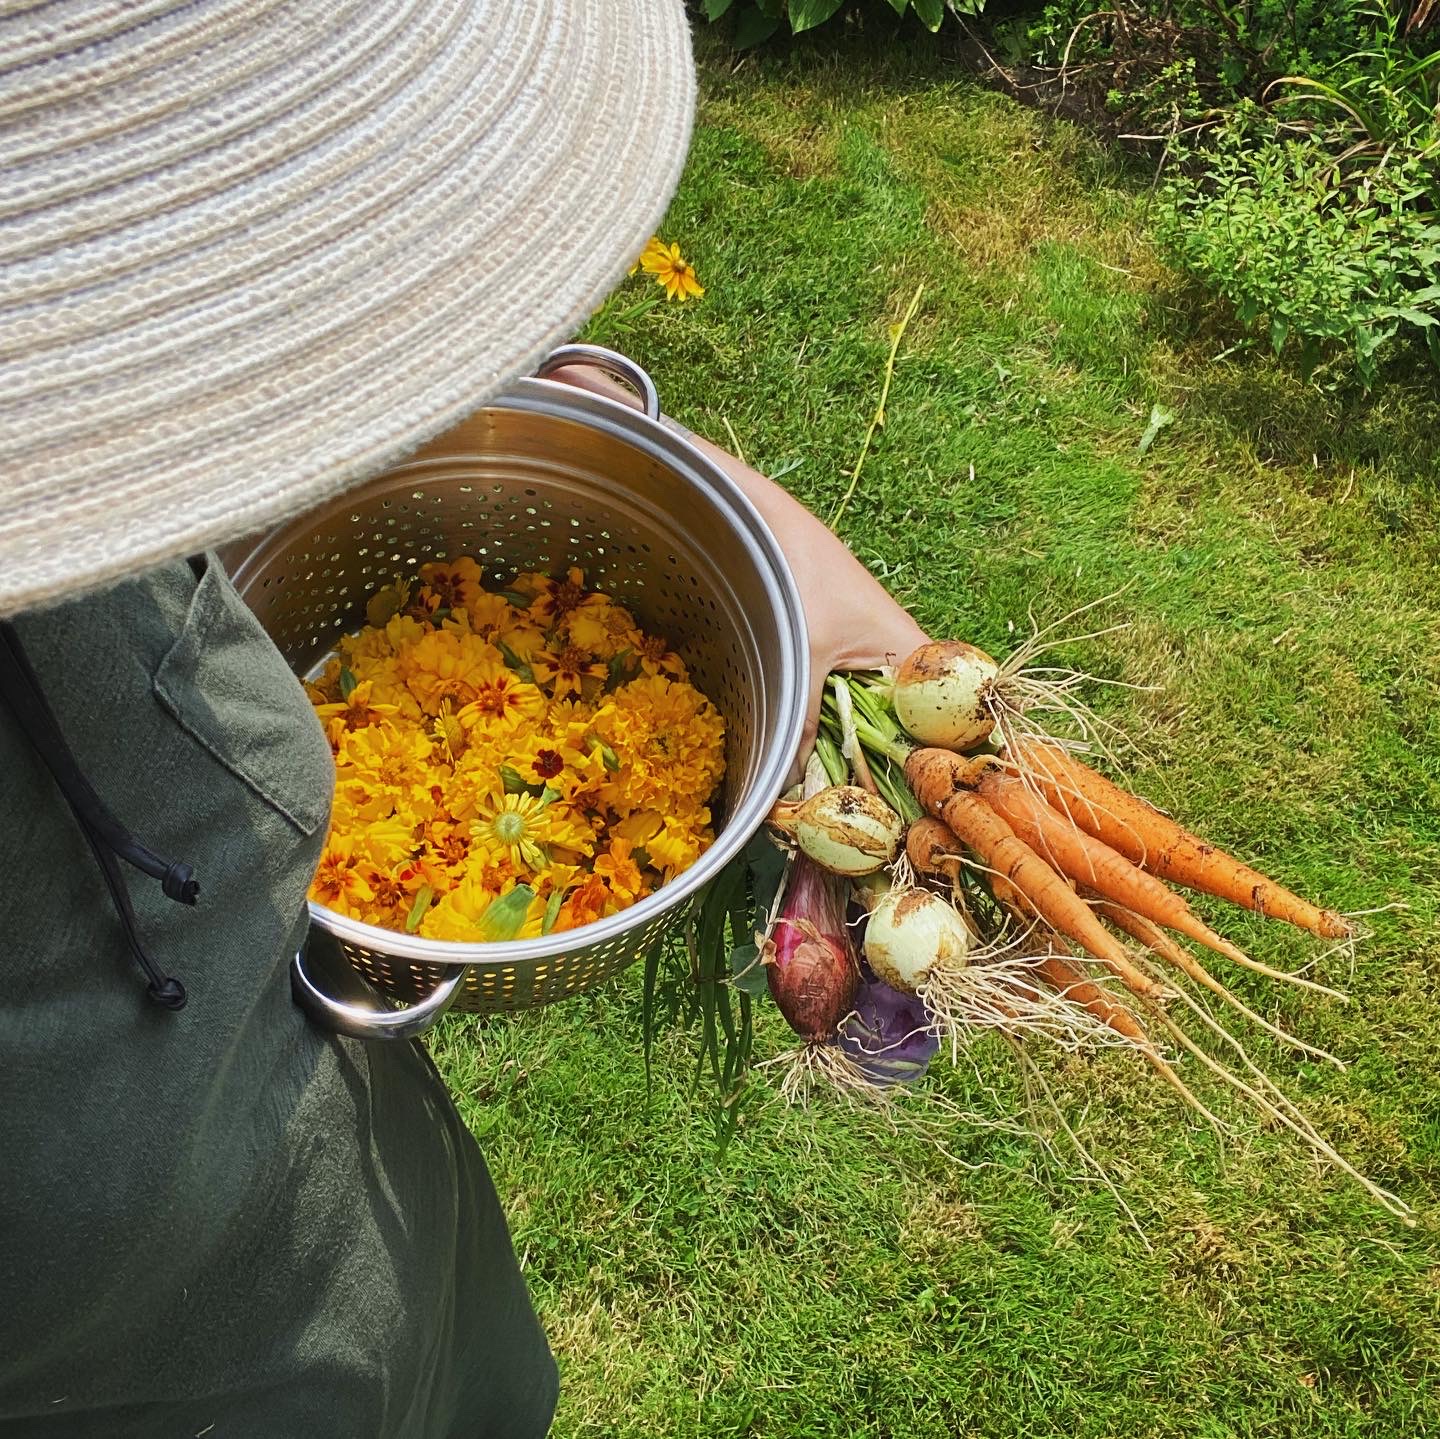
It’s the peak of summer here in the northern hemisphere and as my tomatoes struggle to live up to the perfection I’d imagined over winter, my flowers are filling vases, presses, dye vats, and now paint jars! About a month ago I signed myself up for Falling Off Tree’s Botanical Play Intuitive Painting with PH Modifiers class. I rarely take classes on anything, content (stubborn?) in my autodidact world where I’d rather teach myself with books or the internet, but I’m trying this new thing called trying new things.
Taken @ Falling Off Tree’s Botanical Play class.
The class was relaxed and fun, and I immediately went looking for supplies to experiment more. When you have ADHD you ideally learn to resist the siren song of buying every supply imaginable for your new hobby, so I opted for decent paper and cheap brushes. I’m already eyeing down watercolor sets and fancy brushes so my strength may only go so far.
For our purposes today, you’ll need water, paper, a paintbrush, and flowers.
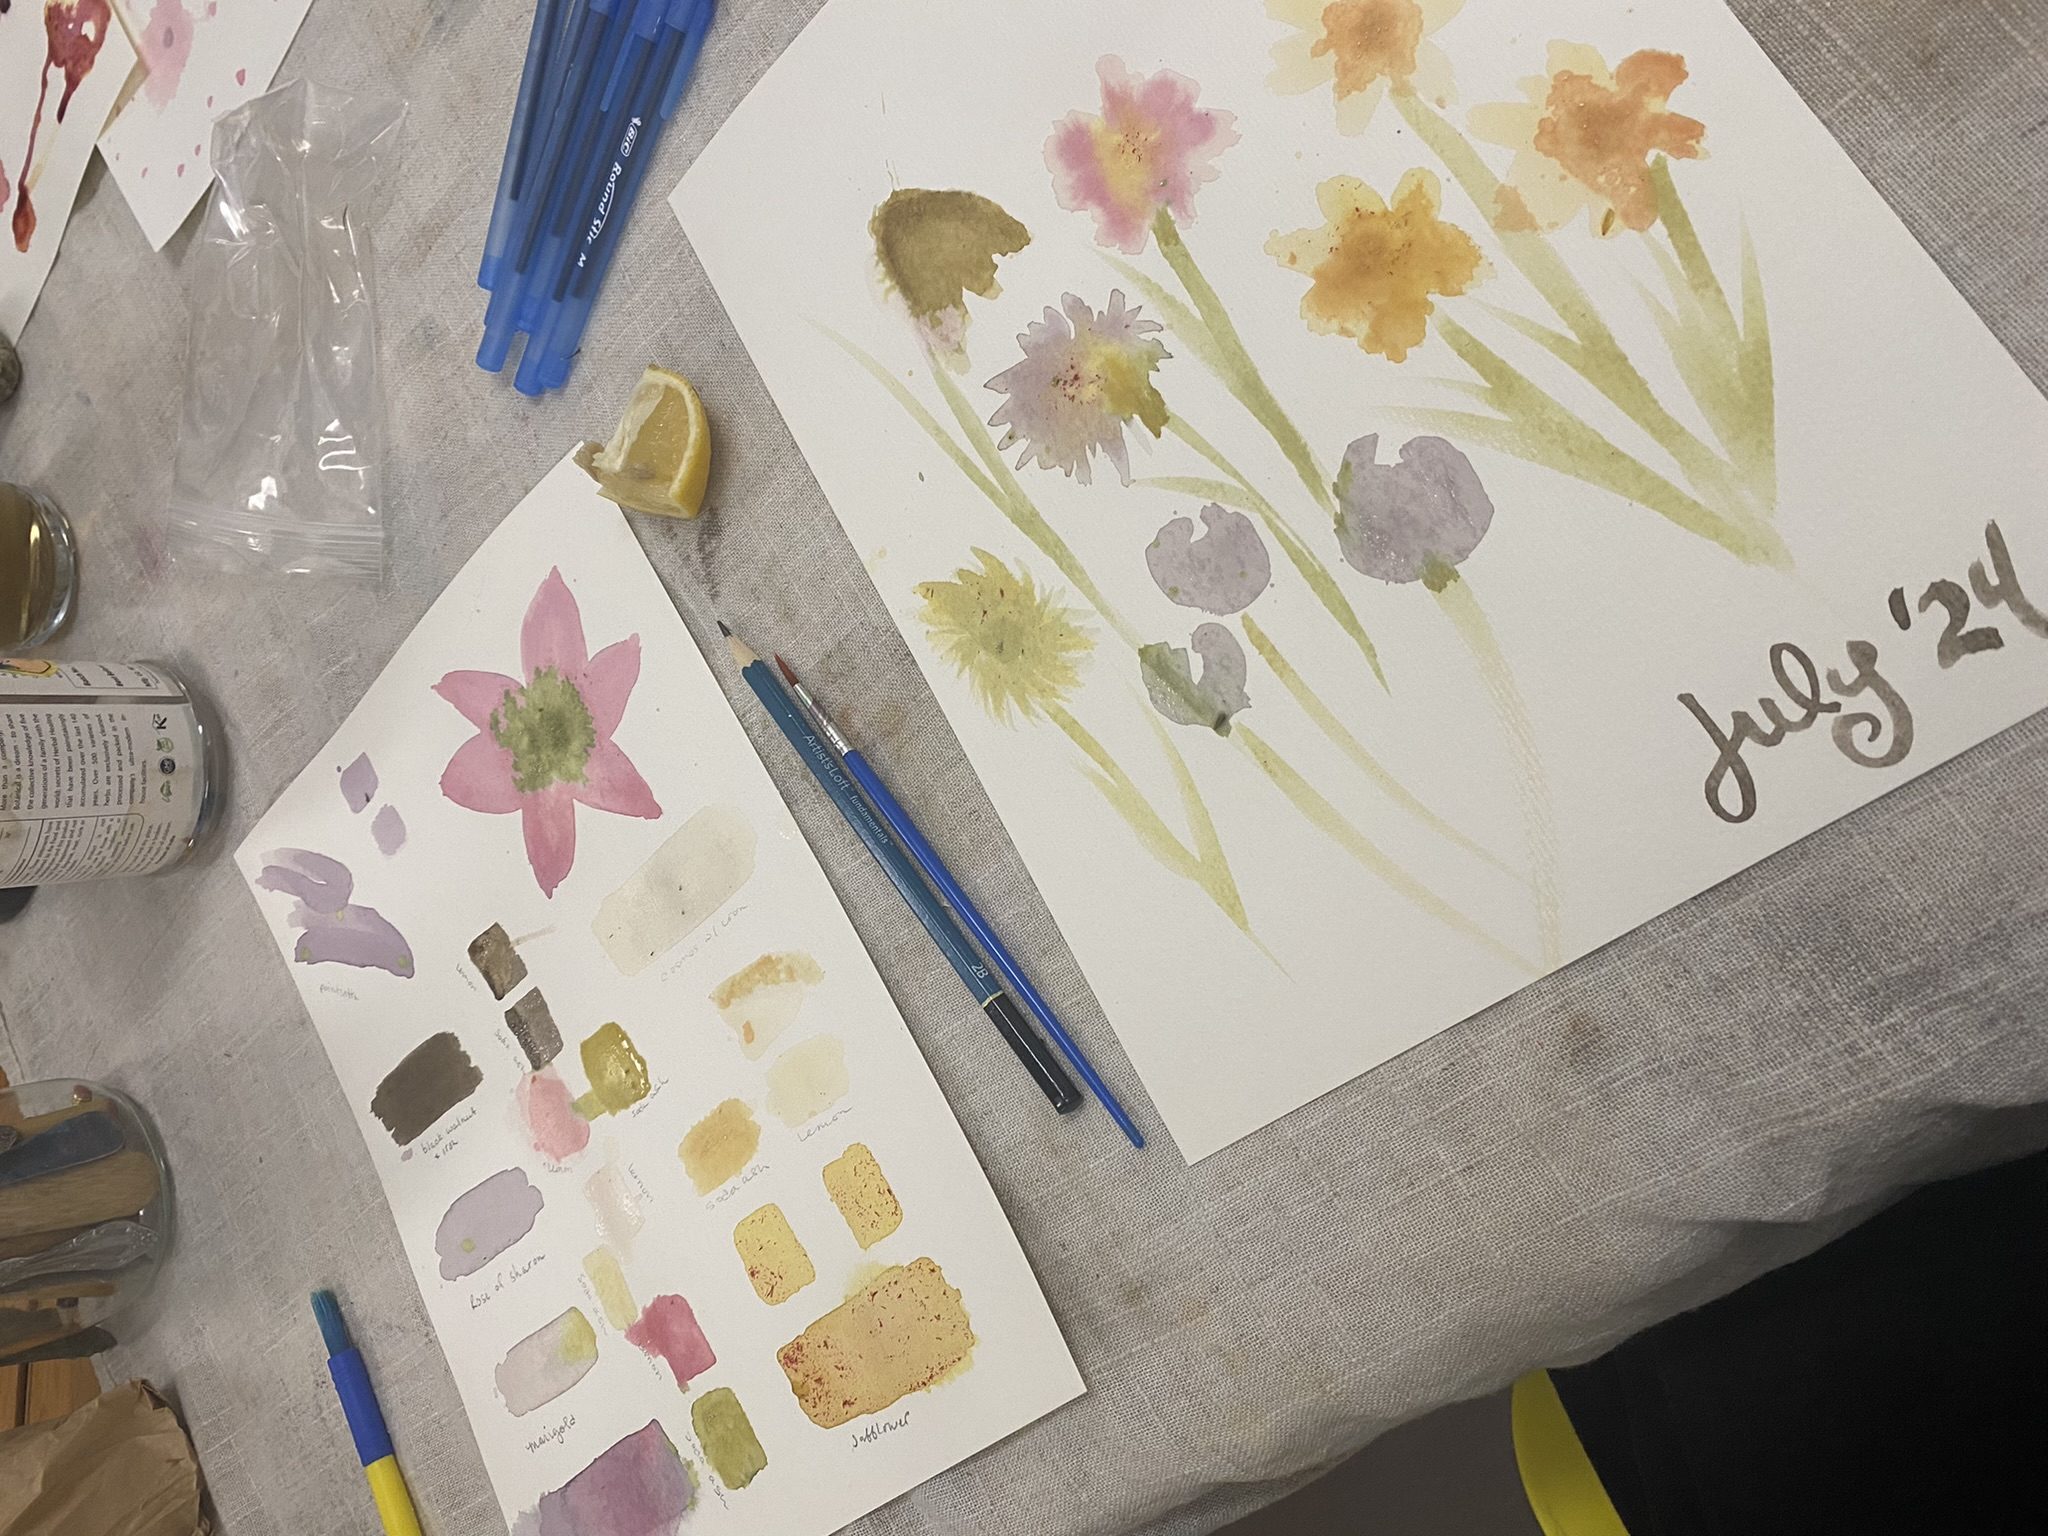
When setting out to learn painting of any kind, I think it’s always best to swatch and play with values and color before trying to do anything else, so that’s mostly what I have to show you. I am not an experienced painter and you don’t need to be either! This is about spending time with plants and working your creativity muscles.
Let’s jump into the process!
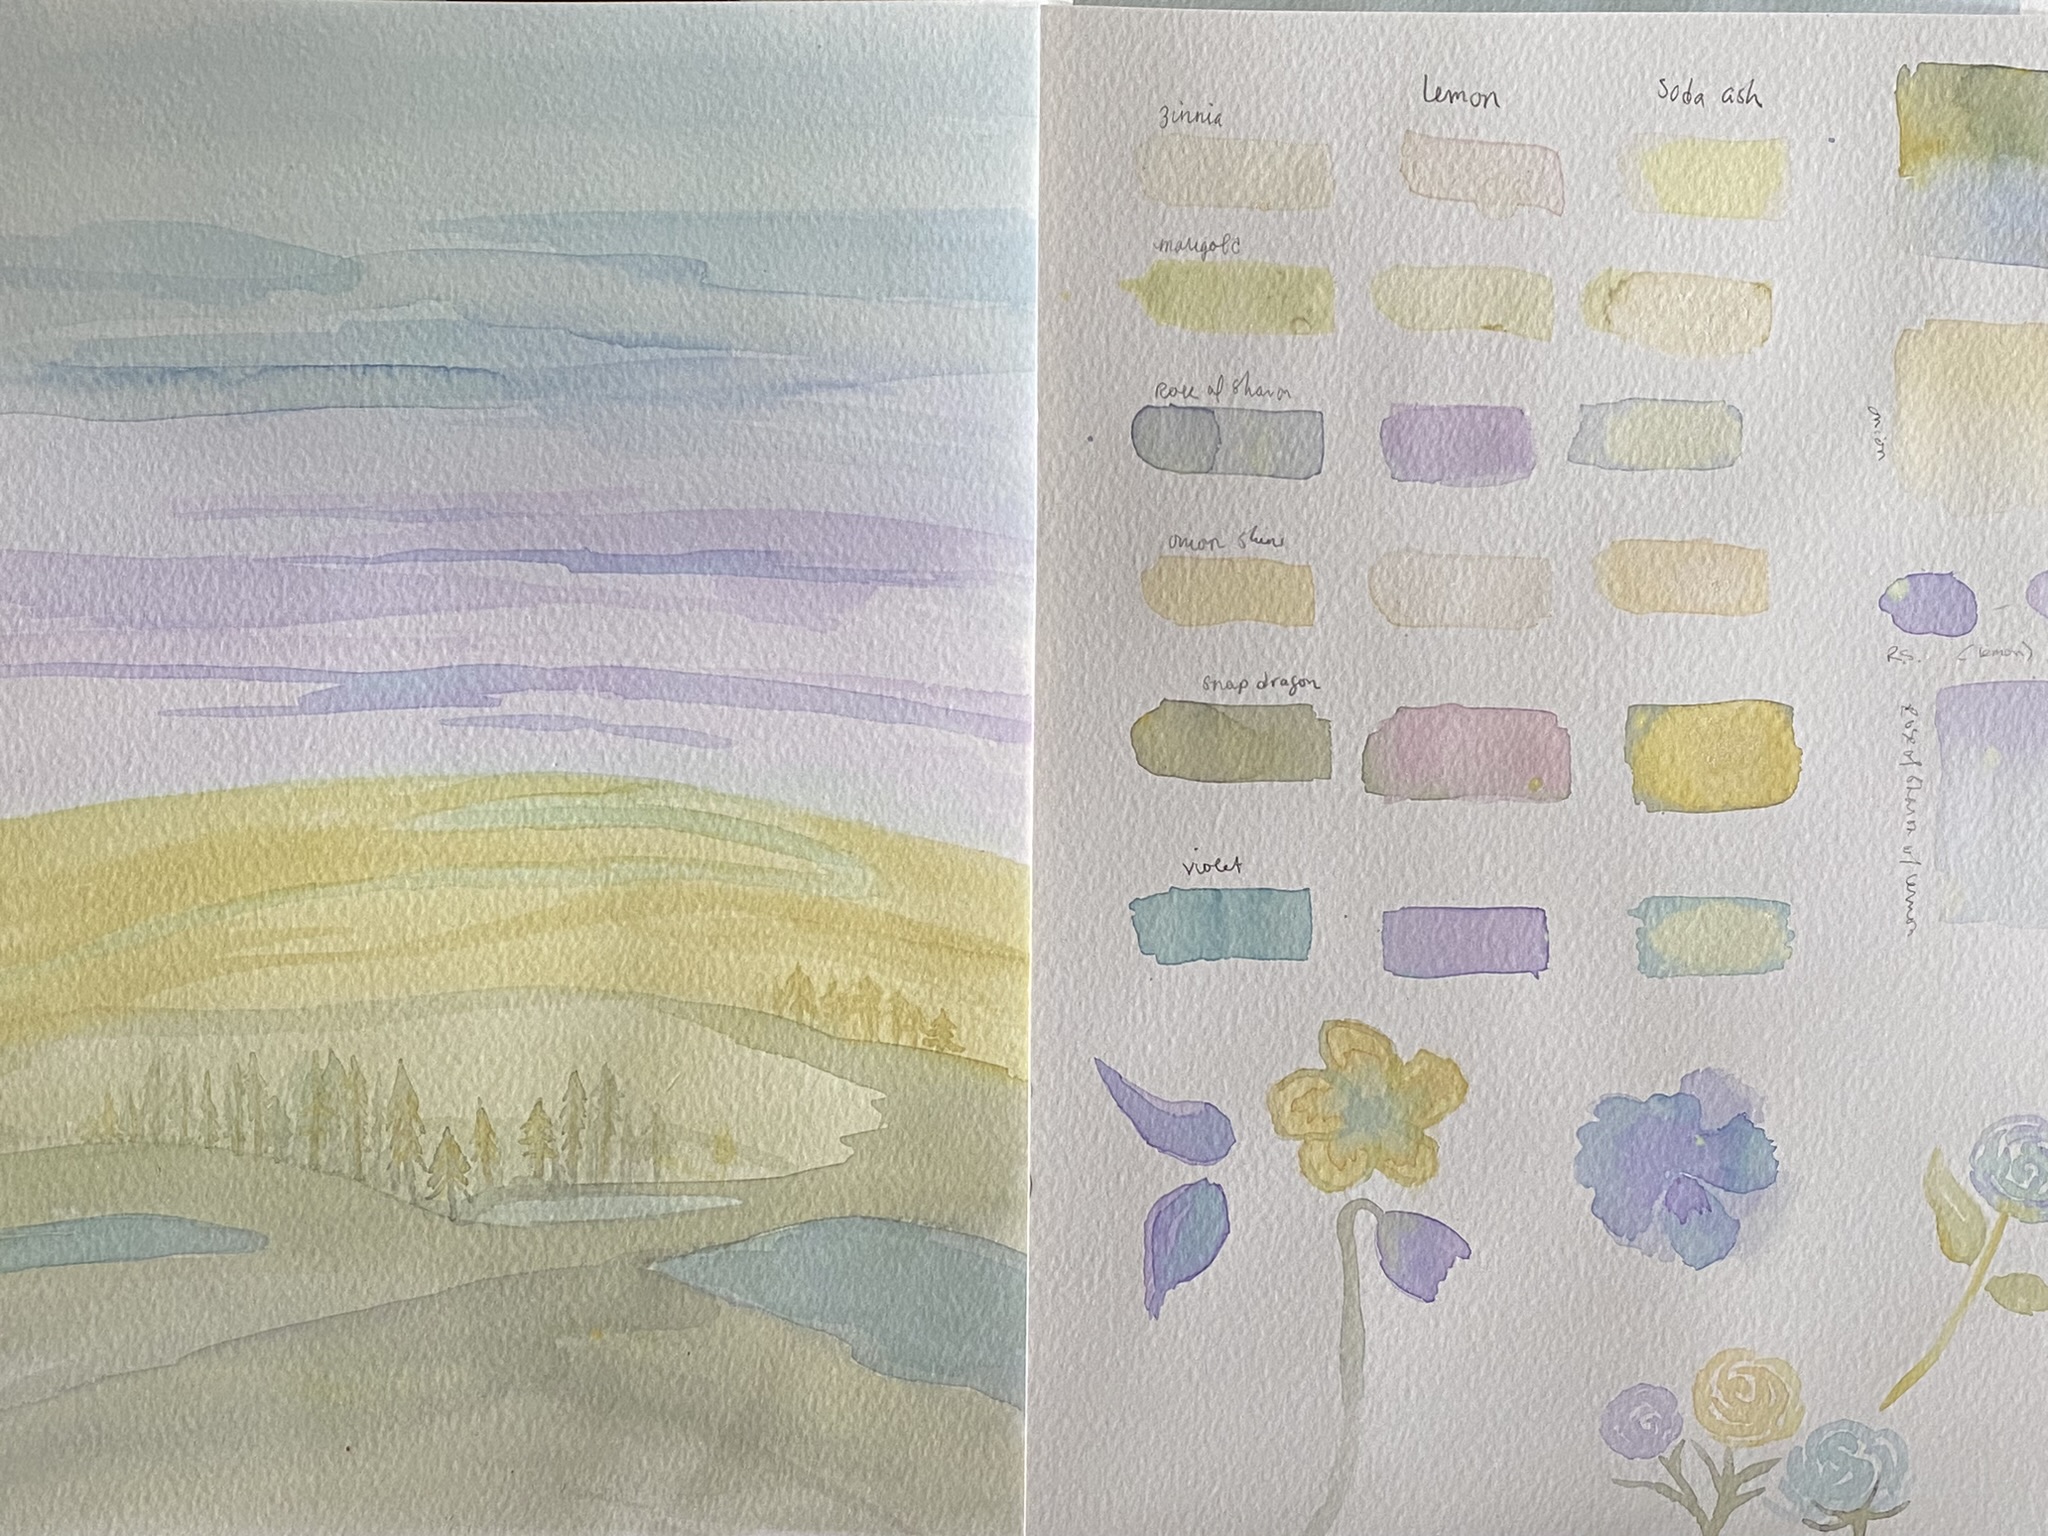
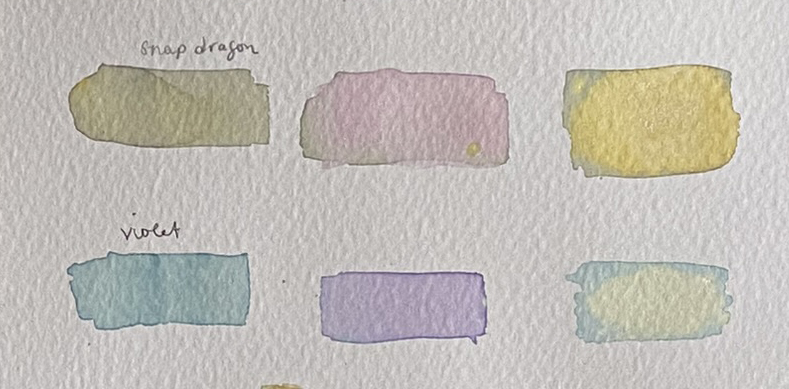
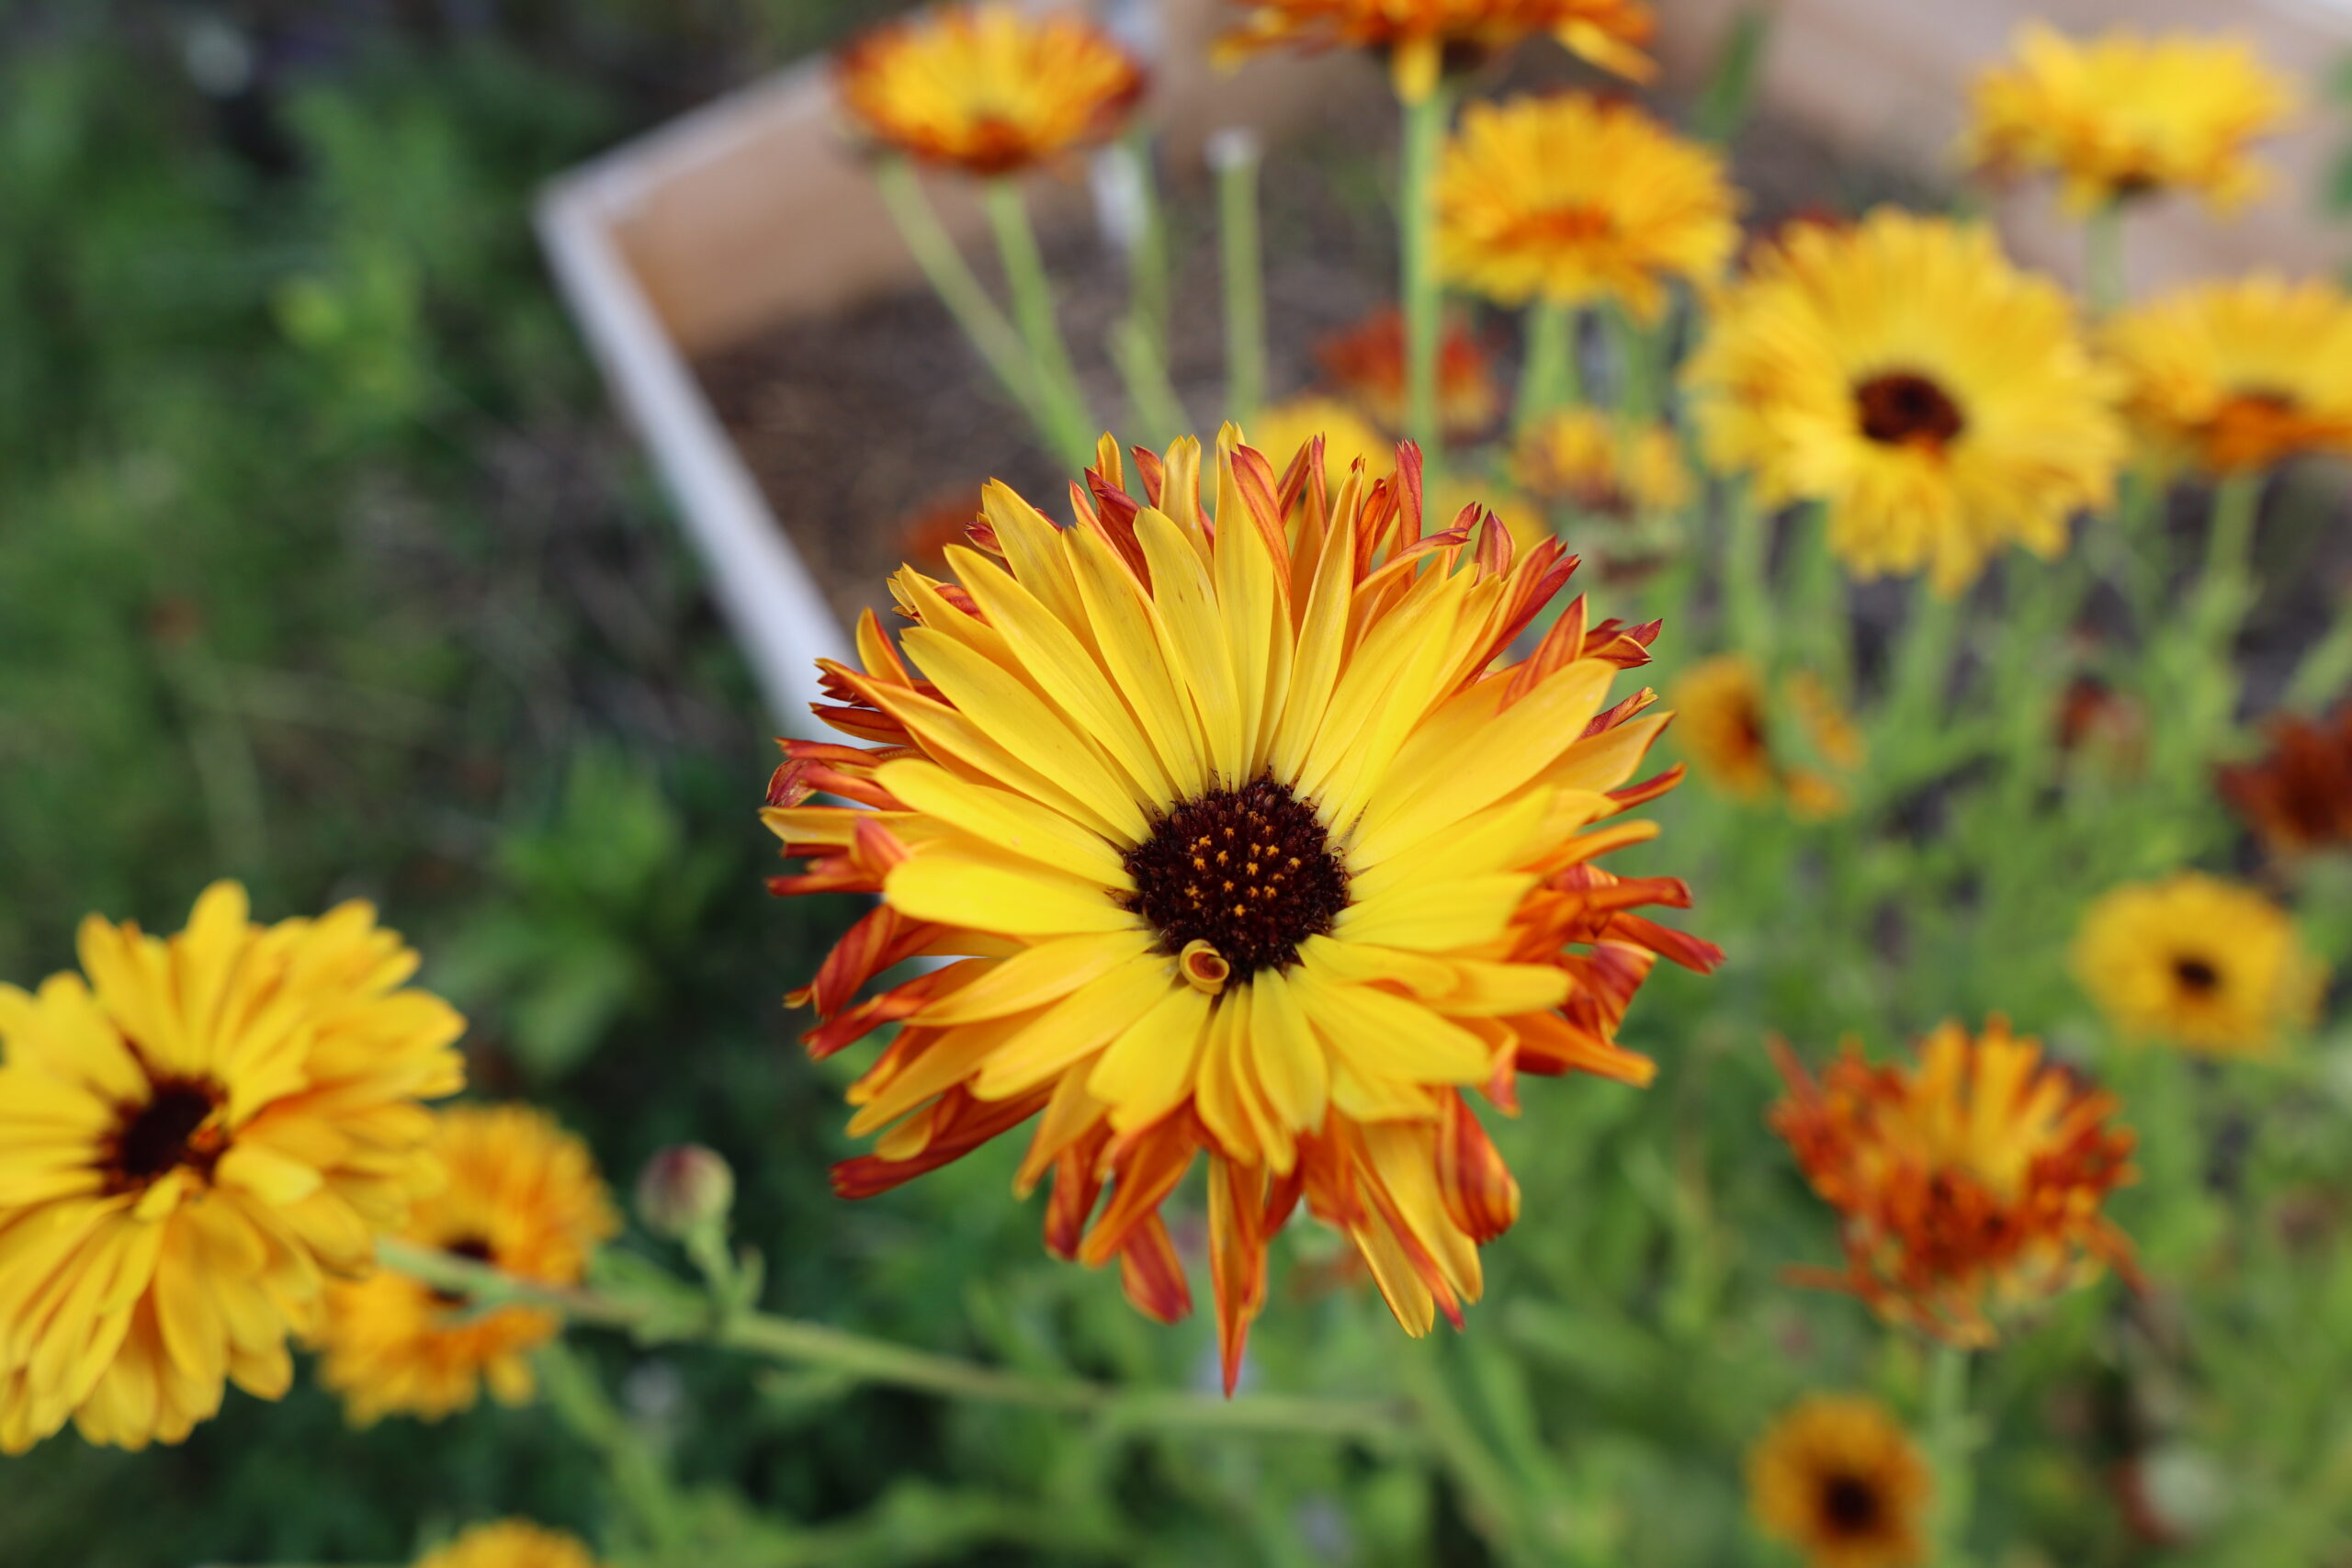
Pansies (purple and blue), rose of sharon (purple), onion skin (yellow), and snapdragons (greenish yellow that dried to a grey)
The process of extracting pigment from plant matter often starts with hot water. You’ll want to tear up or chop your material and then pour some hot water from the kettle over it to steep. Unlike textile dyeing you will need just a small amount to paint, so I used double shot glasses. I let everything marinate for 15 minutes or so before I started to test them out.
TIP: You can use fresh or dried plant material so start saving for winter now!
The next fun layer to this process is adding PH modifiers such as lemon juice, vinegar (acidic) wood/soda ash (alkaline) or metallics (copper, iron, alum) to see how or if it affects the color. You’ll find these modifiers used throughout all natural pigment processes and while they’re all natural, be sure to check safety precautions for everything you use. Natural is not a synonym for safe!
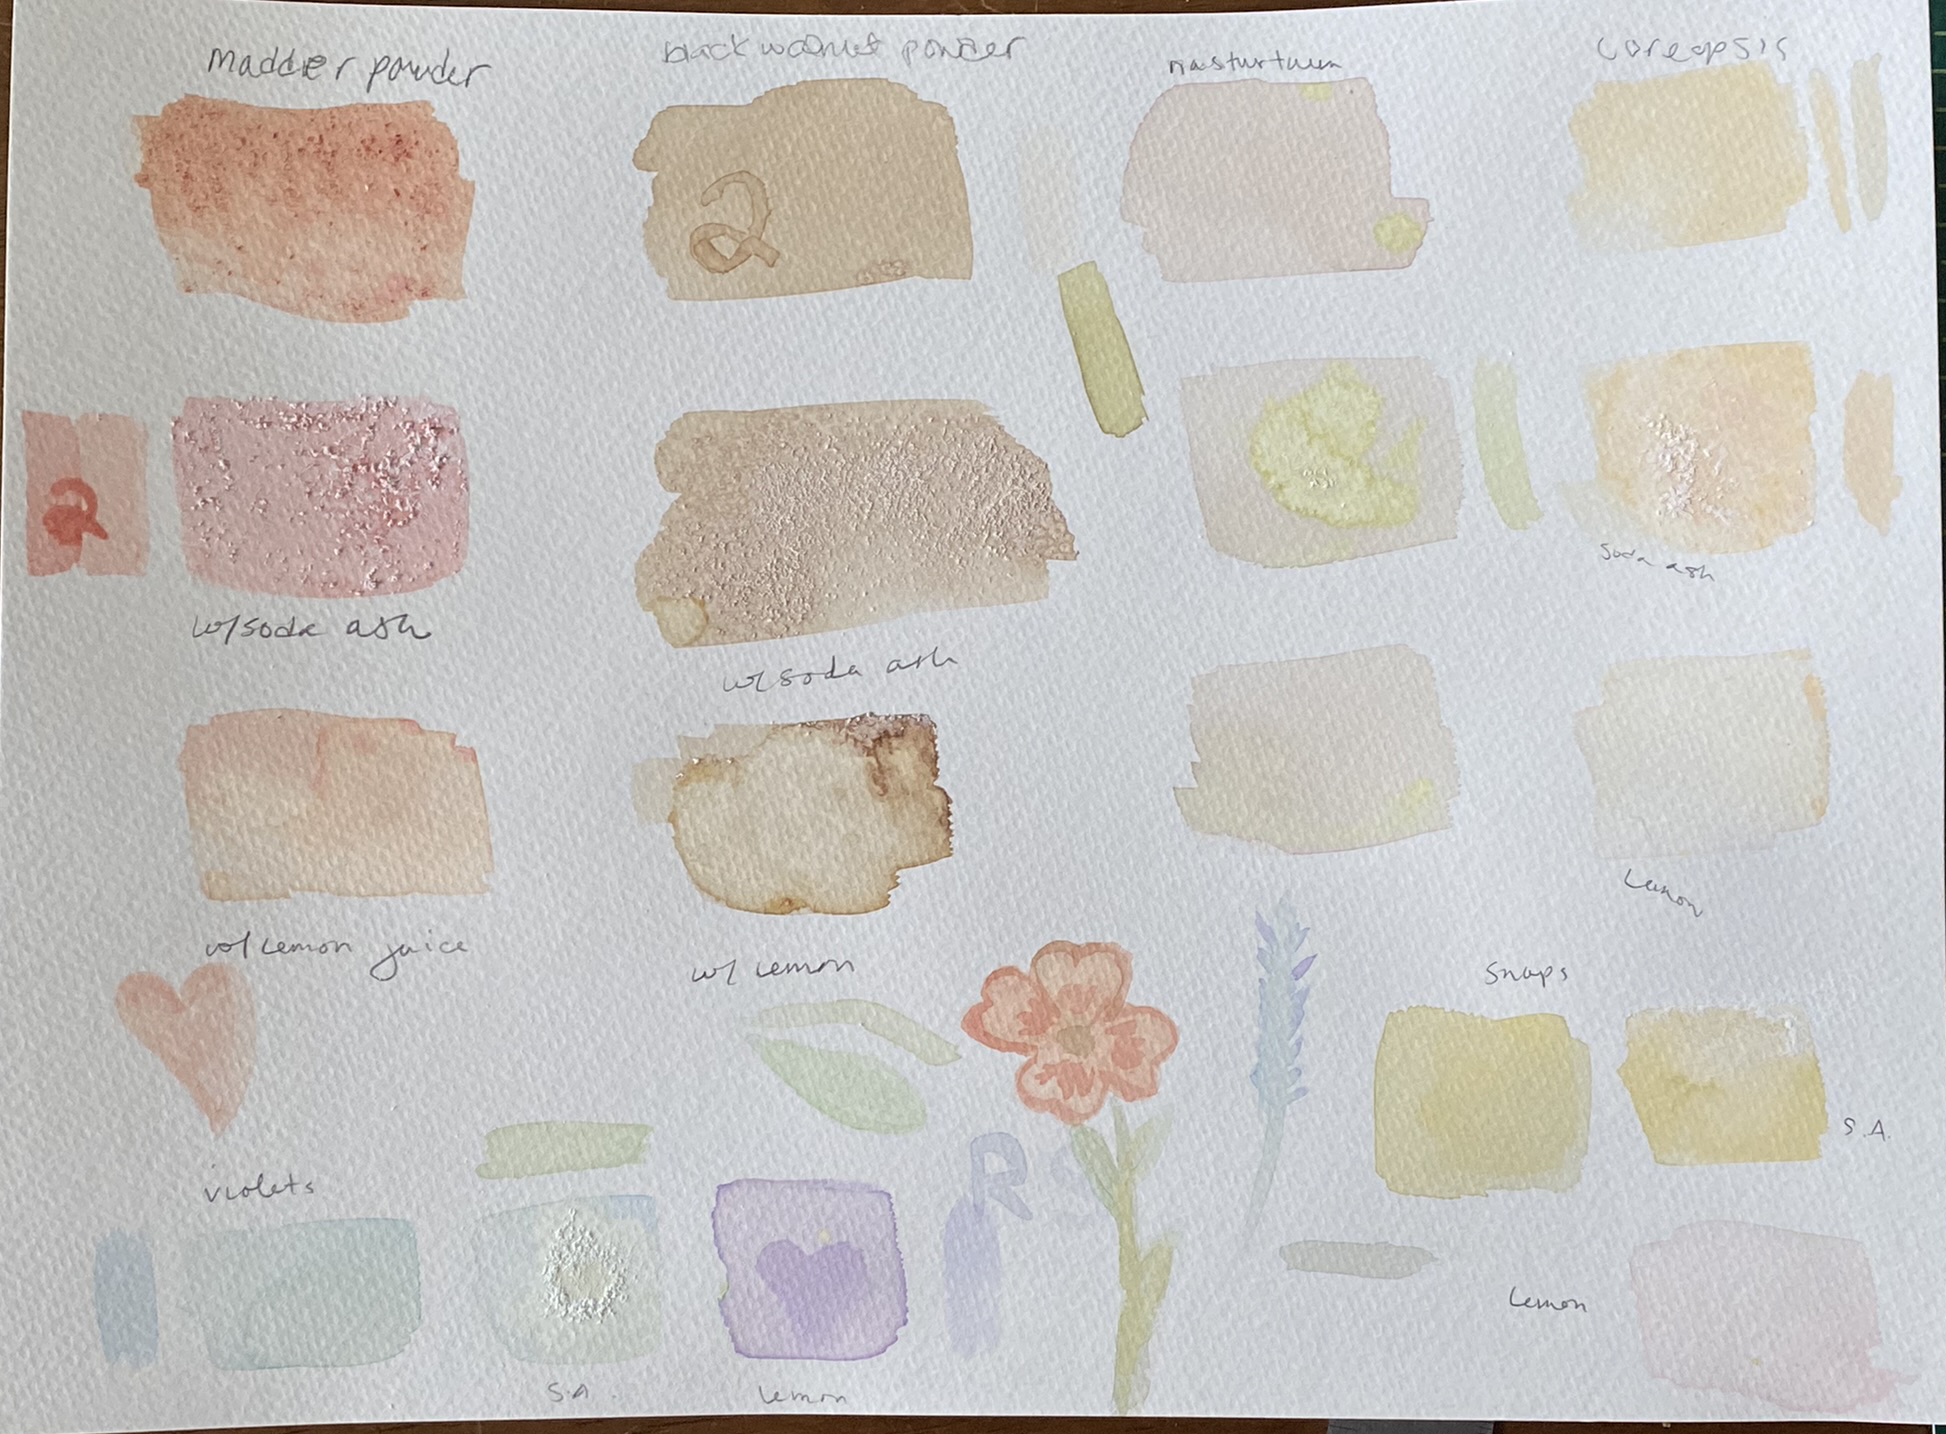
Adding some madder and black walnut hull powders to the mix gave me some reds and browns to play with.
I took each color and painted three swatches, one for the paint as is, one for acid, and one for alkaline. You’ll notice quickly that the color of the paint wont necessarily match the color of the flower. Black pansies really show off how the dry down and use of modifiers can affect your final color result. You may even notice some colors continue to change after a day or so.
Without modification, the pansy produces a deep purple liquid that dries to a blue-green hue, but with lemon juice you’ll get a magenta paint that dries to a purple. Sprinkling some soda ash on the third swatch had a bleaching effect. You can see similar changes with the red snapdragon paint. For these reasons you’ll want to let your swatches dry before tackling a painting unless you’re ok with surprises!
Red snapdragons and “Black King” pansies (marked violet here) show how they change with lemon juice (2nd column) and soda ash (3rd column) modifiers. You can mix modified paints in separate containers or just drip/sprinkle them onto your wet swatch.Use your swatch pages to play with value (light to dark) and layering (letting the paint dry and going back in to detail or darken) the 2’s here show the 2nd layer applied over a dry first layer.
I watched a couple of YouTube tutorials about watercolor basics and lost myself for a couple of hours just doodling and swatching. If you decide to try it, feel free to DM me on Instagram @its_pam_ela and show me how you made out!
If you’re wondering about storing leftover paint, I’ve had mixed results. Some of the lighter pigments didn’t keep in the refrigerator, but the more saturated paint such as that of the black pansy were still useable after 3 days.
Other tips: -Tape down your paper with washi or masking tape so it doesn’t curl. -Do a quick search on YouTube about wet-on-wet versus wet-on-dry, it makes watercolor make a lot more sense! -Go for a watercolor specific, pointed quill brush over flat brushes. They hold water and make beautiful strokes. -Don’t stop at flowers! Leaves, berries*, oak hulls, spices like tumeric and saffron all produce pigment you can paint with!
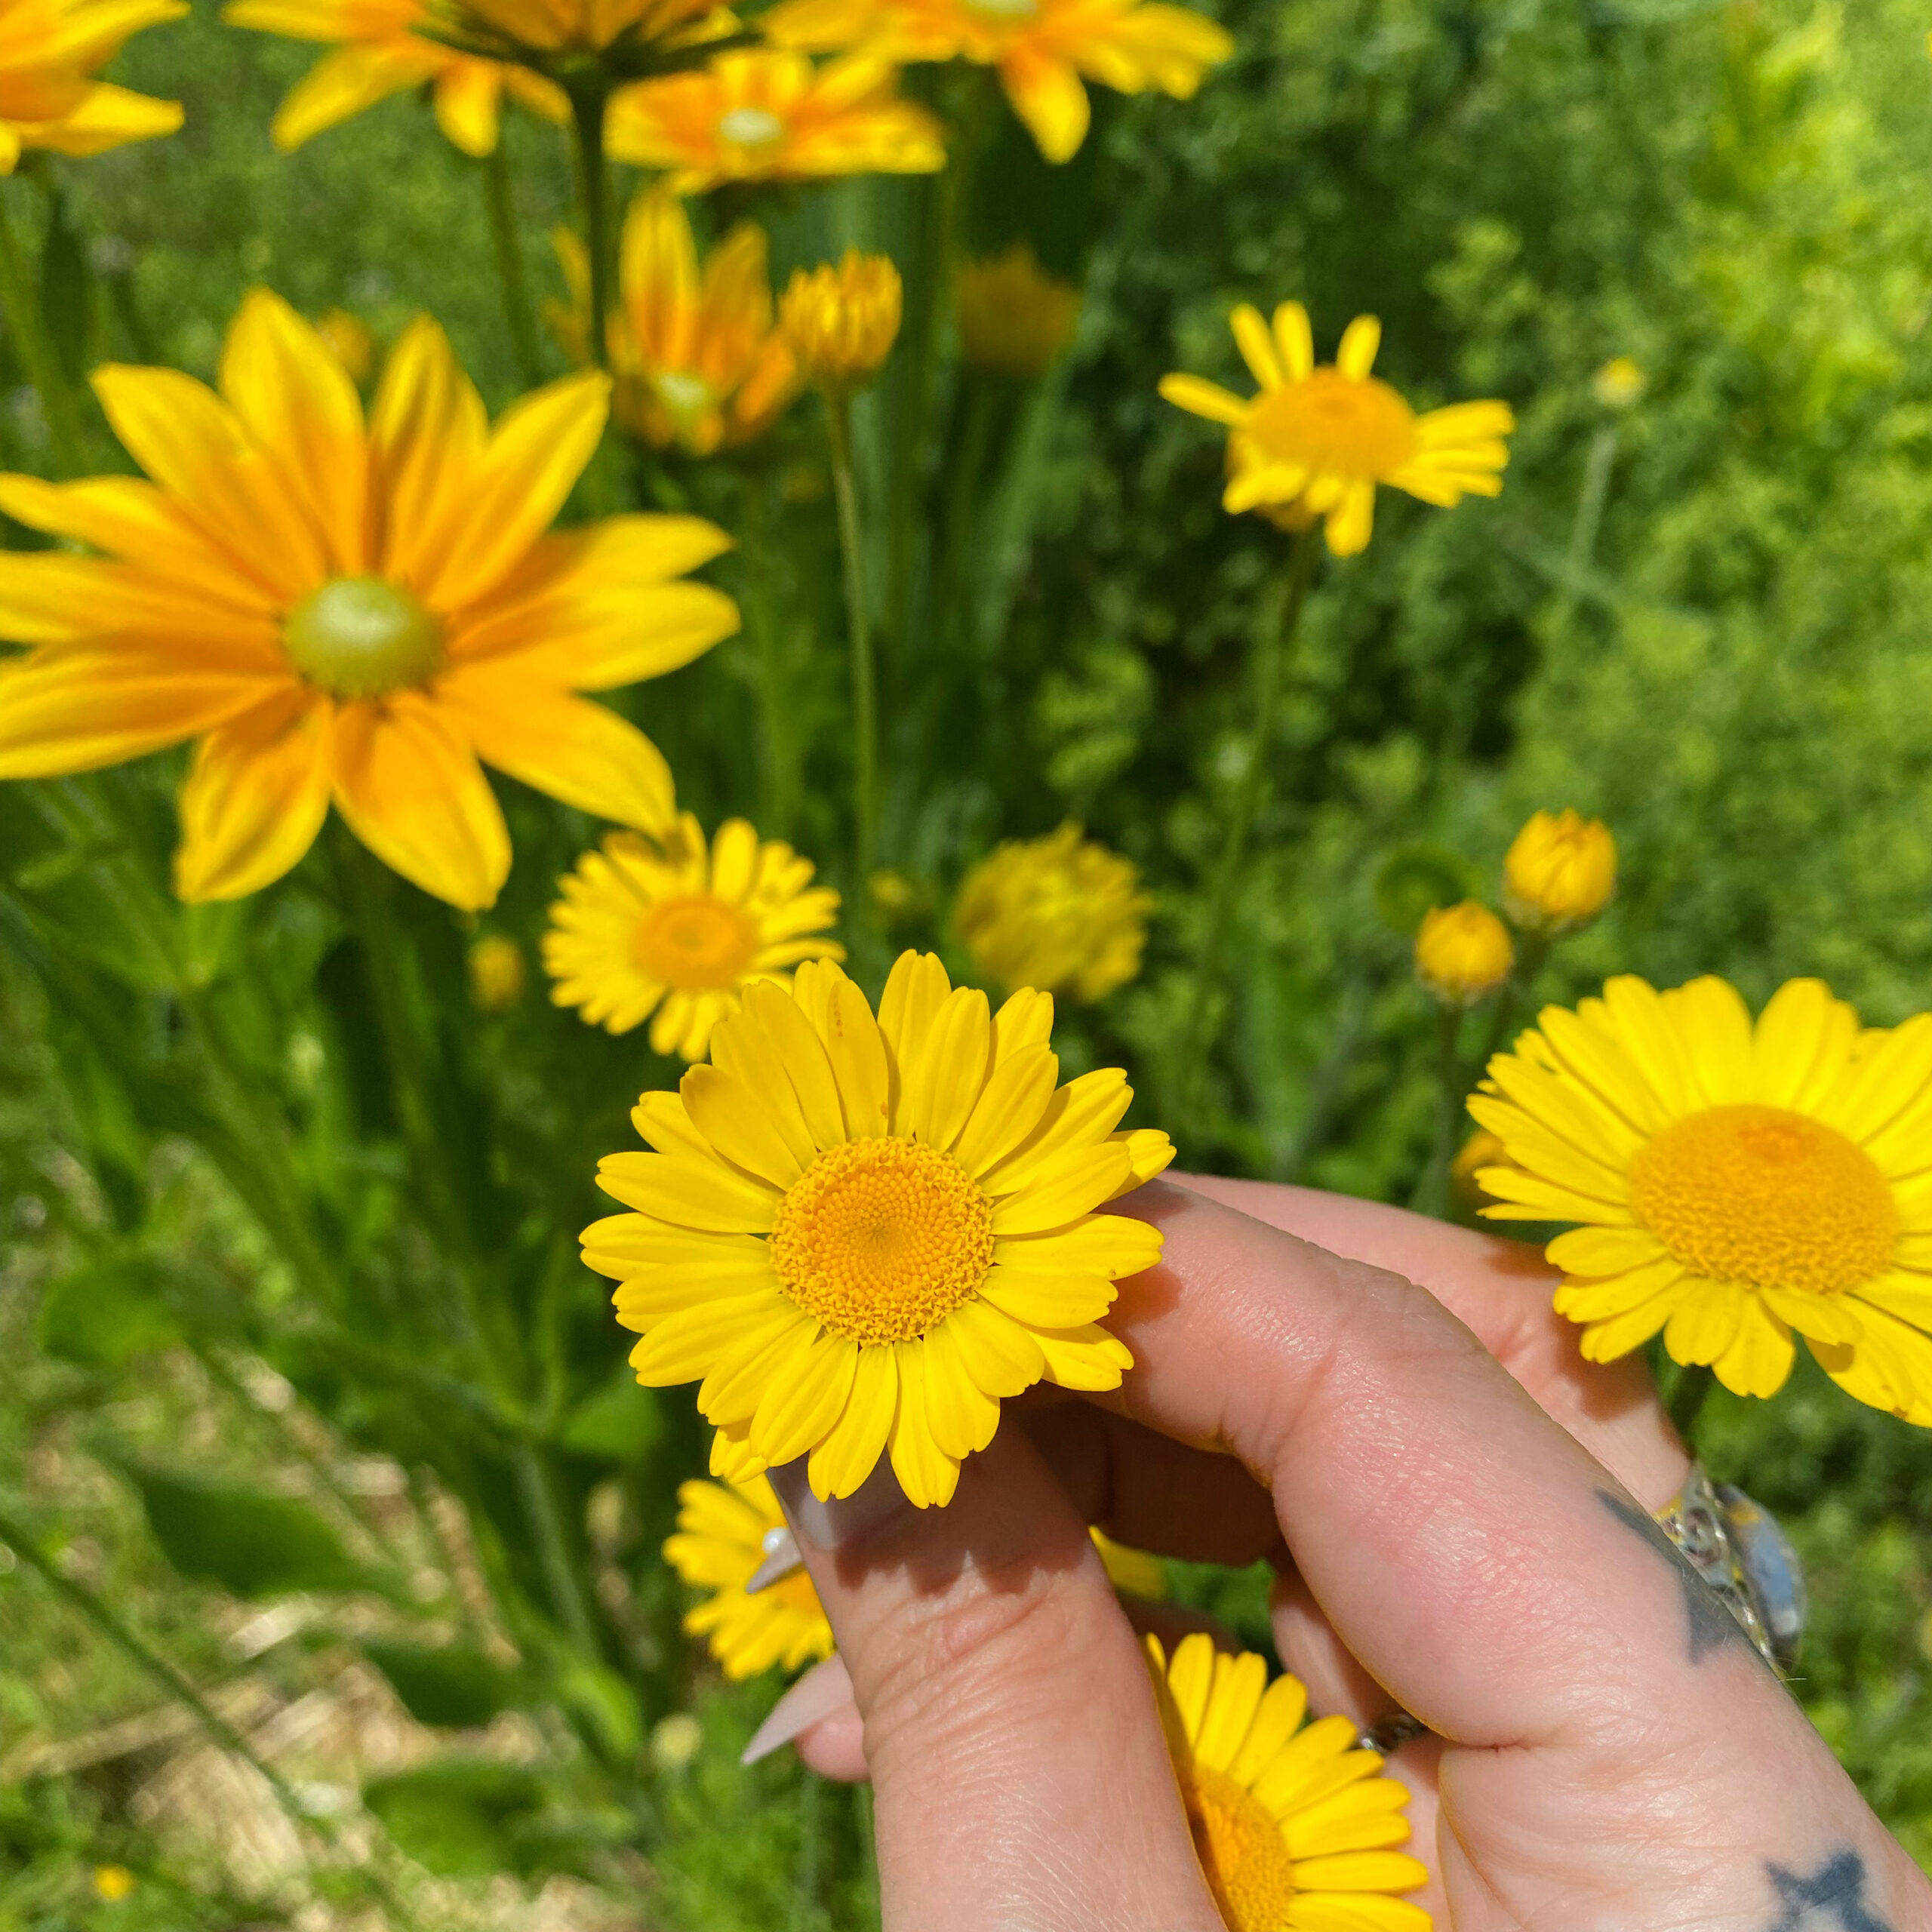
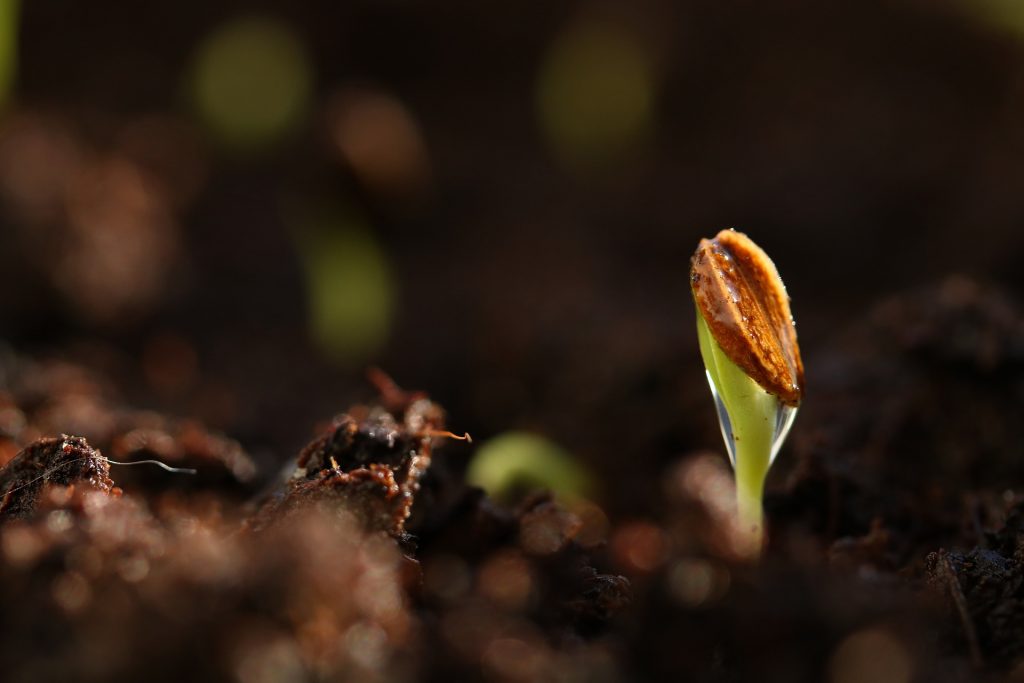
I often hear people bemoan the musky scent of marigolds.
Sometimes when I’m plucking a basketful of their dense, cheerful blooms I can almost understand. Every breath I take feels thick with their earthy perfume and I can feel every particle of pollen adhering to my nasal passages like iron filings to a magnet.
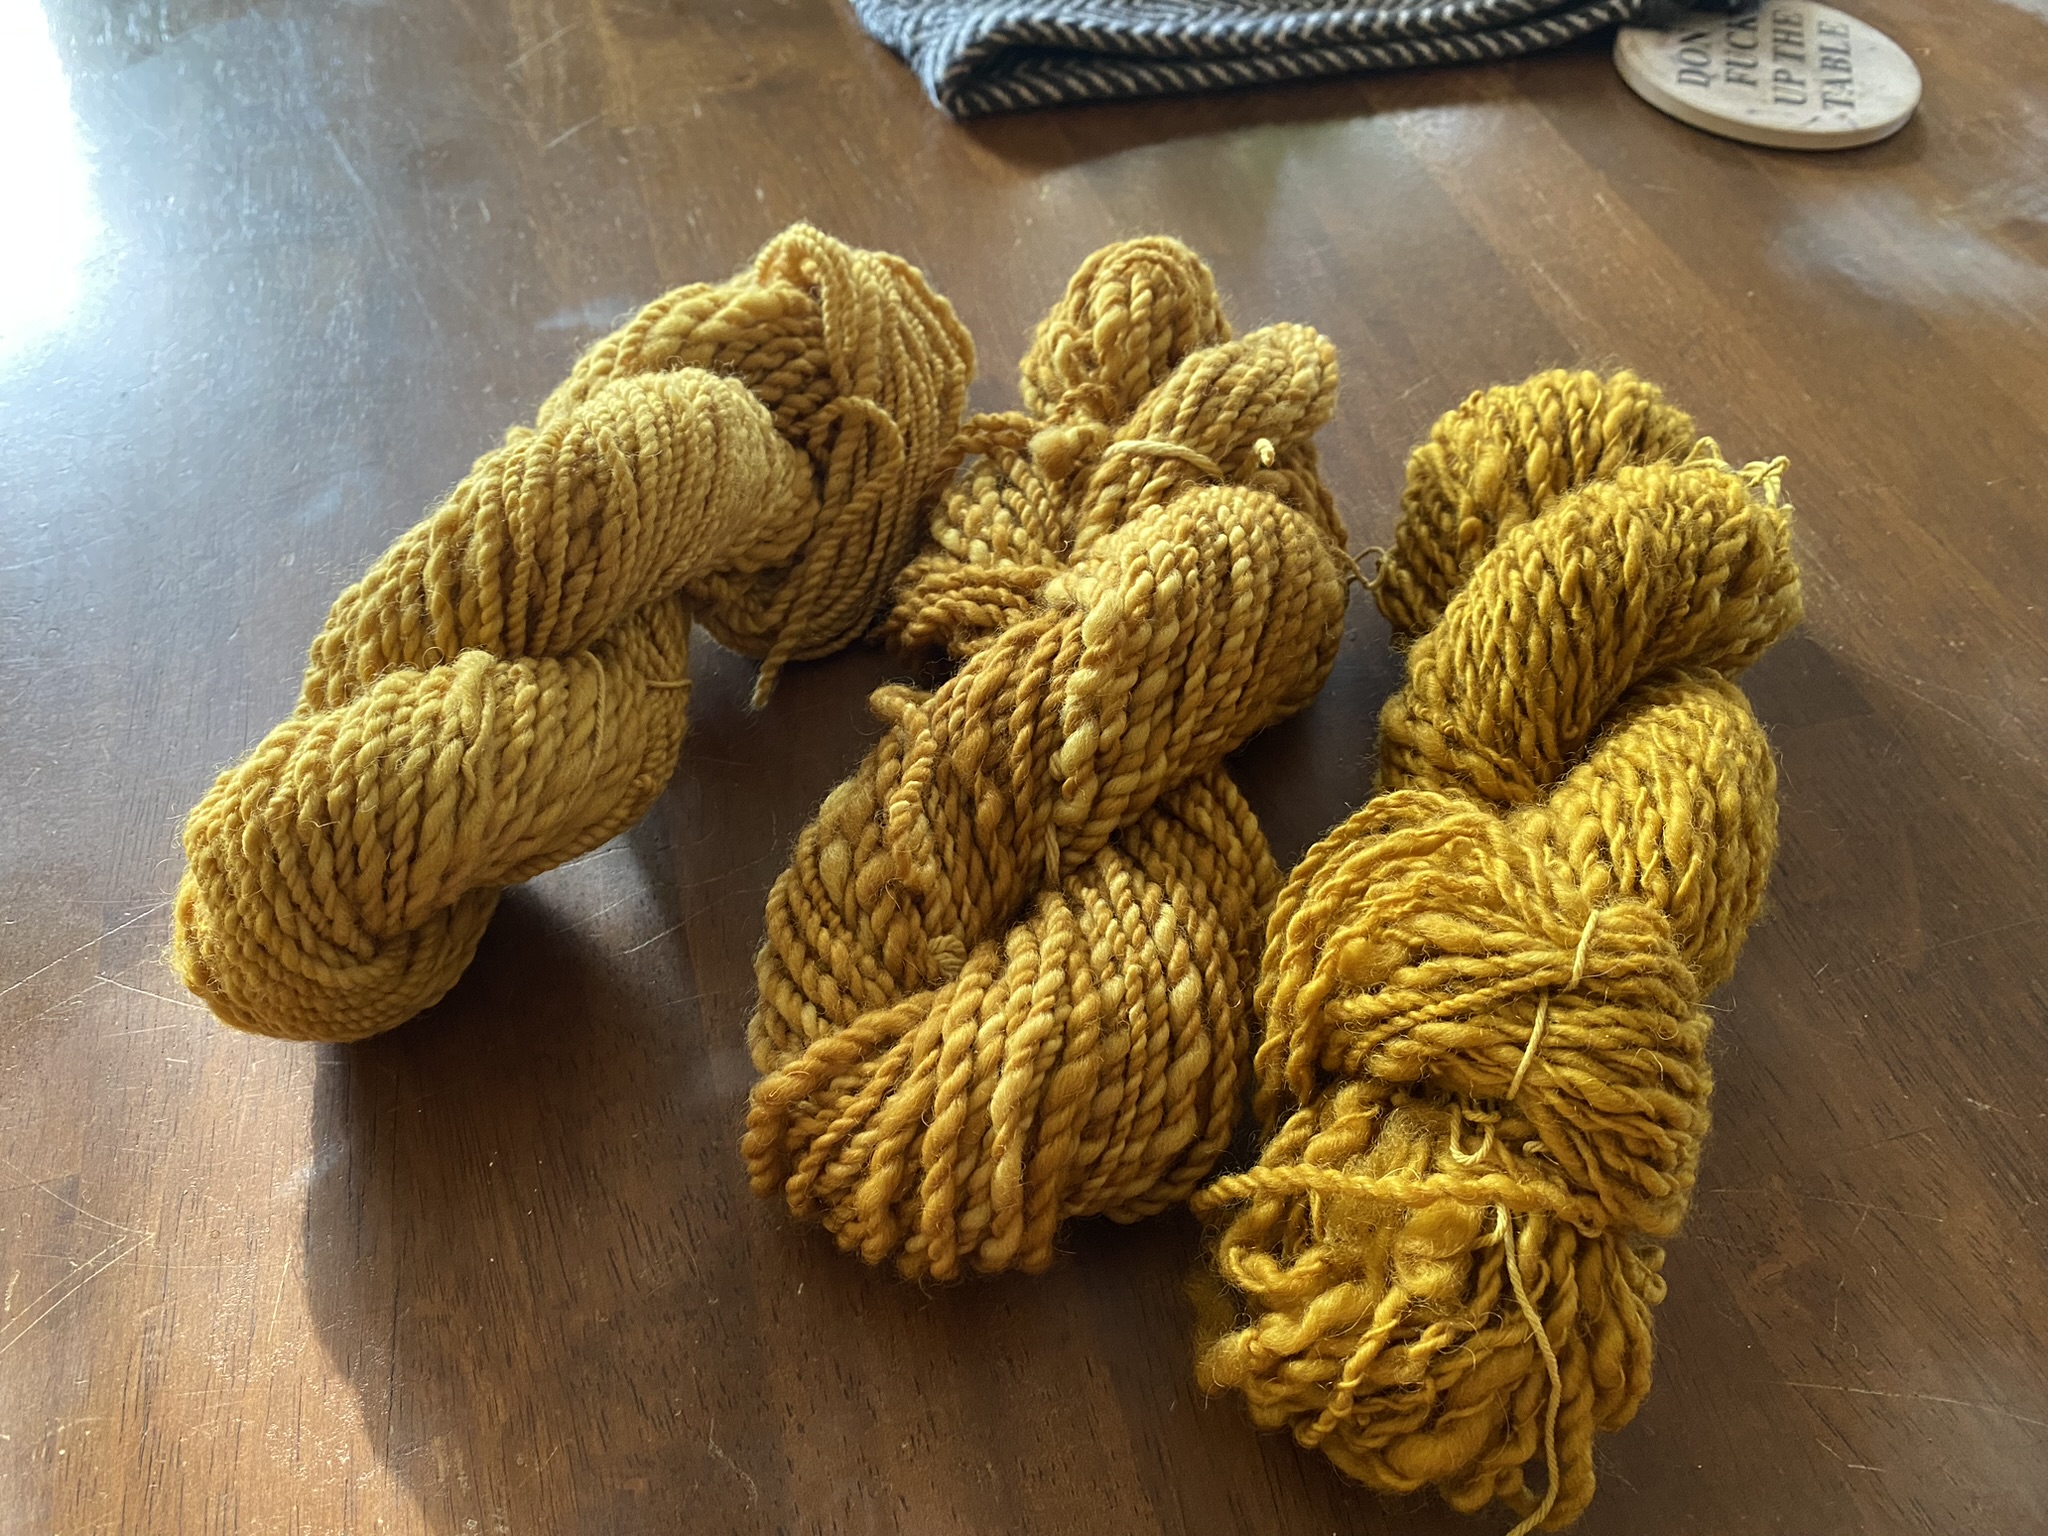
I can’t join the marigold haters club however, because not only have marigolds adorned many of my warm memories of youth, they’re the first flower that I ever used to learn how to naturally dye wool.
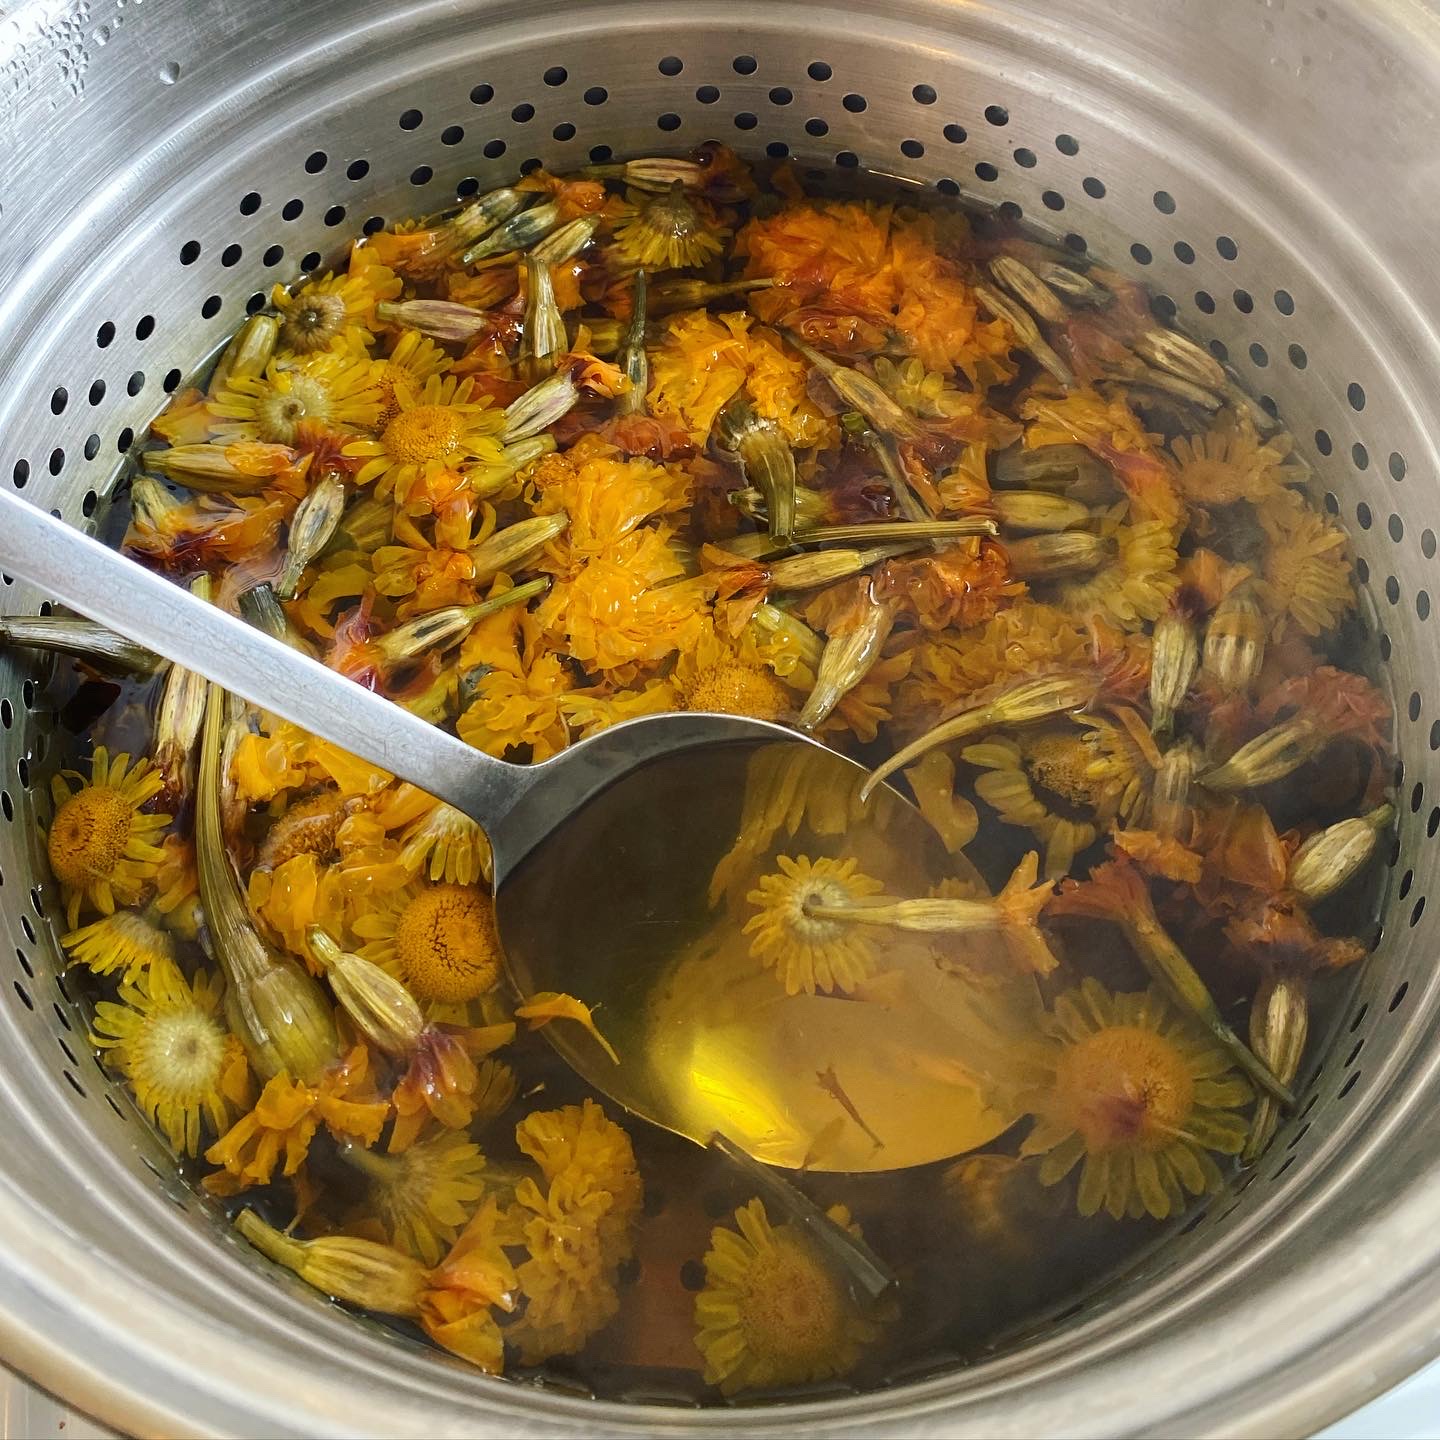
Feeling deliciously witchy on a hot summer afternoon, I brewed that first vat of dyestuff from a basket of bedraggled blossoms. As I lowered a hank of handspun wool into the amber-colored water, the world of gardening opened up again, revealing another layer of this connection to plants that I have felt since I was a child.
With every skill I learn, every book I read, and every new plant I meet, the excitement renews. I’m a kid again, squatting in front of my mother’s marigolds without a care in the world.
I will never get tired of this, I think.
How to Prepare and Dye Wool with Marigolds
To dye wool with marigolds (or coreopsis, or dyer’s chamomile- which I often blended together) you’ll need at least a pint of blooms. You can pluck them as they’re passing their prime and either steep them into dye immediately or freeze them for later. I even had good results after leaving that first basket of flowers to languish on the porch for a day before steeping them.
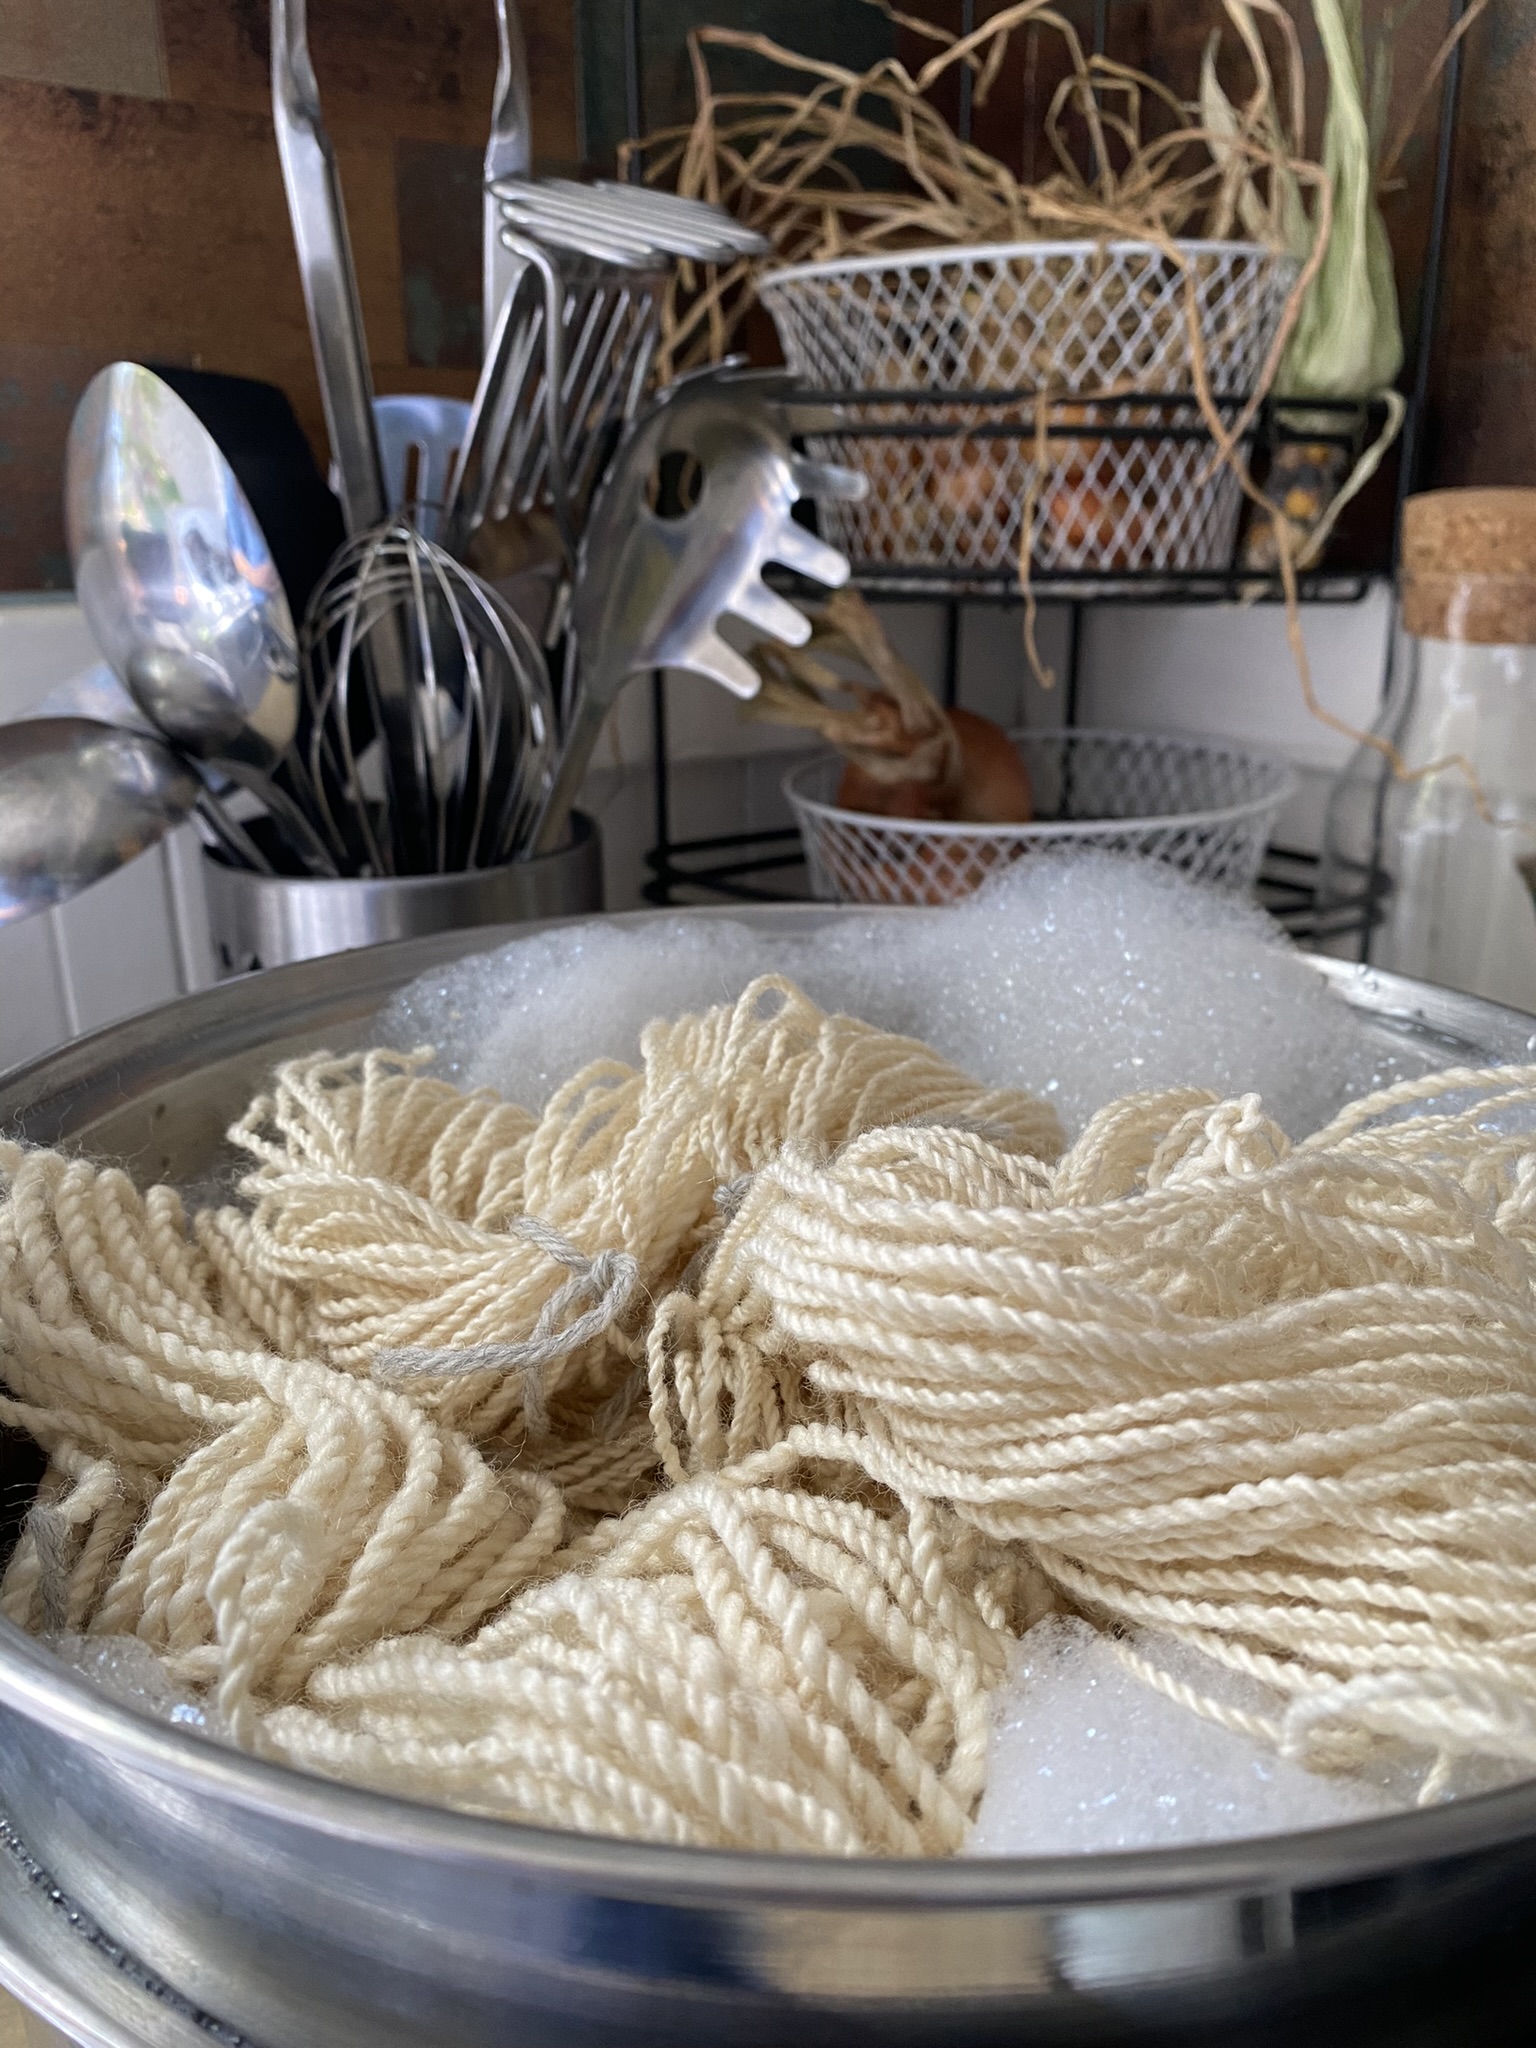
Before the mordanting, washing wool with wool wash is a good idea to strip any remaining “grease” (lanolin) that could prevent the dye from adhering to the fiber. I used a few drops of dish soap here, but it’s better to use a soap made for wool like Unicorn Power Scour.
Wool (as well as silk) are readied for dye in a process called mordanting. The word mordant comes from the Latin word “modere” which means “to bite”. Essentially you’re using a mordant to rough up the fibers and give them some “bite” to grab onto the pigment. An easy mordant to start with is alum combined with cream of tartar.
Silk uses the same mordant, but in smaller amounts. Cotton can be dyed without mordant, but is usually pre washed with washing soda to prepare the fibers to take up pigment better.
From there, the mordanted wool can either be rinsed and dried for later dyeing or put straight into a prepared dye bath where it’s heated to a simmer and then left to cool in the pot. It’s important to never stir or rapidly warm/cool wool during these processes, as it is prone to felting. Drop it in the pot, then leave it be!
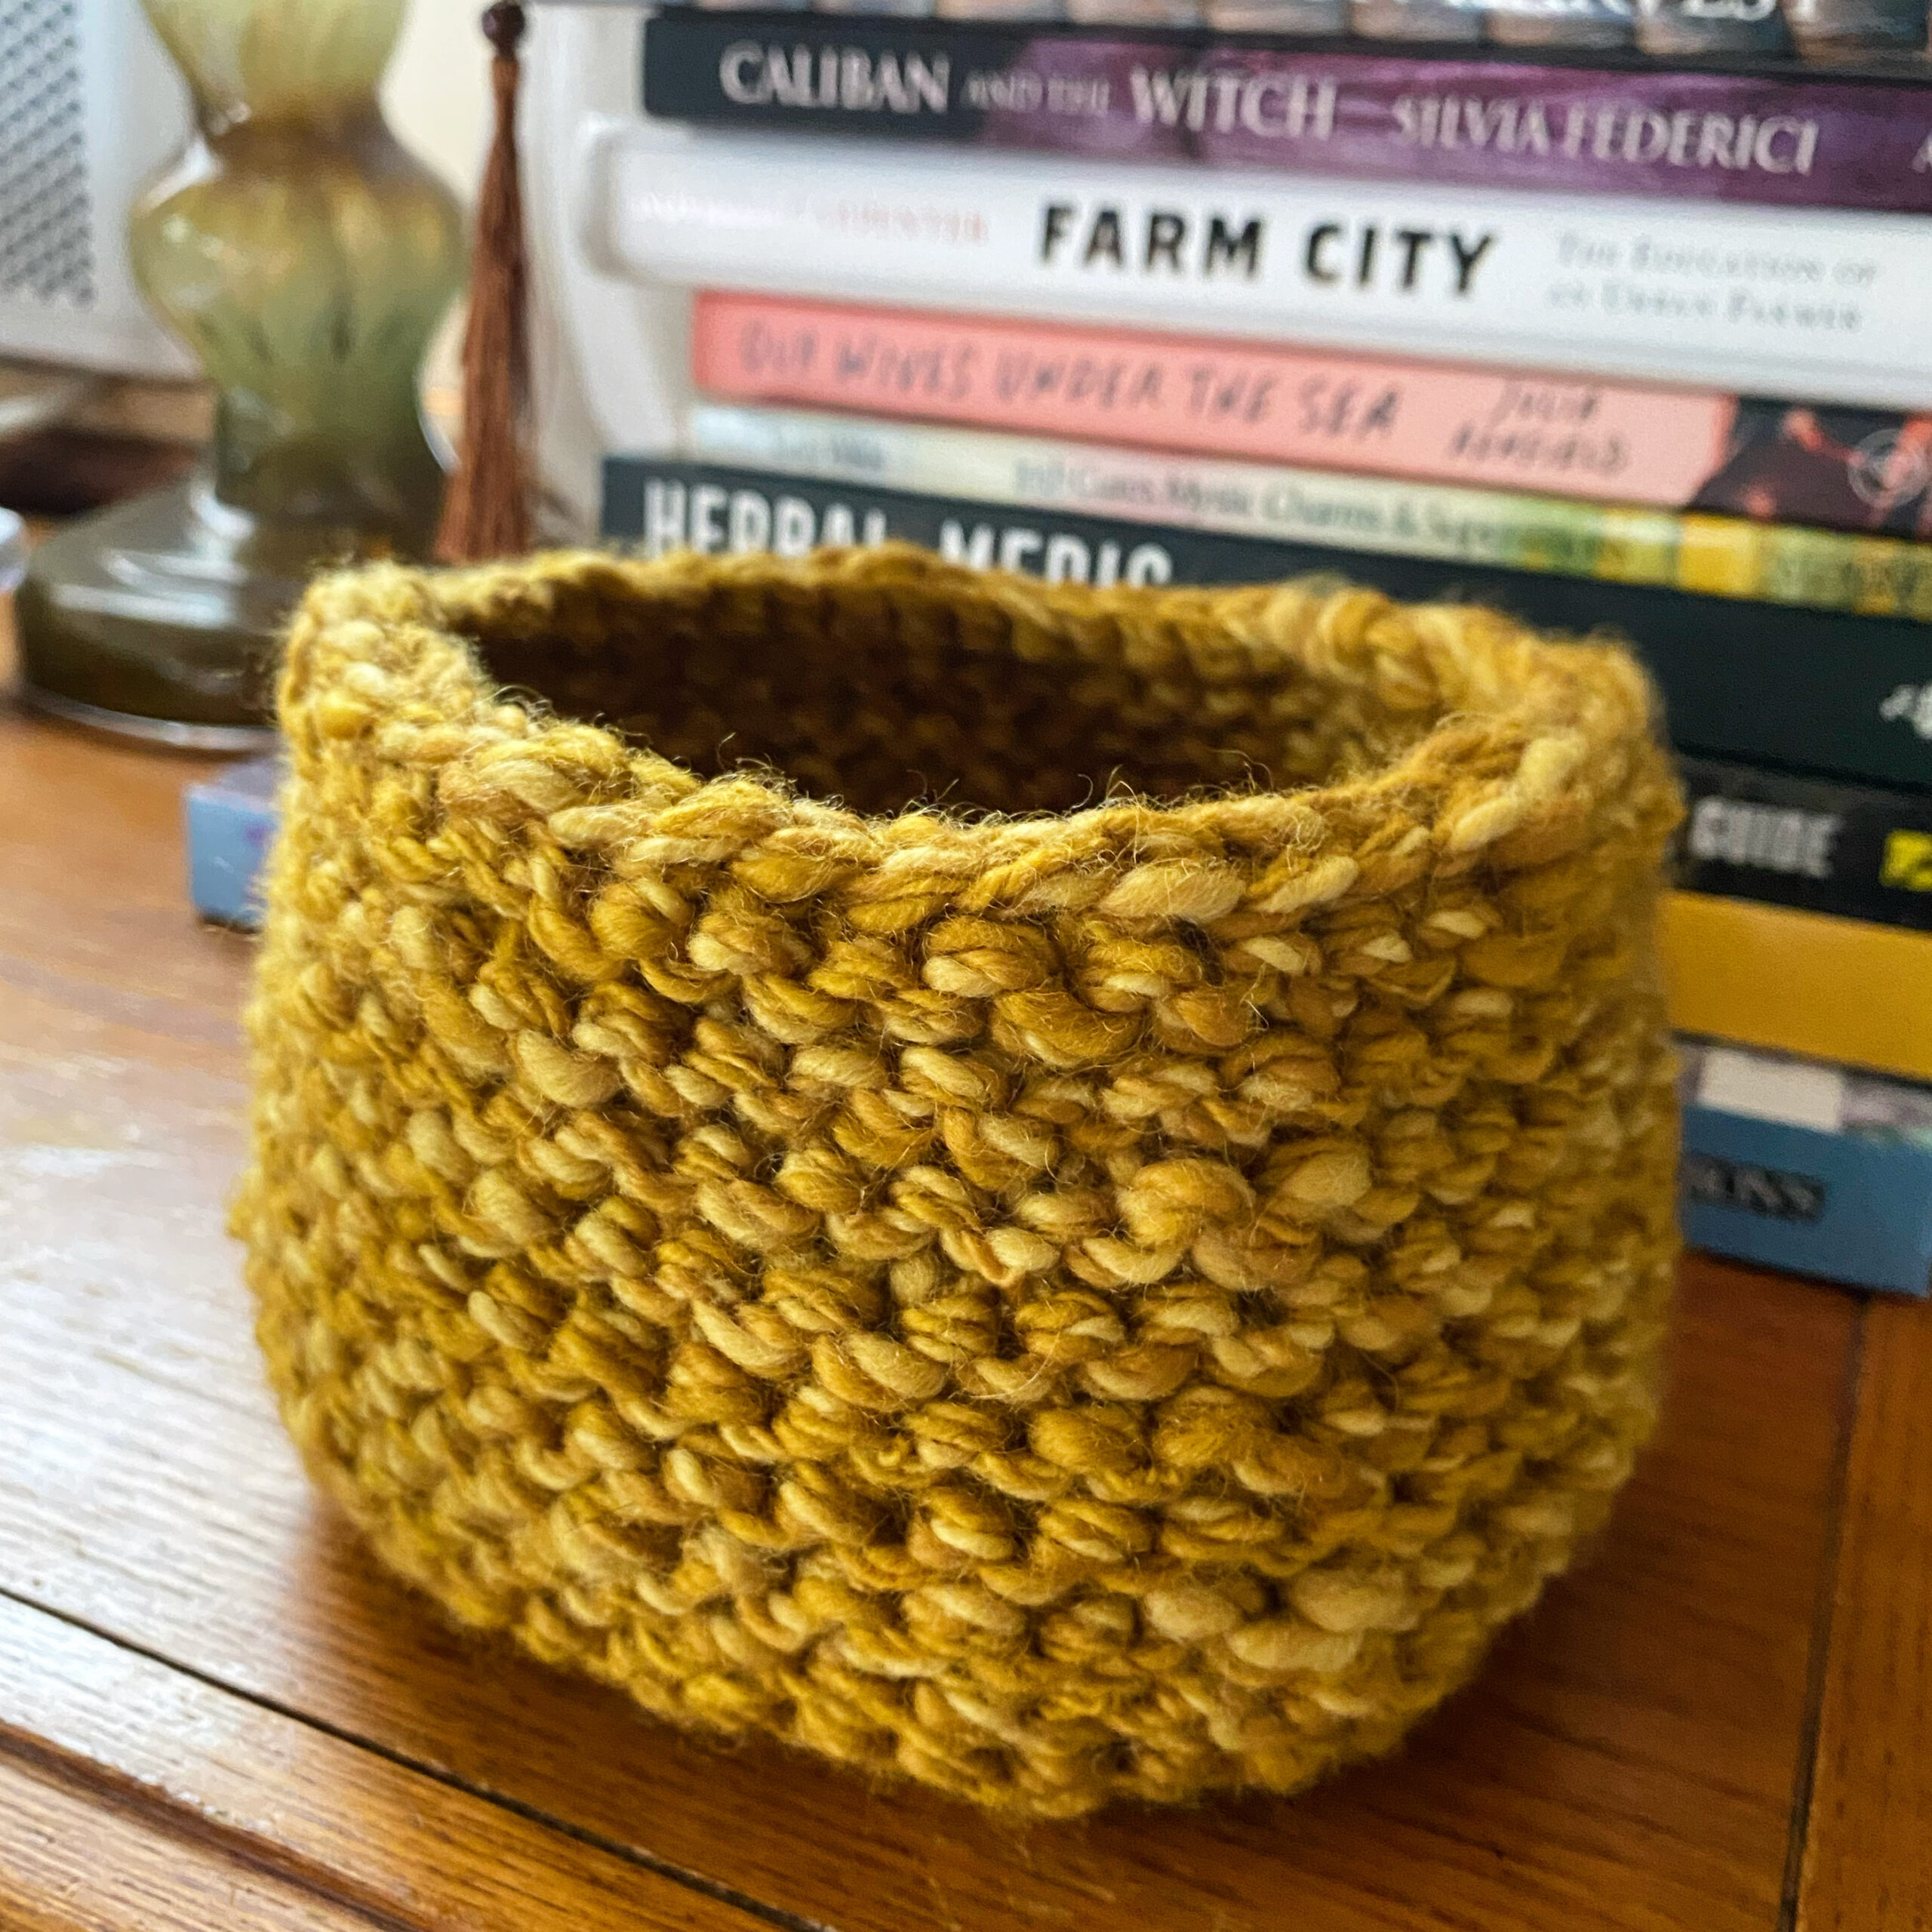
My first three attempts at both hand spinning and dyeing wool
Making dye baths would become a weekly activity after that first pot, and I quickly dyed my way through all of my shoddily spun hanks of yarn, working from the worst to my more skilled attempts. By the end of fall, my cheerful marigolds had mildewed and my freezer was stuffed with frozen blooms for a future midwinter dye pot. I made a knitted basket out of that first hank which I still beam at every day. If you’re not a spinner, you can buy undyed yarn very affordably here.
Growing a Dyer’s Garden at Home
This year’s dye garden will be more robust with options and I have been accumulating supplies to try other methods of using flower and plant pigments. Here’s a list of seeds I intend to plant for the 2024 season:
Marigold
Dyer’s Coreopsis
Tango Cosmos
Dahlia
Zinnia
Greenthread
Blue Butterfly Pea
Black Knight Scabiosa
Hollyhock (biennial)
Hopi Black Dye Sunflower
Purple basil (great for flower pounding)
Indigo
Japanese Indigo
Madder
Woad
Dyer’s Chamomile functions like marigolds and has the added ease of being a perennial plant in my zone 6/7 garden.
My favorite seed company for easy dye plant shopping and information is Grand Prismatic Seeds, but you can find many of these seeds elsewhere if they’re out of stock.
(This post contains some affiliate links for your convenience, these provide me with a small commission if you choose to purchase through them at no additional cost to you.)
In all the years I’ve been gardening (and the many years I spent researching before I had the soil to plant in), I’ve noticed a sort of “pipeline” with gardeners. The start with the idea of a home-grown salad, often planting only food crops and rarely giving much thought to companion planting, pollinators, or soil ph. But, if one follows this theoretical pipeline, it doesn’t stop there.
Usually the next stop on the dizzying, slippery slope of falling in love with growing plants, is flowers. Maybe you get a pack of zinnia while you’re out selecting lettuce, maybe you read about the many, MANY benefits of planting for pollinators while growing food. Maybe from there you stumble into the vast wealth of discoveries in the world of native plants. Maybe, like me, you continue to tumble further and further into herbal teas, pressed flowers, floristry, natural plant dyeing, and macro photography.
Here are the ways I’m taking it further this year, growing not just food but materials to make art, clothing, and a better environments for the local birds and insects.
Canning, Freezing, and Storing:
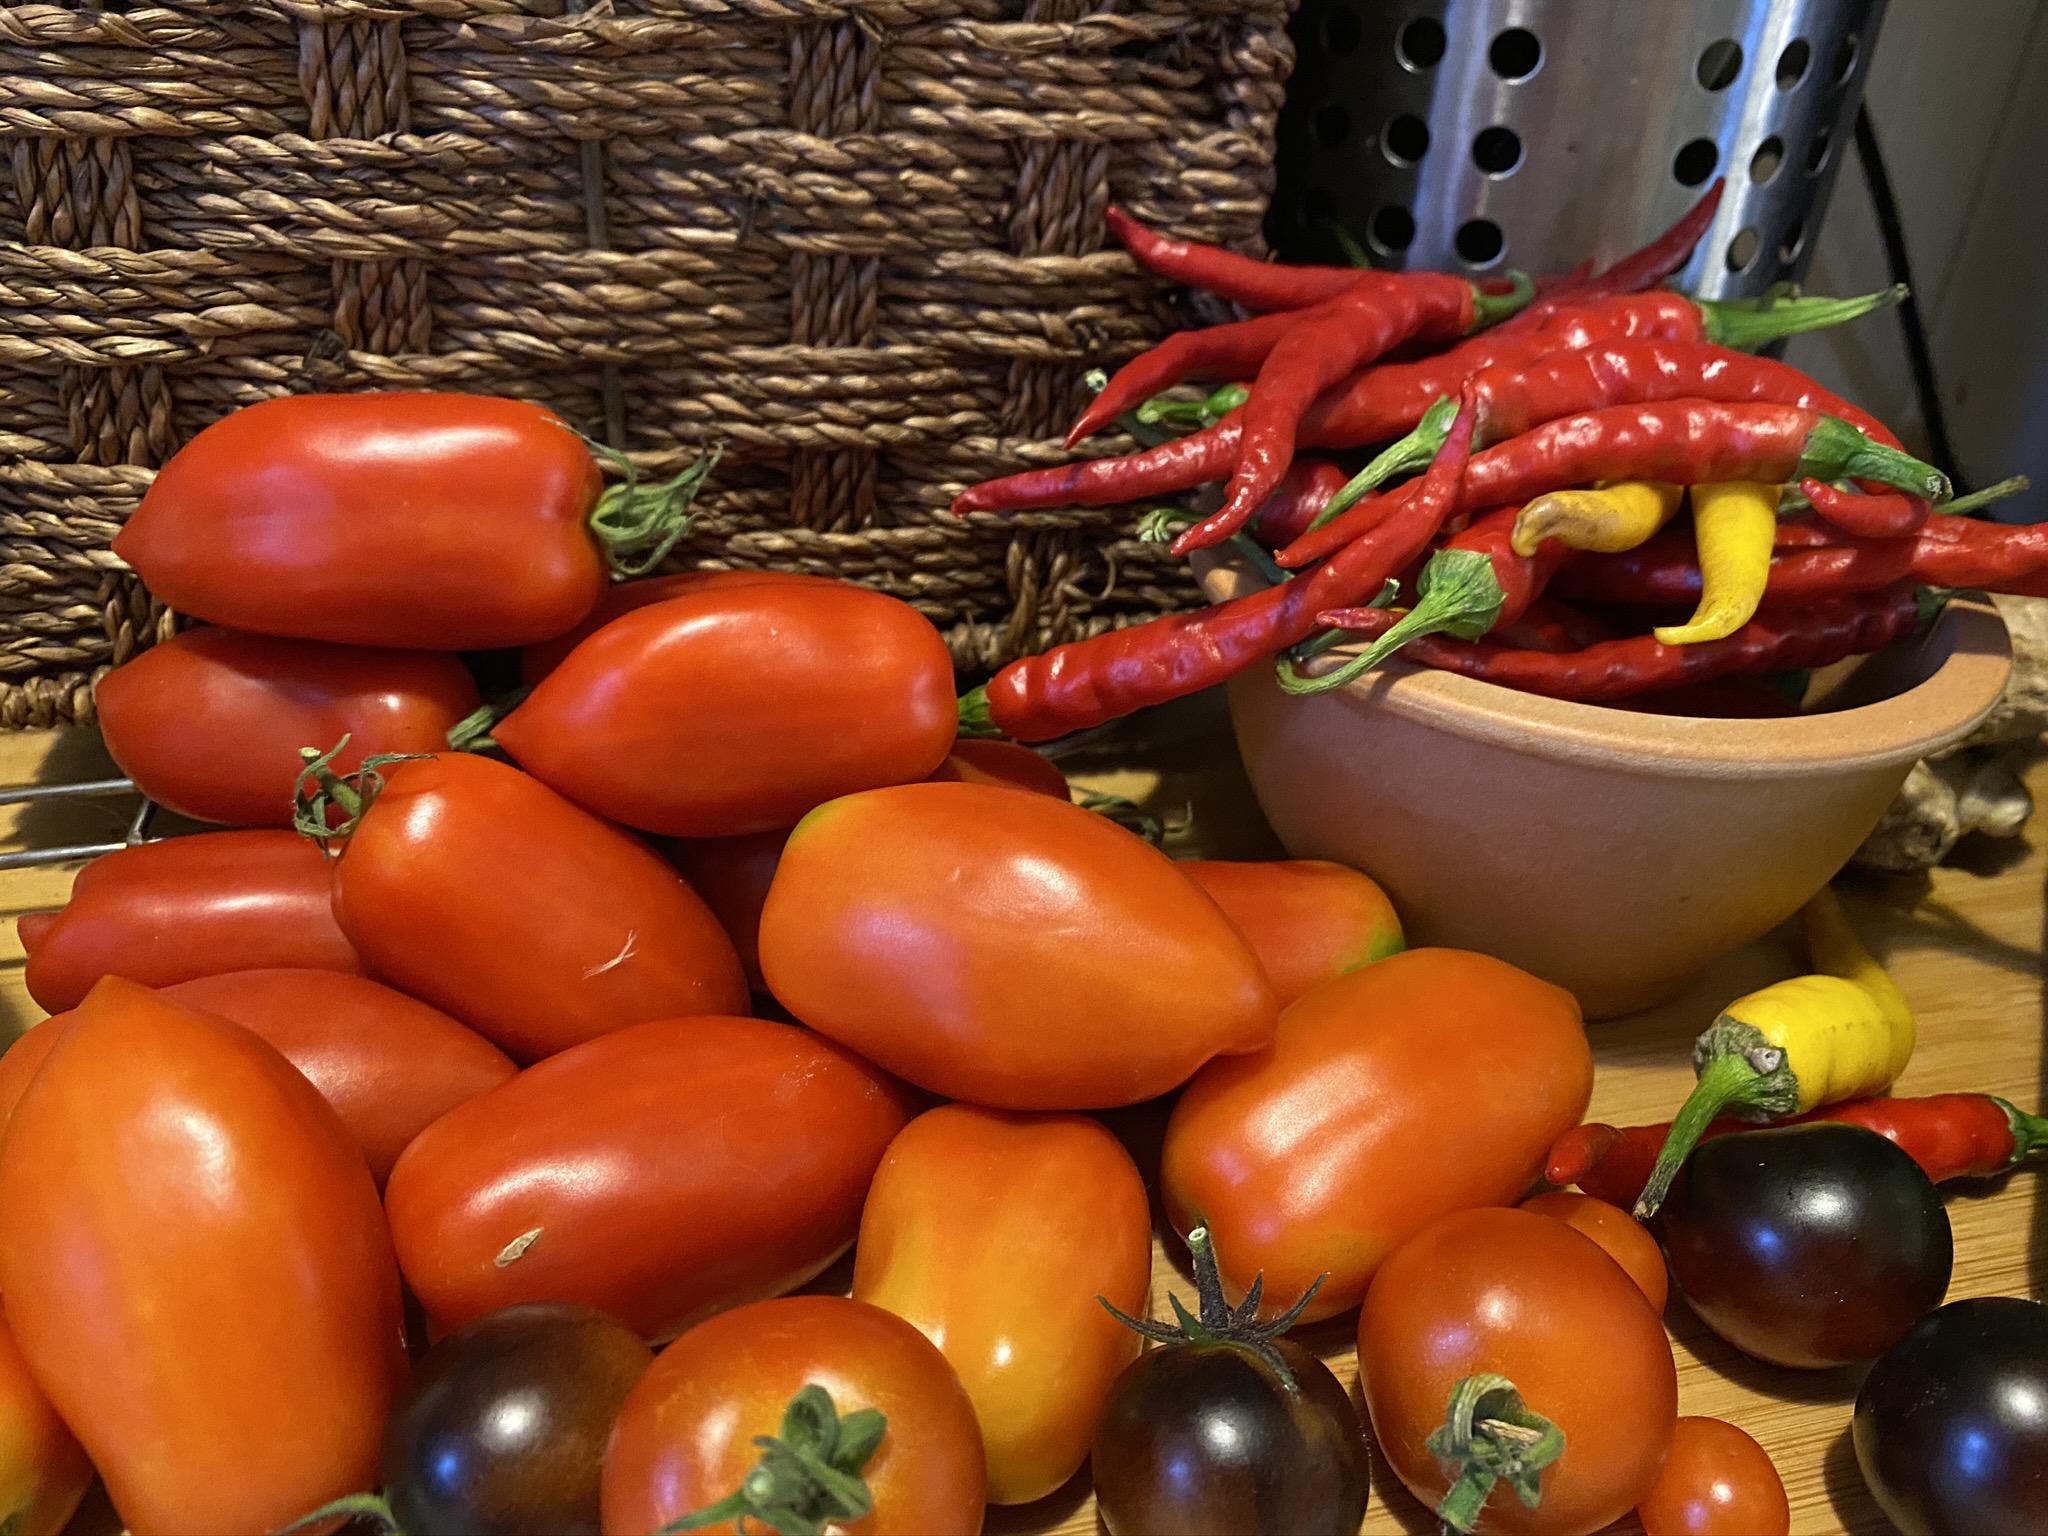
With grocery store prices skyrocketing, and supply-chain crises becoming the norm, the old joke about spending $100 to grow a few dollars in produce is losing its potency. Sure, if you’re installing a brand-new garden, or perhaps watering a sun-parched patch of salad garden in the Arizona heat, your cost of production might still be vastly higher than the output. But in my New England garden, I’ve figure out how to pull baskets of produce throughout the growing season that total up to a net savings when I grow through three seasons and can, dry, freeze, and store the bumper crops.
Dried & Pressed Flowers:
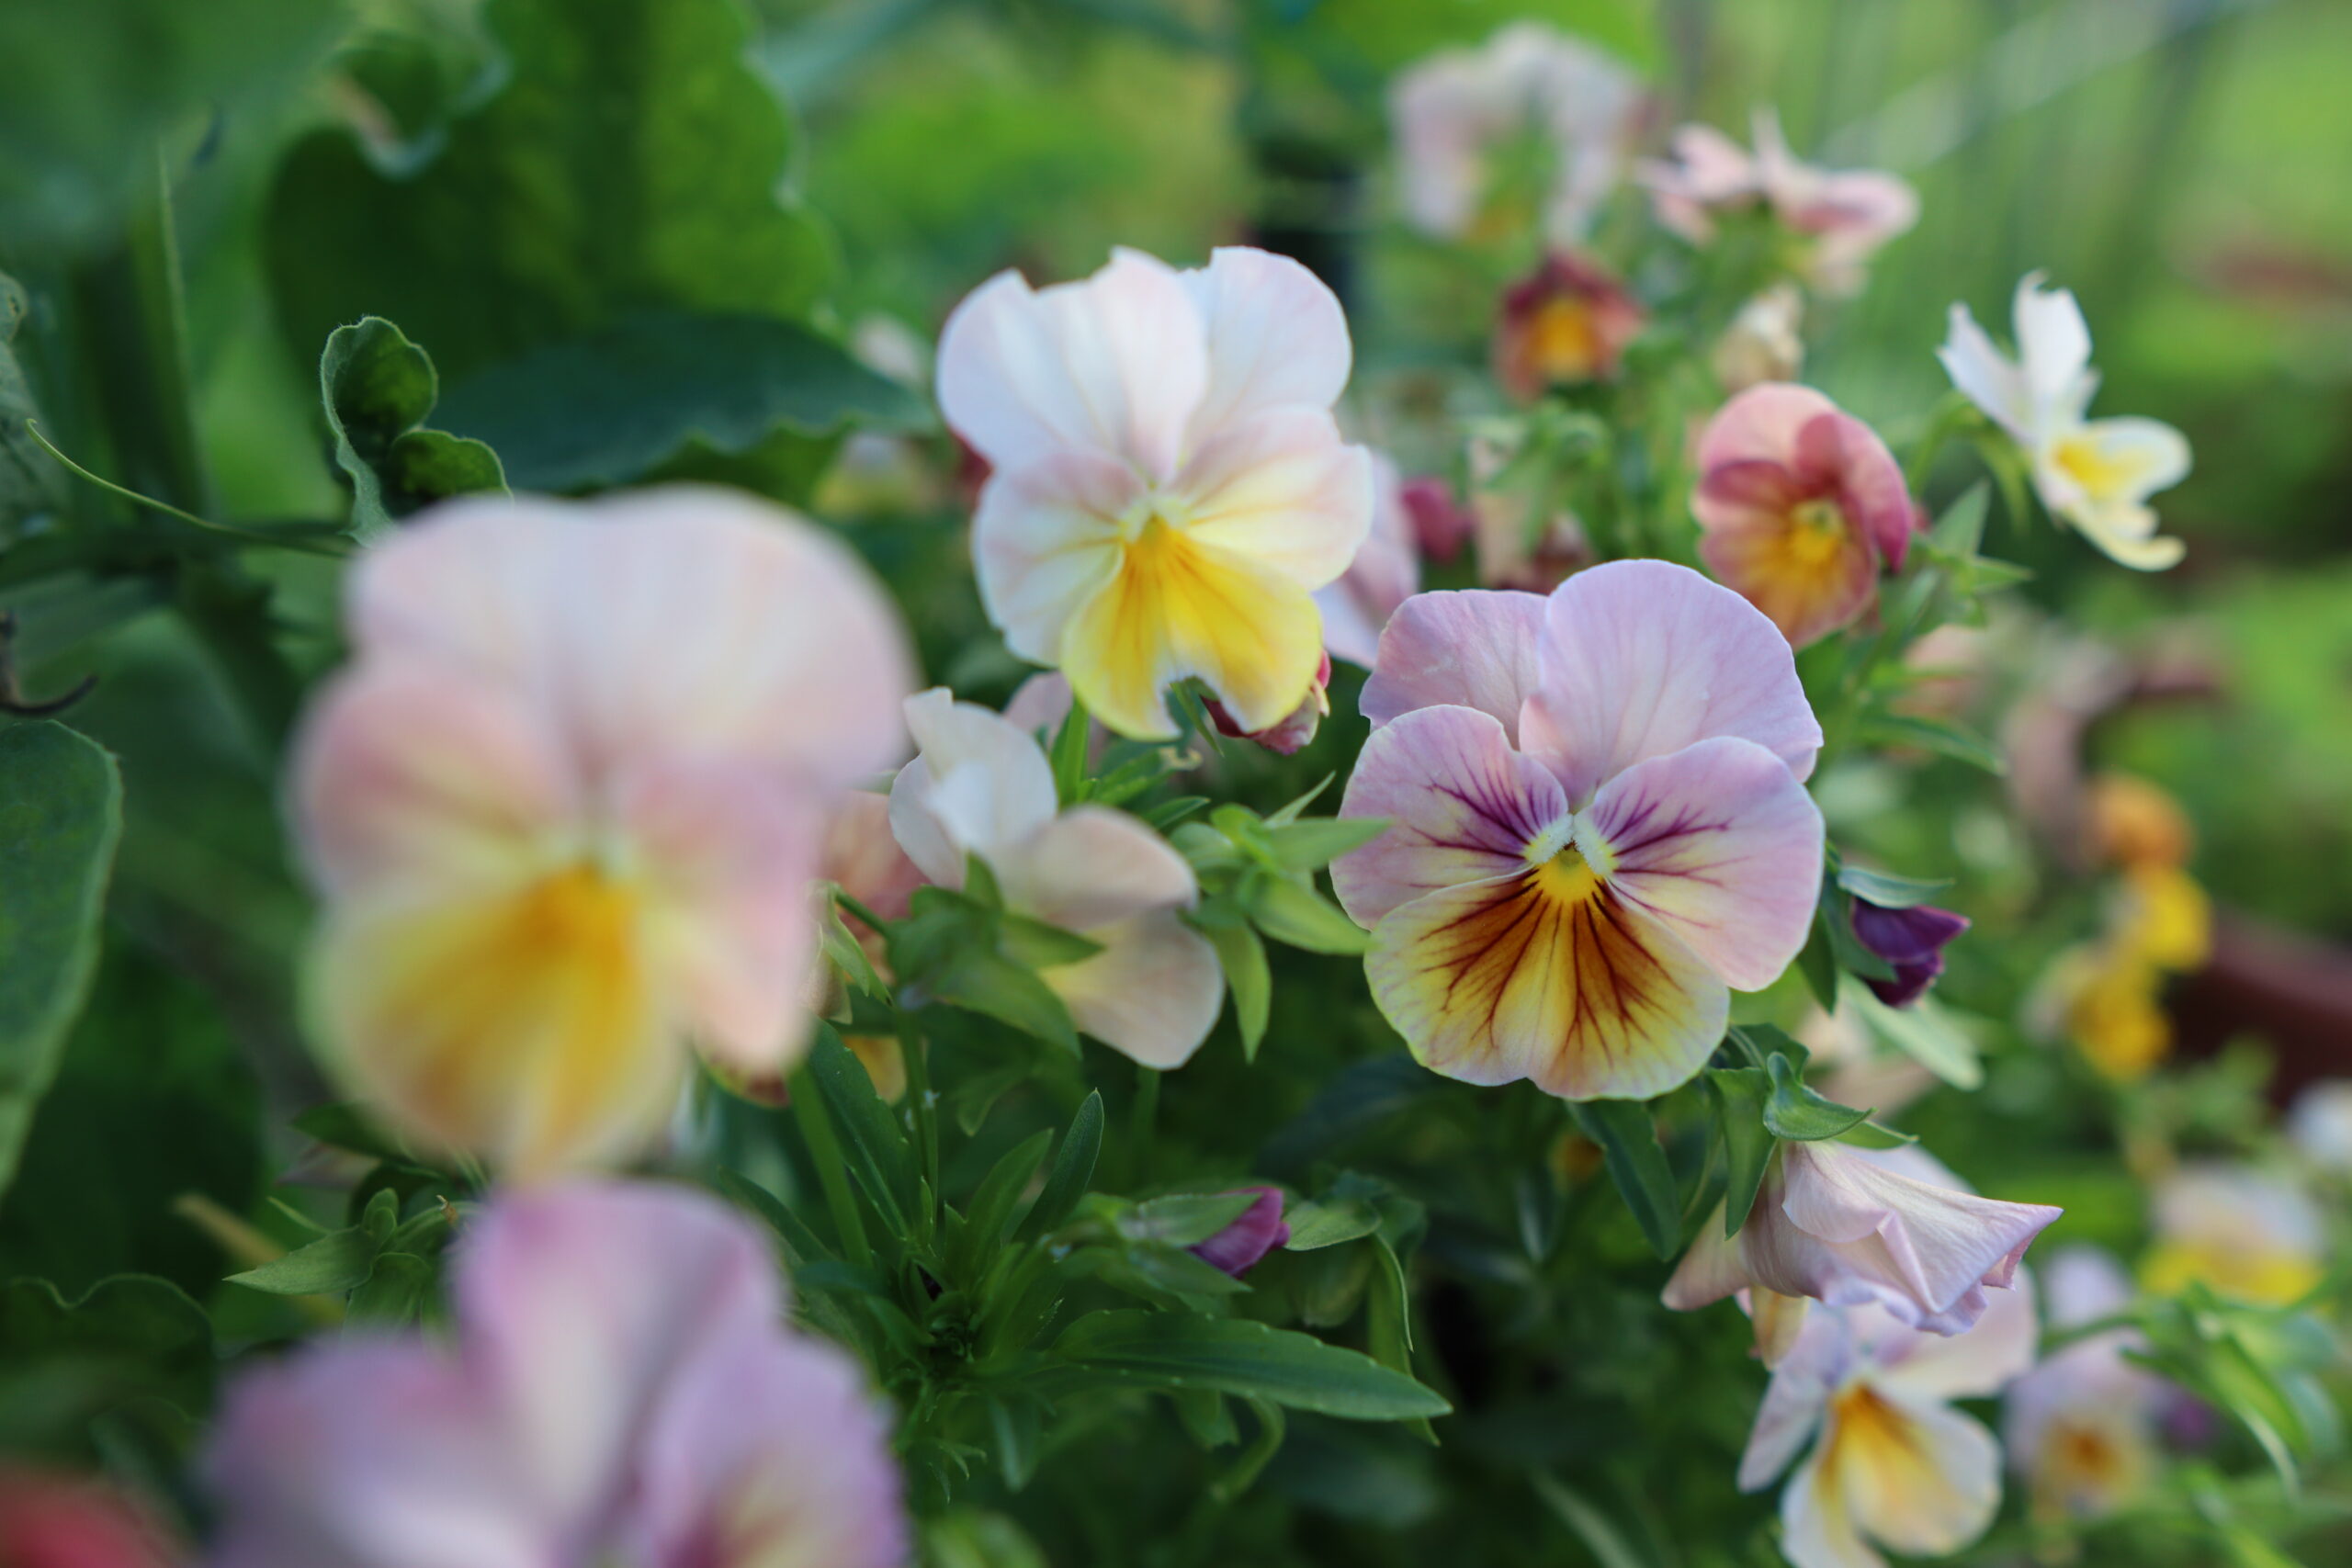
One of the most enchanting new passions gardening introduced me to is the artistry of floral arranging and preserving. I got started by pressing some spring violets and pansies in a small flower press from Amazon two seasons ago. Arranging them into a delicate glass frame brought me so much joy that I promised to increase my attention to drying flowers every year in order to build up material to work with throughout the bitter days of New England winter. My head is already spinning with the possibilities of framed art, resin work, and dried arrangements to keep and share.
Beneficial Insects & Wildlife:
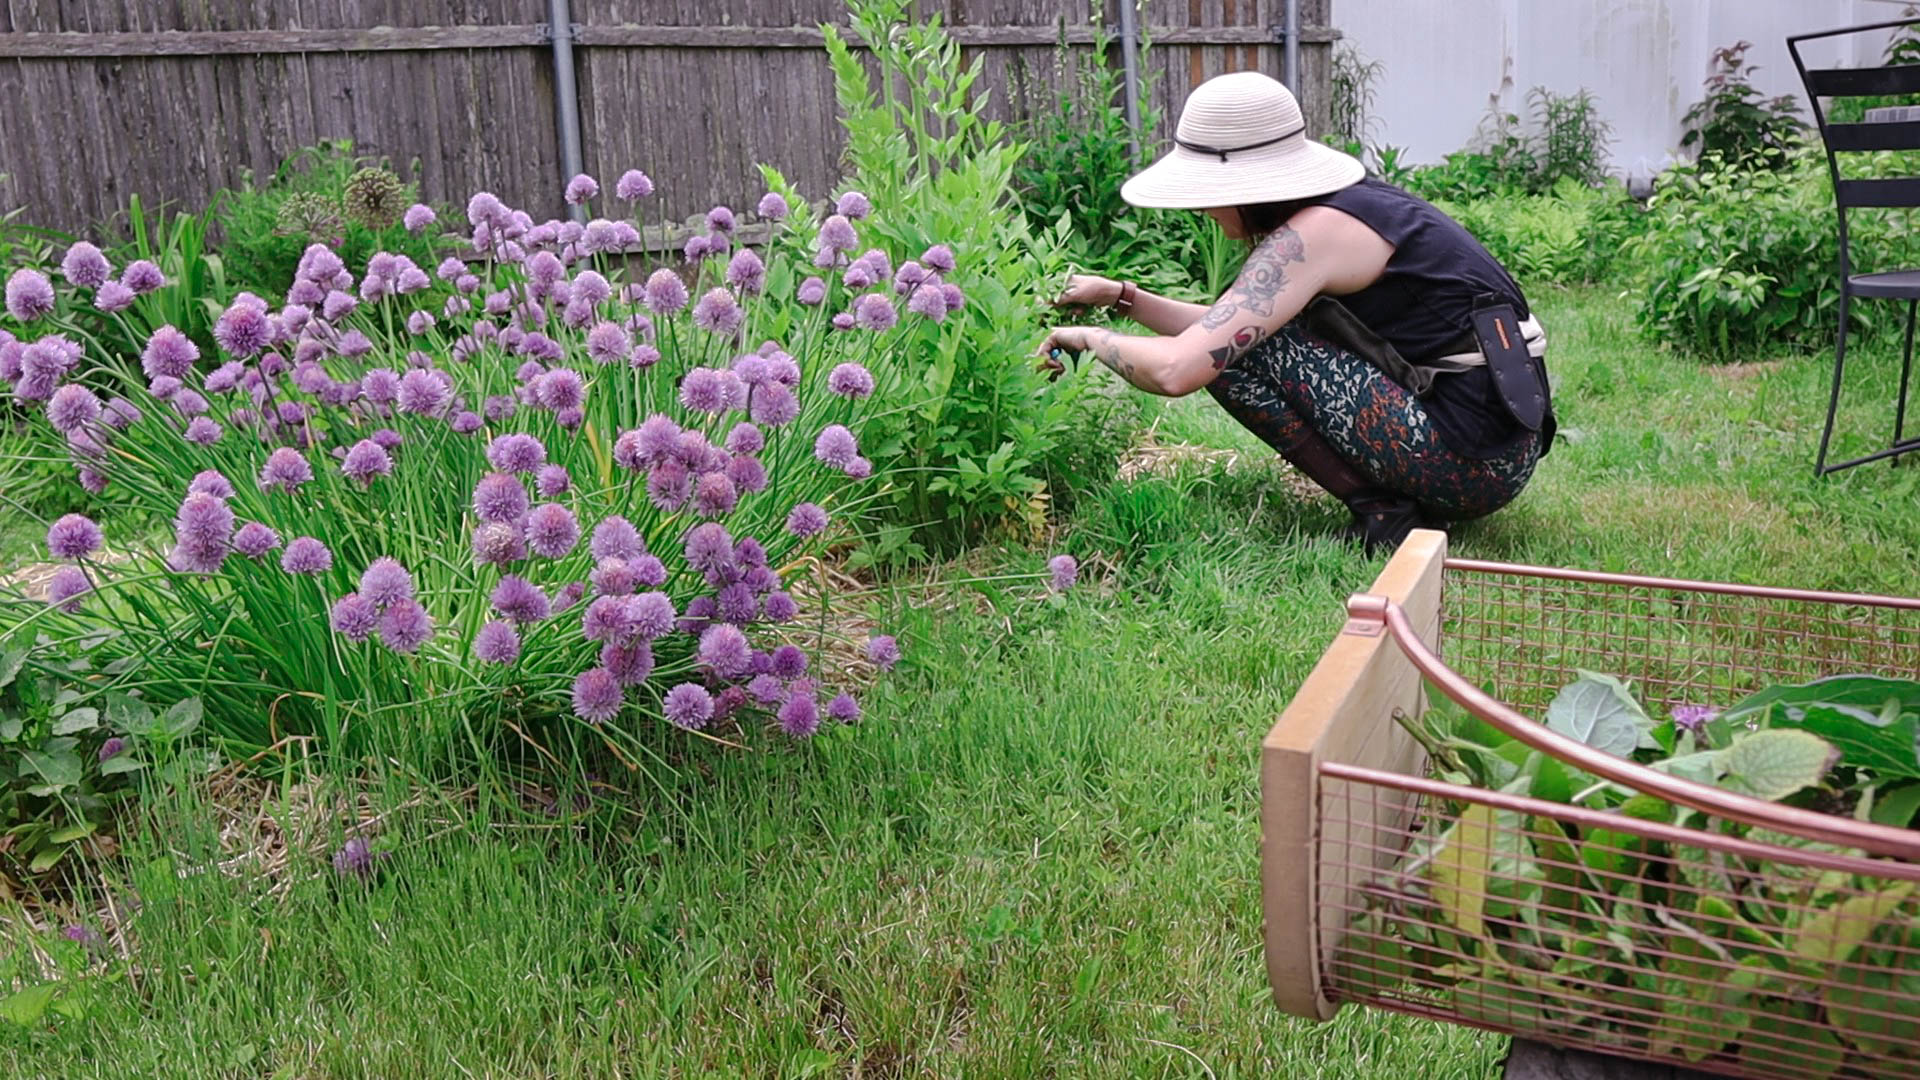
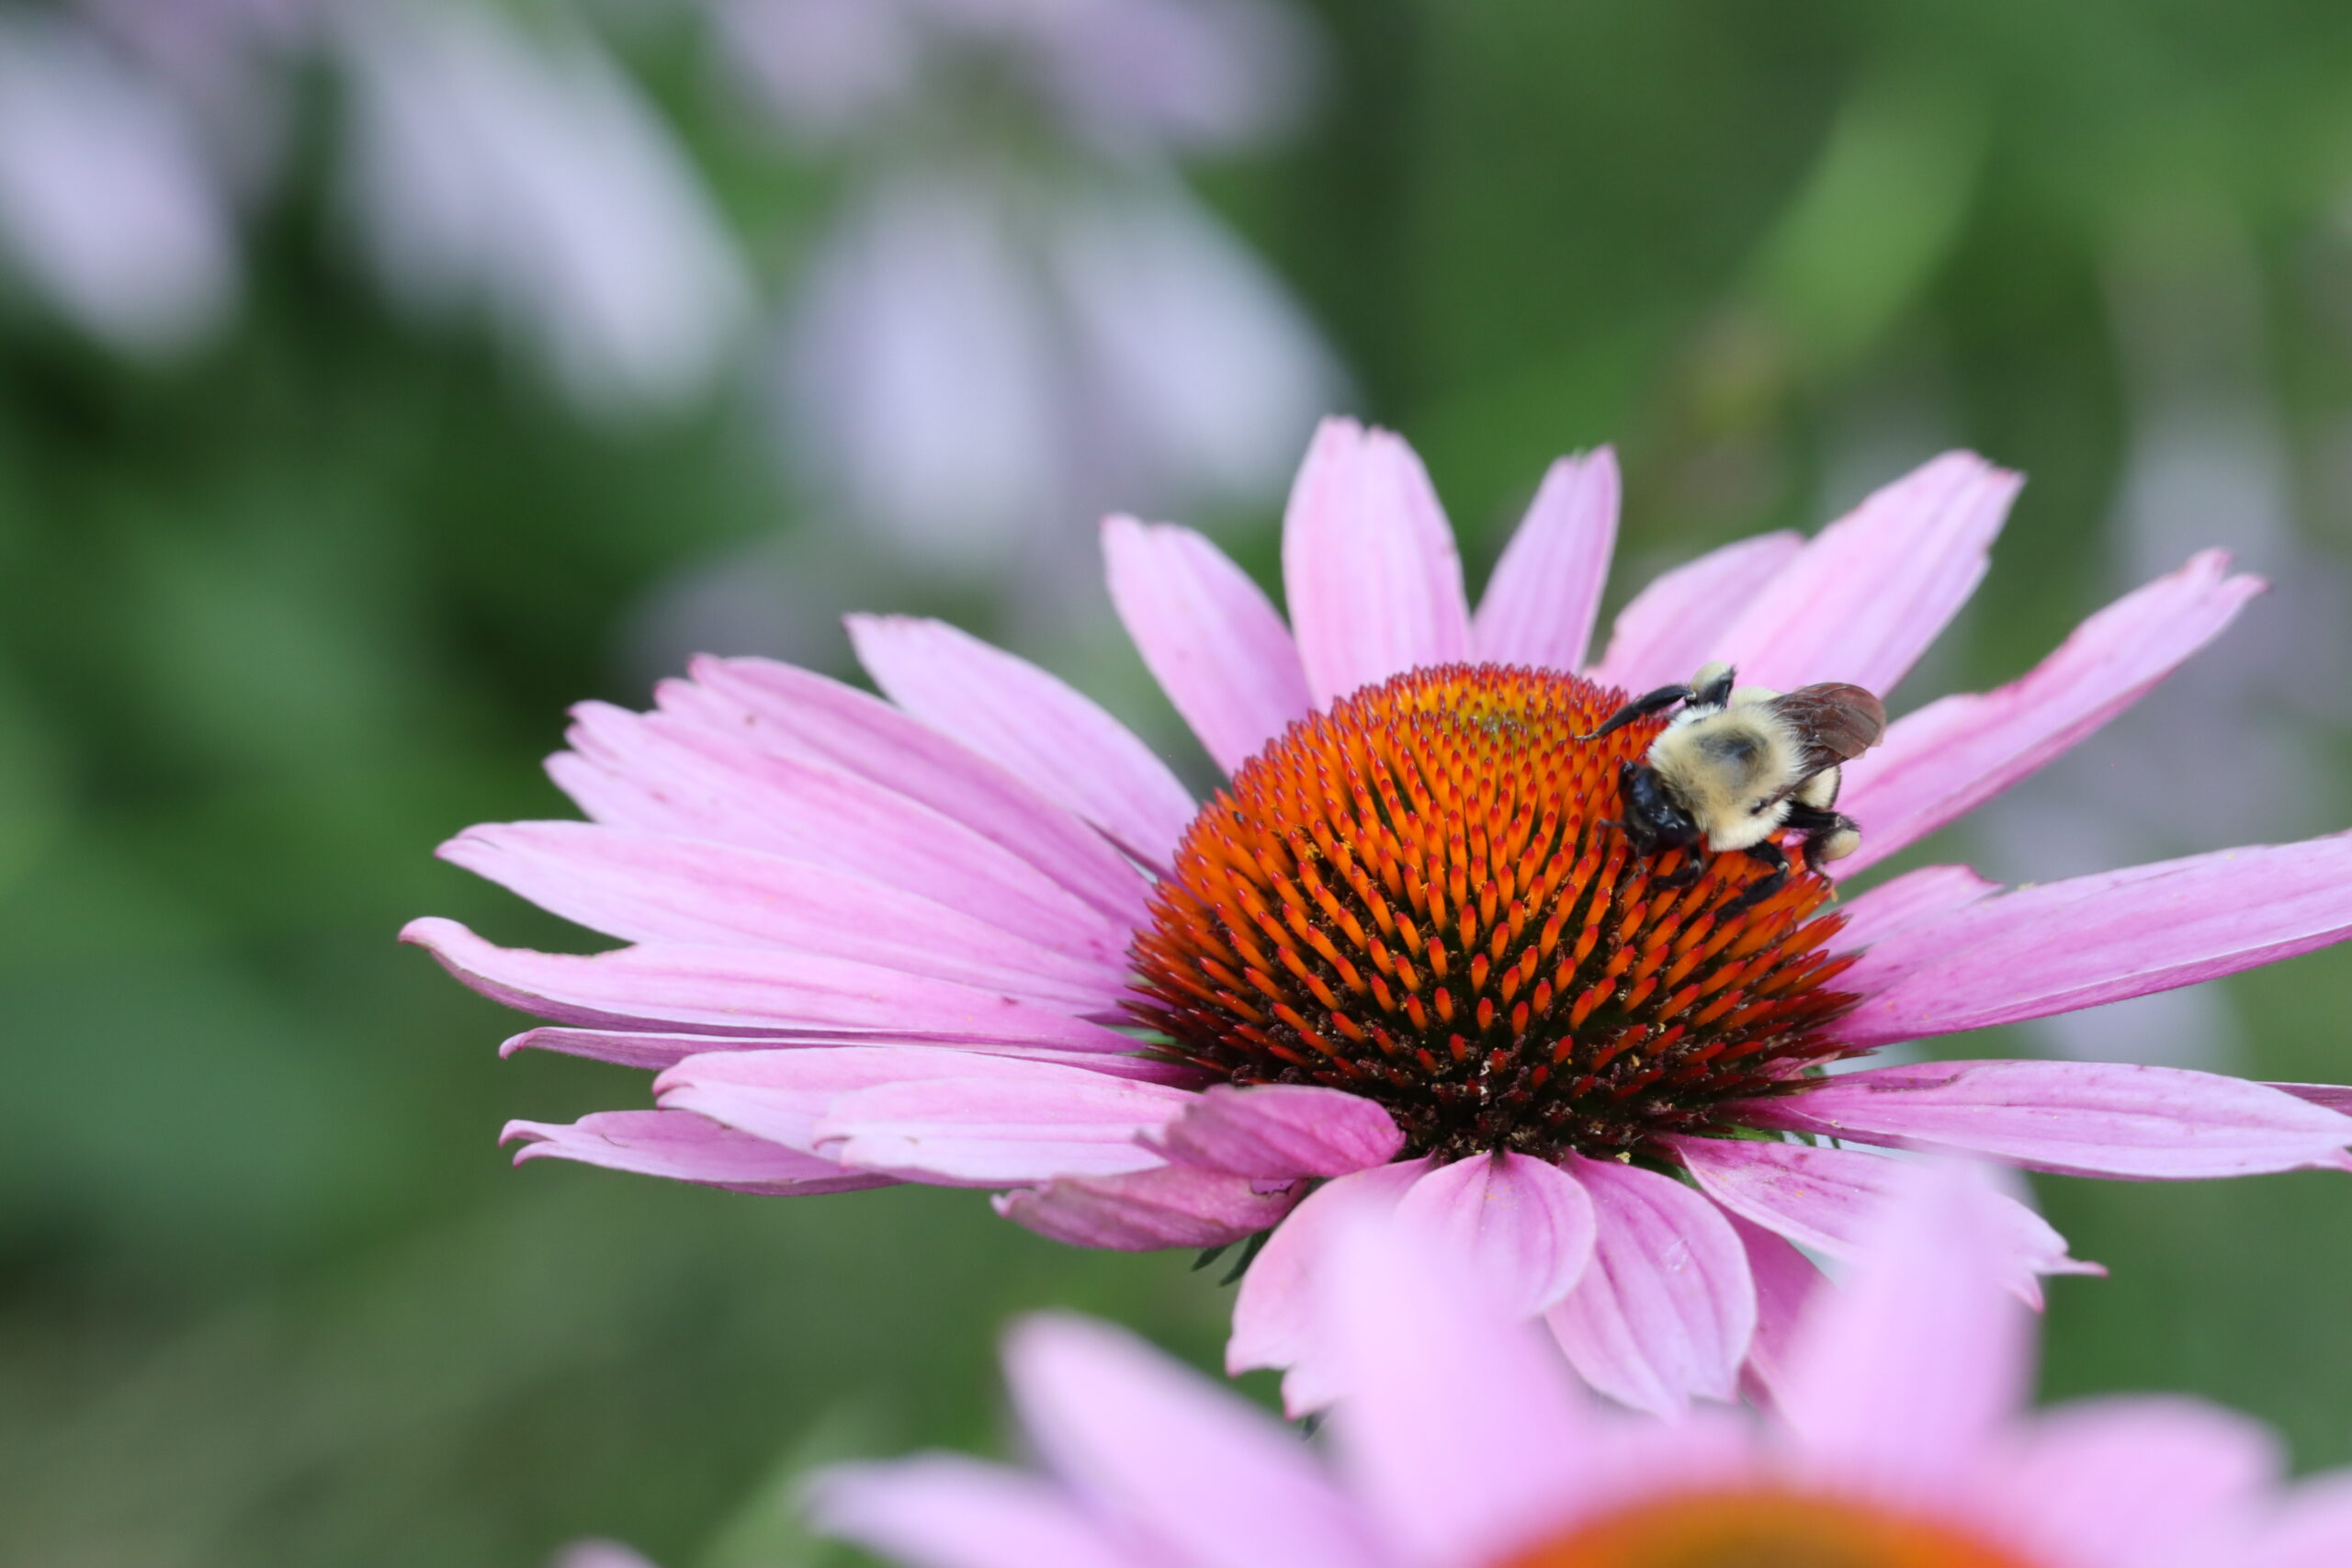
I wrote a detailed blog post years ago about this long-established interest of mine to have the buzzing-est, flapping-est, chirpy-est garden in my city. The very first bed I installed in the formerly languishing lot on the property I rent was a native perennial garden. A few non-natives have found their way into that bed but largely it’s remained a love letter to local bees, birds, and butterflies- especially my beloved Monarch and Swallowtails. I made sure to plant enough that there are blooms from last frost to first frost and an abundance of seed heads and hollow twigs for winter survival. I don’t rake until May to keep my bumblebees abundant, and they return this kindness by helping me pull in baskets of beautiful tomatoes come July.
Tea, Spices, Incense, & Herbs:
What’s a witch without her stores of fragrant and powerful herbs? I’ve been hand grinding my own herb and resin incenses since I was a teenager, and to this day I do not use commercial incense in my home. Nothing compares to the smell of smoldering rosemary. (Be sure with all incense to ventilate your home!) I enjoy the whole-body hug that is a cup of mint and tulsi tea all winter long, and there is just something about crumbling your own thyme or cayenne pepper flakes into a pot of winter soup.
Natural Dyeing:
Here, sweet reader, is my newest special interest when it comes to plant selection! Over winter, my restless heart found comfort in a once-fanatical hobby from my 20s: knitting. Knitting again led to finding my hand spinning stash and I’ve also fallen back in love with spinning my own yarn for knitting and weaving. *Deep inhale* and that led me to realizing “I can grow dye plants and dye the yarn I spin”! Two trips to the library later I am ready to let the garden color my life in a whole different and quite literal way.
Photography, Video, & Income:
Finally, and perhaps this is obvious, the last way my garden will give me more than just a salad, is through my work with cameras. I make videos on Youtube, visually document on Instagram, and take portraits and nature shots with the flower-heavy backdrop of my dreams. My garden doesn’t just feed my body, it feeds my creativity. Every morning from the first sunny mornings of late winter until it’s too cold to be enjoyable, I take my coffee in the garden. Often the camera comes with me and I’ve got folders full of beautiful b-roll and striking photos of rabbits, bees, and birds to show for it. An unexpected and usually unplanned income bonus comes by way of selling my extra plant starts off every spring, usually funding the supplies I need for my late June succession planting.
What are some ways you can get more out of your garden this year? Leave me a comment, or drop by my YouTube video companion to this post and we can chat there!
It’s officially the 2020 garden season as far as I’m concerned.
In my ongoing battle to find acceptance that my crass New England self is never going to fit in anywhere with a warmer climate and thus winter is a permanent fixture in my life, I am learning to winter sow.
If you missed my post about winter sowing and how to do it, check it out here.
In previous gardening years I’ve made the rookie mistake of starting my veggie crops too early out of excitement and a misguided sense of power to speed up the frigid days with Spring-like behavior.
Take it from me, you want to firstly add two weeks to your last average frost date, and secondly, keep in mind the space you have for growing plants that you won’t be able to get outside until the winter relents.
Fortunately for the antsy New England gardener, it seems we’re in for an early 2020 Spring. But as any wise New England gardener will tell you, never trust that groundhog’s predictions with your precious baby plants.
What we can start early, however, are herbs like chives, oregano, rosemary, and thyme, as well as many frost-tolerant greens. Broccoli, Brussels sprouts, cabbage, cauliflower, celery, chard, spinach, and collards can go in soon, as well.
Rosemary and lavender will germinate more successfully if you refrigerate the seeds for a few weeks before sowing.
Hardier flowers such as Begonia, Delphinium, Antirrhinum (snapdragons), and Viola (pansies) can usually go outdoors in April here, so you can get a jump start on those for an extra colorful spring.
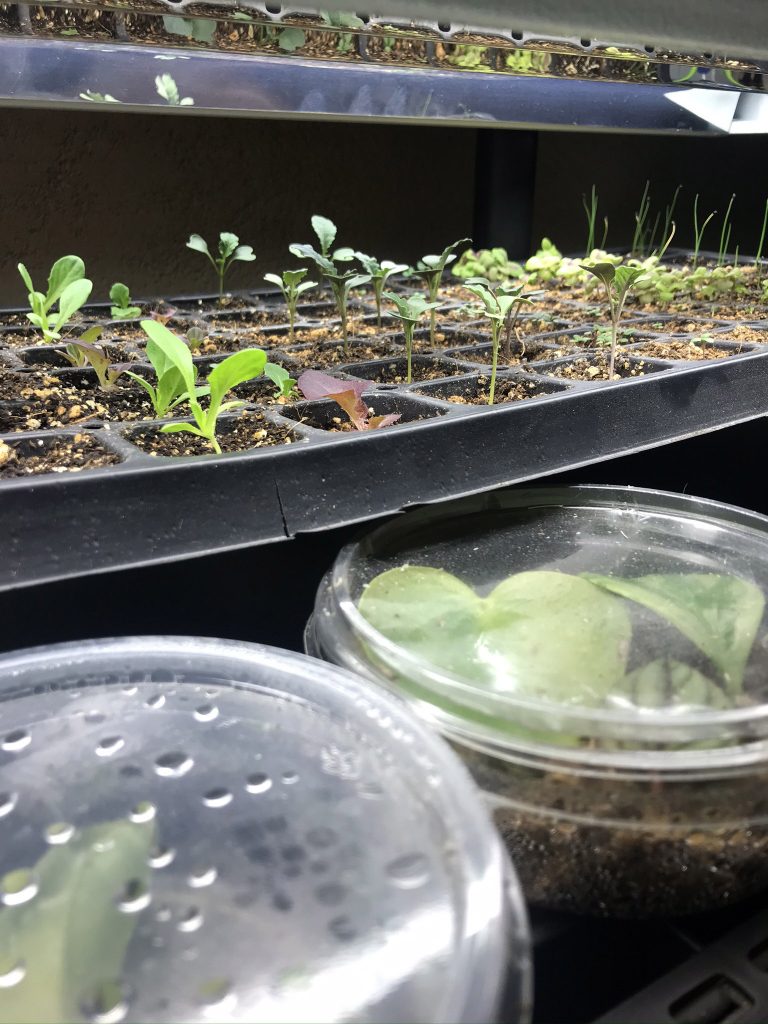
I’ll be using both LED and fluorescent lights, keeping them on 14-16 hours a day with the light very close until they sprout, and then I’ll cut the light back to 12 hours and raise the light fixture. I’m also utilizing heating pads to encourage germination as my apartment is pretty chilly.
Bottom watering keeps the seed starting mix moist under the warm light, but I have to keep an eye on it as it will dry out quickly between the light and heat pad.
I’ve popped my lavender, rosemary, columbine, and poppy seeds in the fridge to see if that helps with germination success, as well as put some in a jug outside to stratify with my wildflowers. Check out the winter sowing post for more on cold stratification.
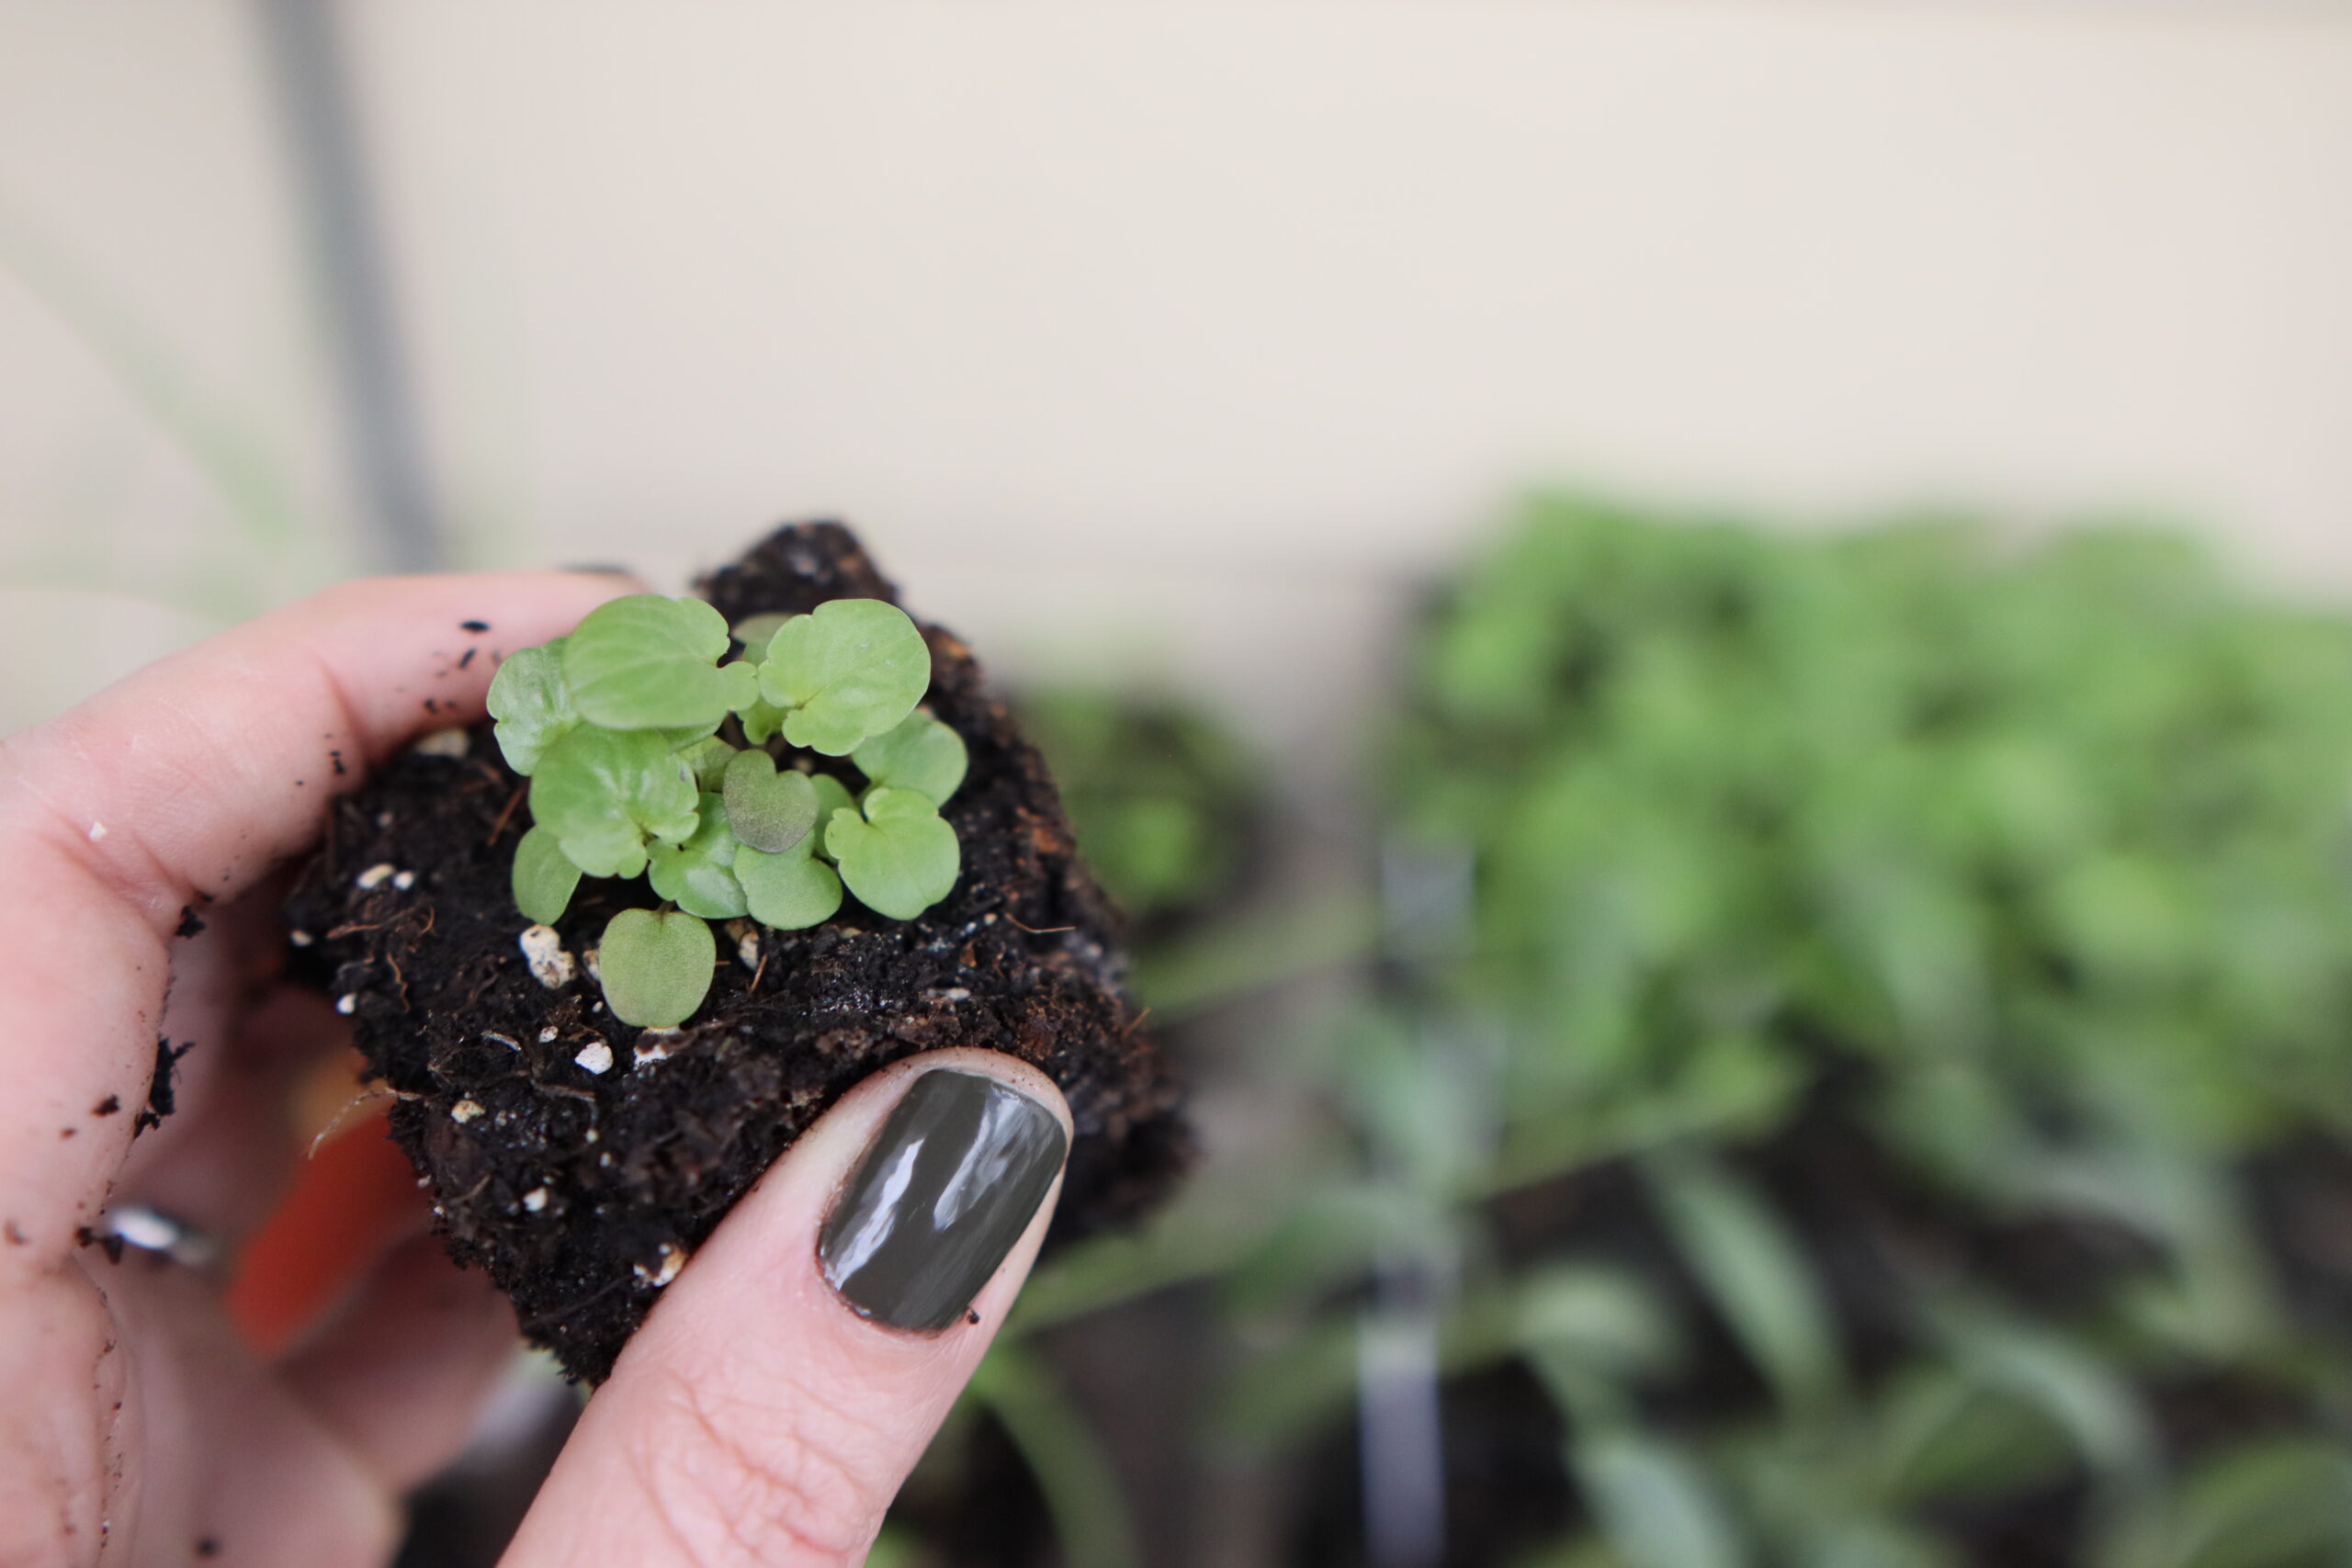
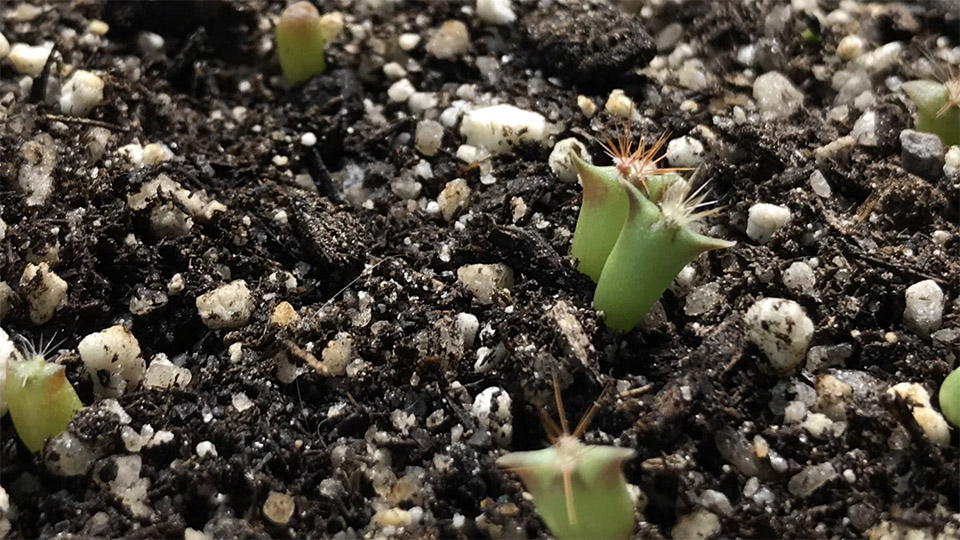
I’ve got cactus seeds in a take out container and cactus soil, too, just to try something totally new. Much to my surprise and delight, some of these (the saguaros I think) germinated in just four days, and already had cute little crowns of spikes betwixt their cotyledon leaves.
My Coleus and chives seedlings popped up around day 5 & 6. The added warmth from the heating mat really speeds things up.
Winter here in New England has been especially warm, so I’m hoping that my winter sown seeds get enough of a freeze to flourish! However, I’m excited by the thought of an early spring with early flowers!
Last year, the Amazonian fires sent the world into a collective panic. The Amazon rain forest is known as our planet’s” lungs” and this panic was not misplaced. I bring it up not to diminish the importance of rain forest preservation, but as the foundation to ask an important question I first read in Bringing Nature Home by Doug Tallamy:
Why don’t we worry about the catastrophic loss of plants, animals, and insects here at home? Is it because the change has been so incremental, and yet constant, that we simply don’t perceive the scale?
According to the alarming statistics in the first few chapters of Bringing Nature Home by Doug Tallamy, we have taken and repurposed 95-97% of the land in the continental United States. 41% of that land is reserved for agriculture, and 53-55% makes up our suburban and urban residential land.
15% of the Amazonian Basin has been lost to logging. We’ve lost 70% of the forest here on the Eastern seaboard.
And what have we done with that land? Stripped it and replanted it with foreign ornamentals, which will not feed our native animal and insect populations. One doesn’t need a biology degree to surmise that less food means less biodiversity.
Tallamy uses an excellent example to explain the importance of biodiversity, or having a wide range of animal and plant species in an ecosystem, and the importance of keystone species. He explains ecosystems, such as your own backyard, as a Jenga game tower. You can remove some blocks without much consequence, but eventually, one of the blocks you remove will bring the whole tower down.
In nature, certain species of plant, animal, and or insect play such a key role in the food chain, their extinction or removal from an ecosystem will destroy it. Tallamy explains that we’ve already lost around 50% of our native bird population, and much of that is due to a lack of juicy, nutritious caterpillars!
This is where the doom and gloom begins to subside, my green-thumbed friends. While not all of us have a patch of Earth to lord over, those of us who do can be a positive change simply by choosing the plants we plant a little more mindfully.
Enter native perennials! Weeds to many people who succumbed to the propaganda of overly-manicured lawns flecked with imported species of ornamentals. While some species can be a bit…tenacious, many native wildflowers are every bit as impressive if not moreso than their useless non-native counterparts!
Aside from providing more food sources to welcome a variety of animal and insect species, planting native means working with plants that are accustomed to thrive in your zone, your soil ph and consistency. This means less work for you in the long run, healthier plants, and as I keep banging on about- more biodiversity!
I know I’m going to have a hard time convincing some of you that your lawn is one of the worst offenders in the disruption of biodiversity, so I’m not going to try…right now. Not yet. But just know, it’s coming.
No, I won’t demand that you kill your lawn today, but perhaps, consider raising the blade a little. It’s better for the grass and you’ll have less carnage happening under your mower. Maybe you don’t rip up your whole lawn, but maybe…rip up a little.
If you don’t have any earth to till, I highly encourage launching native seeds into those neglected roadside meadows and lots some of us may have around town in the fall. It’s called guerilla planting and if it’s wrong, I don’t want to be right.
Charles Bukowski once wrote, “you save the world one man at a time”. I’d argue that changing people is too hard on the heart, plant a garden instead.
Most native perennials require cold stratification to germinate, if you’d like to learn how to do that, check out this post!
Winter sowing seems to be picking up steam among hobby gardeners all over social media, but what is it, and WHY do it?
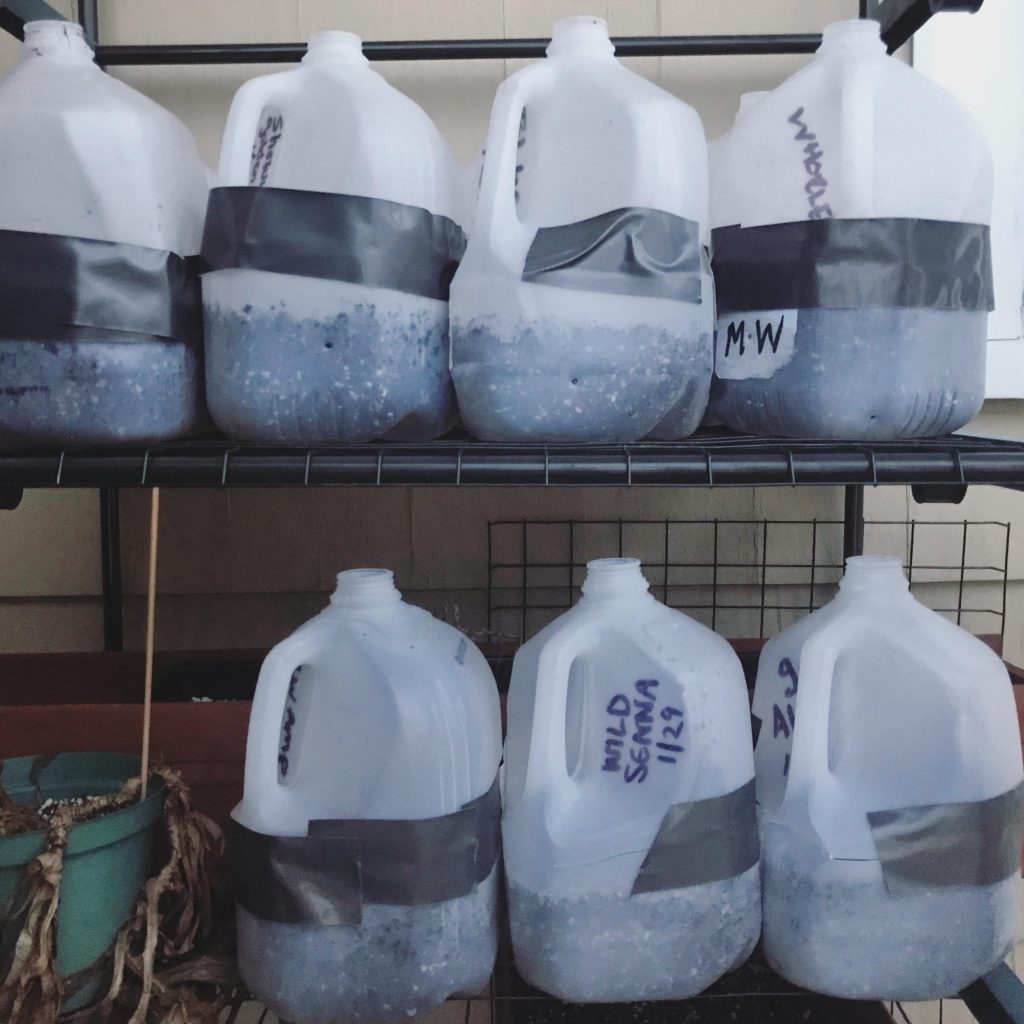
I decided to give winter sowing in milk jugs a try this year, and learned a lot about plants in the process! If getting a head start on Spring planting in the gloomy months of winter sounds appealing to you, read on!
First of all, why winter sow at all? Couldn’t you just start your seeds outside in the spring, or even inside under a light? Well, you can, but with some plants- including most native perennials- you won’t have much success. This method also comes with some convenient perks we’ll discuss shortly.
Have you ever bought a package of rosemary, milkweed, or lavender seeds, only to have few if any sprouts turn up? There’s a reason for that, and no, it’s not you or a lack of a green thumb!
Many plants, such as wildflowers native to the temperate regions of North America (areas where winter is cold enough to kill vegetation), will not germinate without an extended period of moisture and low, freezing temperatures.
This required low temperature and high moisture period is called stratification, and it’s one of many evolutionary functions plants use to survive. This process starts a chemical reaction that releases the plant embryo from dormancy.
You can simply put your lavender and rosemary seeds in a baggy of damp potting mix in the fridge for a couple months before planting, by the way.
Stratification ensures that the seeds dropped by mature plants do not immediately germinate in the warm autumn sun, only to be decimated by the first frosts of winter.
Because seeds only contain about 2% water, they are not damaged by this water expanding as it freezes over winter, however the foliage of a plant contains 95% water. This is why gardeners fear unexpected frost! With that much water to expand, leafy plant matter is torn to shreds!
Another example of this evolutionary insurance policy that you may encounter in the native plant world is called scarification, or marring of the protective seed coat by outside intervention.
In nature this might take the form of a thick seed coat being worn down by the digestive enzymes in an animal’s stomach, and dispersed back to the earth in their waste, or simply dissolved by just the right amount of rain.
Gardeners often achieve this effect by gentle filing or scraping the seed before sowing it.
Additionally, many plants will only germinate when exposed to the right amount and hours of light and darkness that match the plants target growing season.
When we winter sow, the seeds are being exposed to the correct seasonal temperatures and light to have the best chance of germination.
In simpler terms, plants are really smart and they have their reasons! Work with them, not against them, and you might find yourself with less work this spring!
Now you may still be wondering, why not just plant the seeds directly in the ground? In my opinion, this is where winter sowing in plastic jugs really shines. Seeds sown directly in the garden are subject to being washed around in the rains, dug up or eaten by wildlife, or trampled by careless humans.
With this method of winter sowing, you’re getting far more control of your garden design, with less time spent trying to tell seedlings apart as they sprout among other flora in the garden.
Some of my milk jugs working their magic outside. Photo by Me.
Once germinated, the tender foliage of these plants are at risk of annihilation should a surprise late frost rear its ugly head. The jugs act as mini greenhouses to protect the plants, while still allowing them the temperature, water, and light they require.
An added perk to this method is total avoidance of the hassle of “hardening off” indoor-started seedlings. This process can be tedious and it only takes one instance of falling asleep early watching Netflix on a chilly night to kill off your whole seed tray!
Having these precious baby plants in a perfectly mobile container, whose top can be opened for light and warm spring air, closed against the chill of night, or in emergencies, moved indoors safe from weather extremes makes all the sense in the world to this control freak!
Fellow sufferers of SAD Seasonal Affective Disorder) will love this mid-winter project, you can begin laying the tracks for your garden right after the holidays in most regions!
You’ll better guarantee your early crop and get to brag about your beautiful seedlings before your comrades even start theirs! Be honest, you know you’ll enjoy that just a little! There’s no judgement here.
OK, if you’re as sold on winter sowing as I am, let’s start making our little mini-greenhouses! Check out the video for a step-by-step!
Here’s What You’ll Need:
Milk jug / plastic bottles
Take out tins
rubbermaid /clear totes
Well-draining potting mix
X-acto knife or other sharp/safe tool to cut plastic
Hole-punching tool (heat up a screwdriver or sharp poking tool)
Directions:
Cut the jug as shown in the photo, just below any handles the container may have. Leave an inch or two under the handle uncut to form a “hinge”. Get rid of the cap, you won’t need it. NOTE: Leaving the cap on saved jugs will make the jug smell nasty, so chuck the cap before you store them.
Punch or melt holes in the bottom of the jug, enough so the soil can freely and quickly drain. You don’t want water sitting in these any more than you would in a potted plant! You may also want to add a few more ventilation holes around the top of the container.
Fill the bottom of your new mini-greenhouse jug with well-draining potting mix or compost and moisten it with water if you haven’t already. You can make sure you have adequate drainage here, the water should move through the soil and holes freely.
Plant seeds according the depth noted on the back of the packet being mindful that some seeds require light to germinate. Each plant embryo only contains so much energy to get it to the surface where it will use photosynthesis to get more. If you plant too deep, it may run out before it makes it out of the potting mix.
Close the greenhouse, label it**, and seal about 80% of the cut part closed with duct tape. You don’t want it airtight, just securely closed.
Place the containers in a place that isn’t blasted with the harshest hours of sun as this can be detrimental later in the season.
**Paint markers seem to be the best for labeling as sharpies will fade, I recommend keeping a chart as well of which container has what.
What I’m Winter Sowing in Zone 6b:
Lemon Beebalm/Purple Horsemint Monarda citriodora (Non-Native to NE, A) Corner Sun Summer 2-4ft (purple)
Native Wildflower Mix (N, P)
Verbena Bonariensis (South America) Draining Soil, Corner Sun, Can spread too much Summer-Frost 2-5ft (purple)
Zinnia, Mixed (A)
Mexican Sunflower (Mexico, S. A.)Tithonia rotundifolia (P) Draining Soil, Sun Summer 4-6ft (red)
Sneezeweed Helenium autumnale (Naturalized in New England, P) *late blooming late summer-fall 2-6ft (yellow) named by Linnaeus for Helen of Troy, said to have sprung from where her tears fell
Blue Mistflower / Wild Ageratum Conoclinium coelestinum (Non-Native to NE, P) late summer 2-3ft (blue)
Blazing Star / Gayfeather Liatris spicata (Naturalized, P)